Pocket Mirror
3D Printing
CAD
A portable compact fully fabricated through a single 3D-print. Inspired by heart lockets, this compact incorporates print-in-place hinges, ball joints, and mid-print inserts for a convenient magnetic closure.
Ideation
Pocket Mirror was a quest to create something I've always wanted. I've always loved lockets and had been searching for a heart-shaped mirror of the same design. However, all of the mirror compacts I found online were either did not have a hinge or were too small to comfortably use.
Through print-in-place joints and mid-print inserts, I sought to 3D-print a compact that is ready to use right off the bed. Additive Manufacturing was perfect for this project, as it almost completely eliminated the need to manufacture and assemble multiple parts.
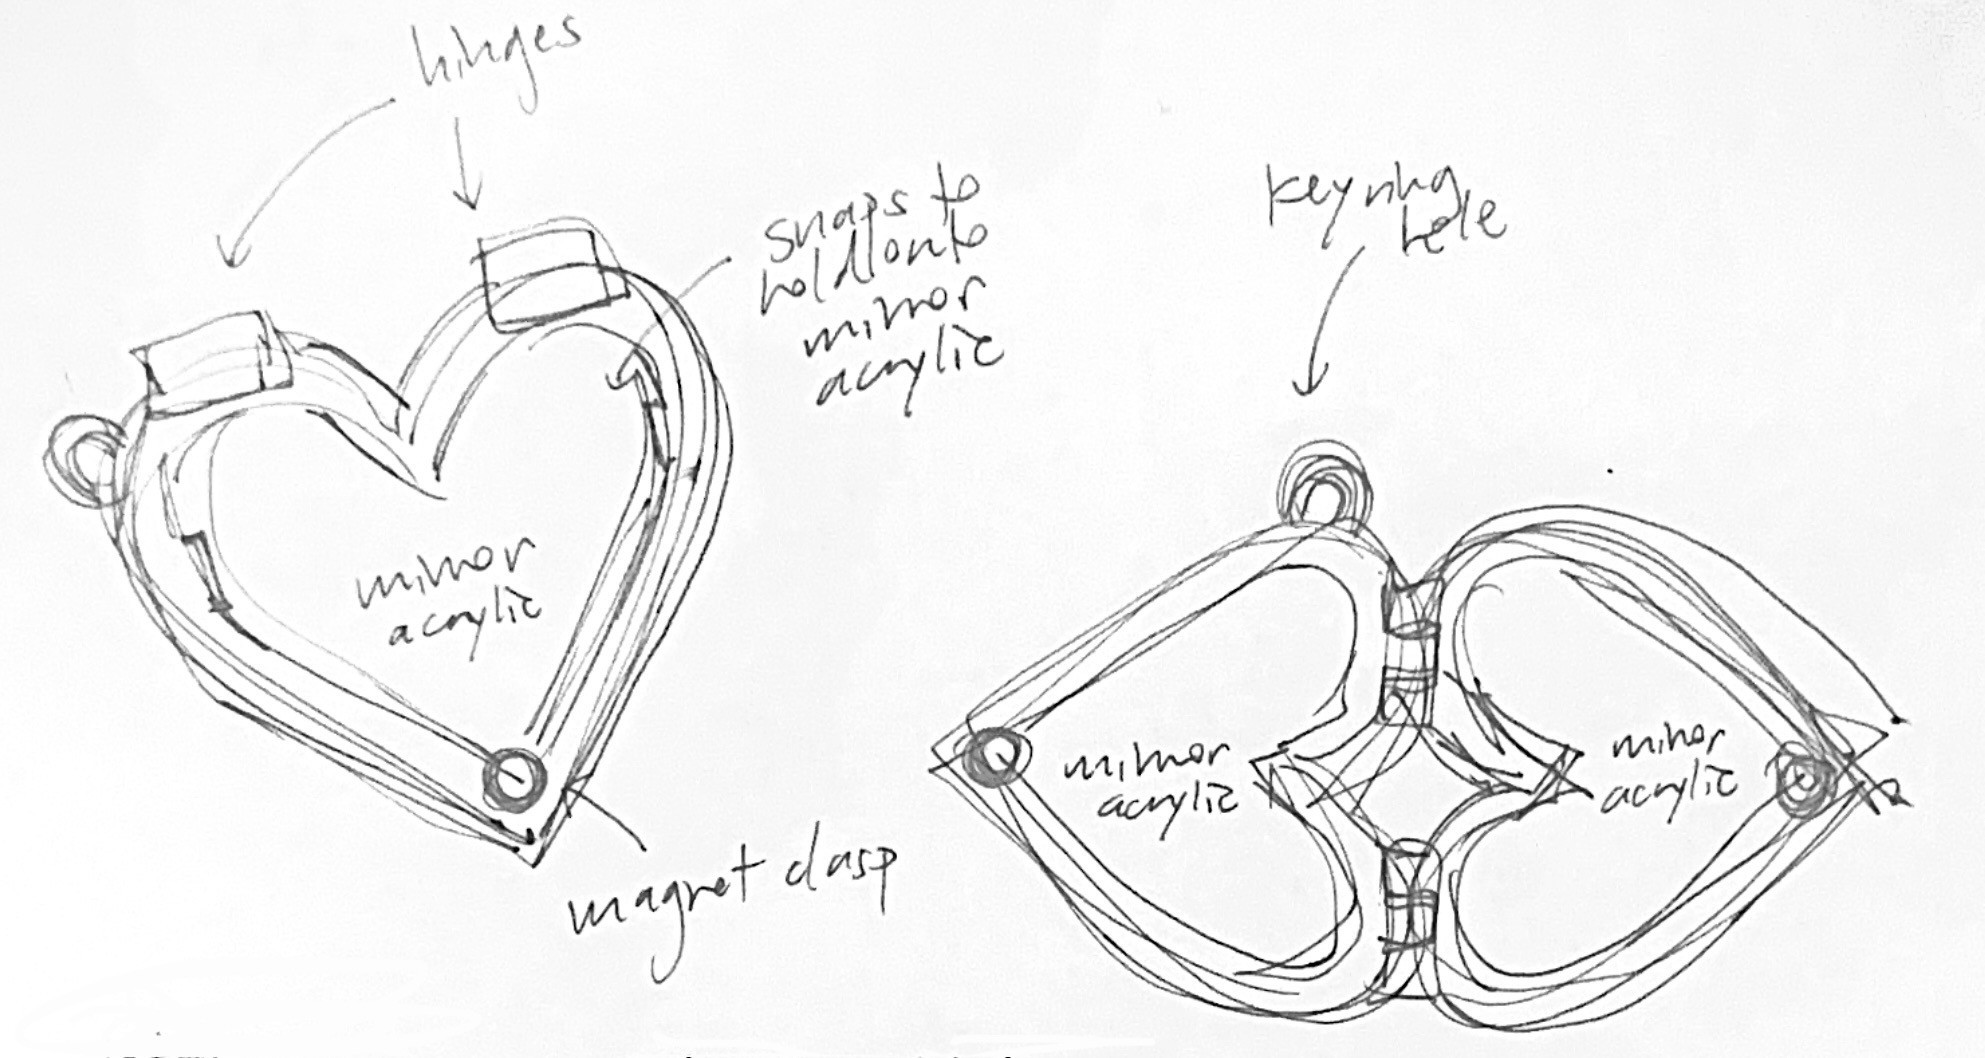
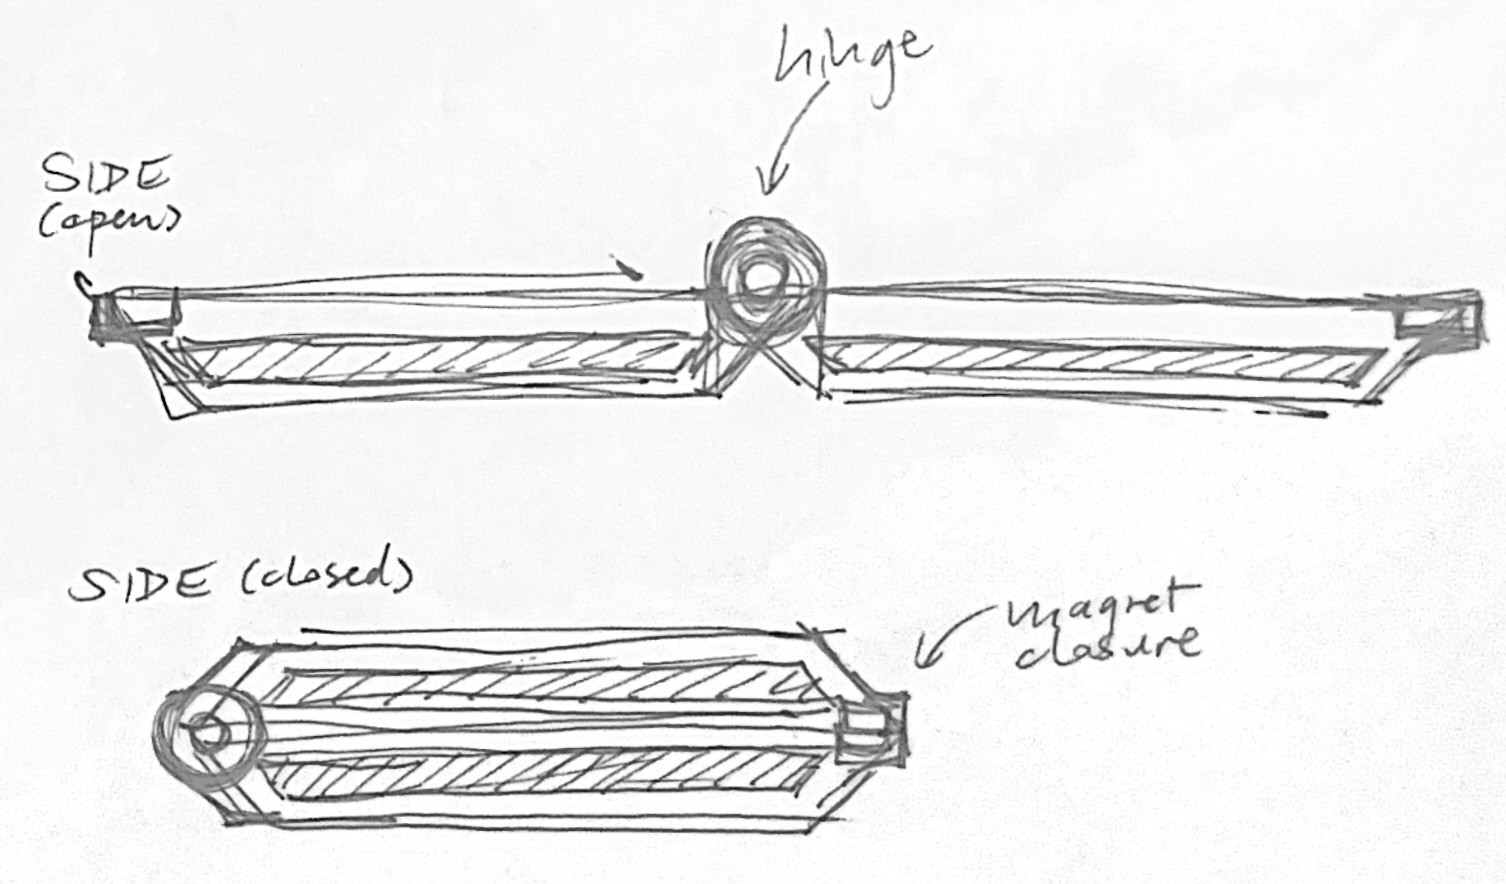
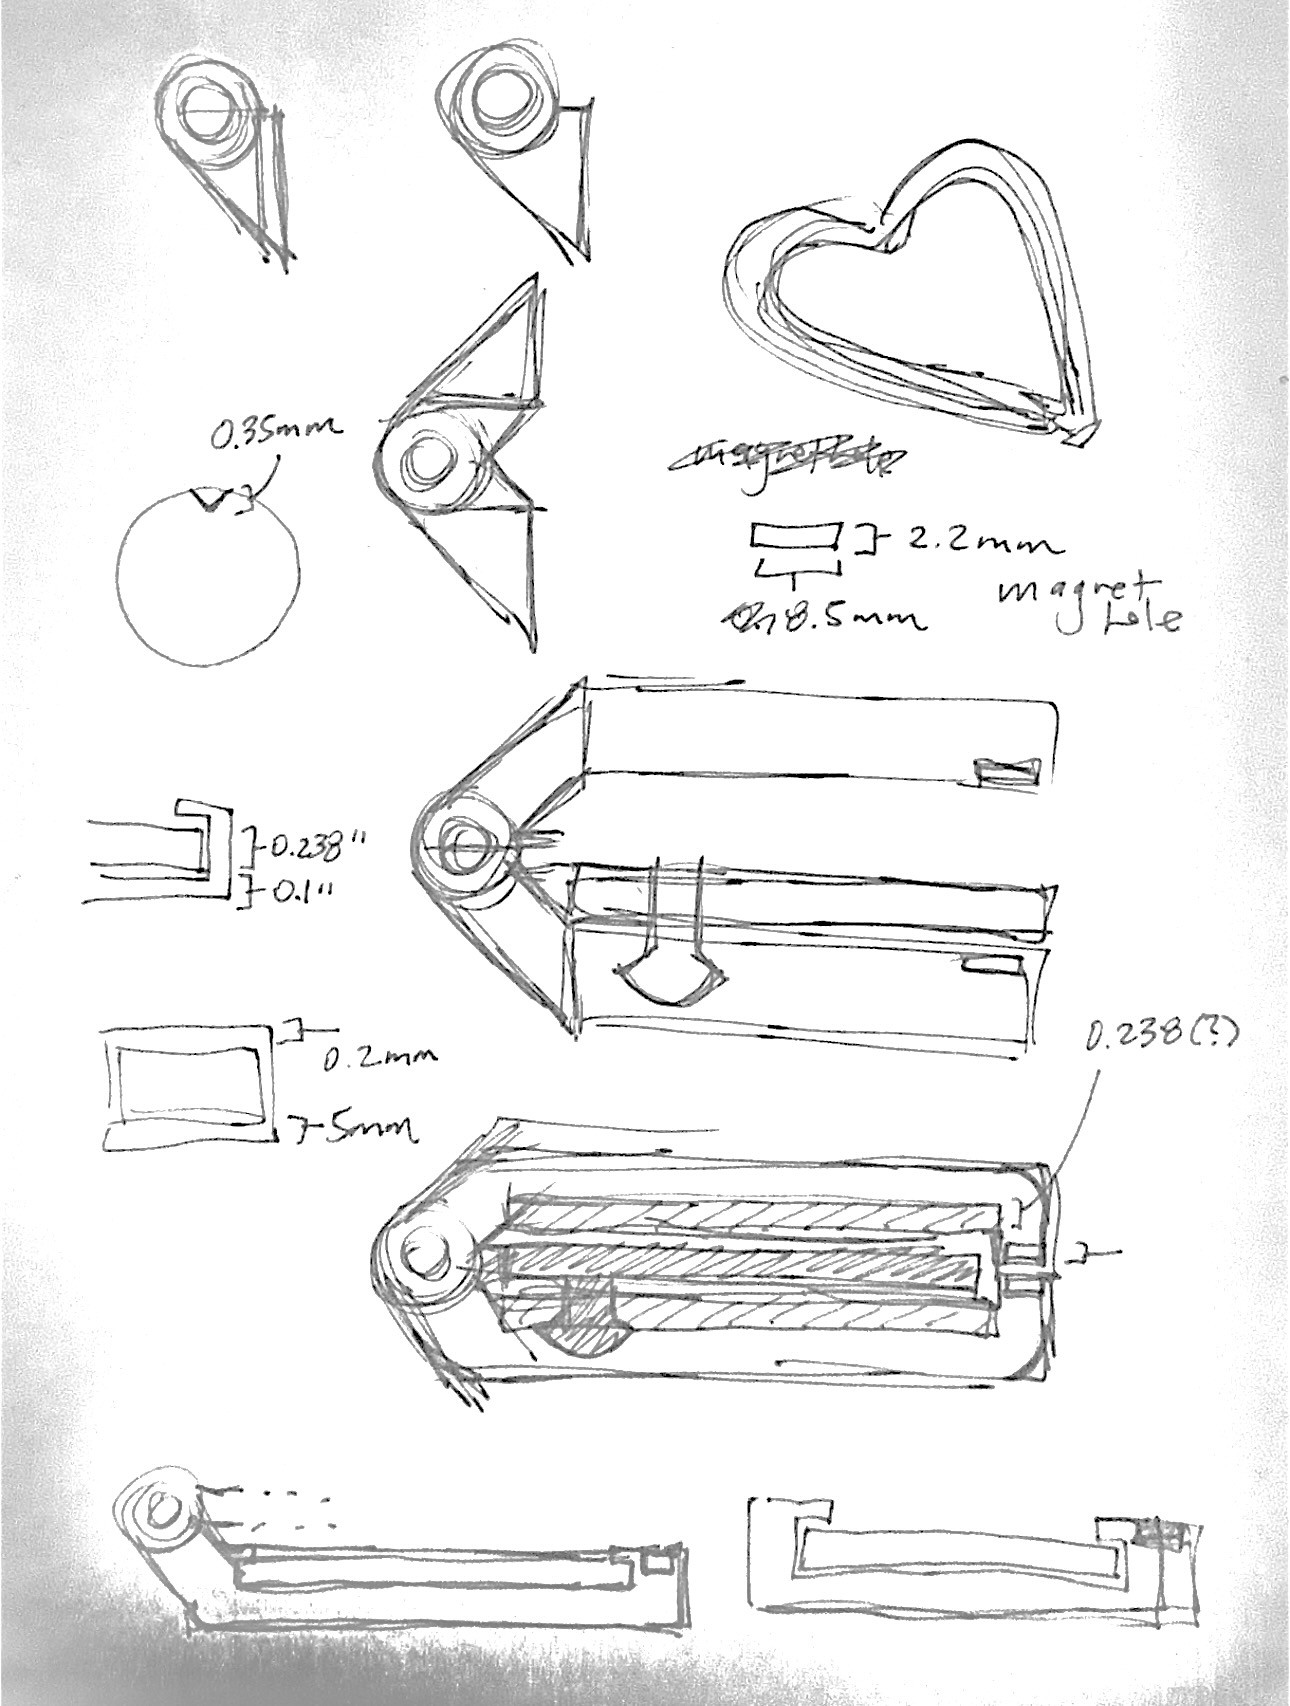
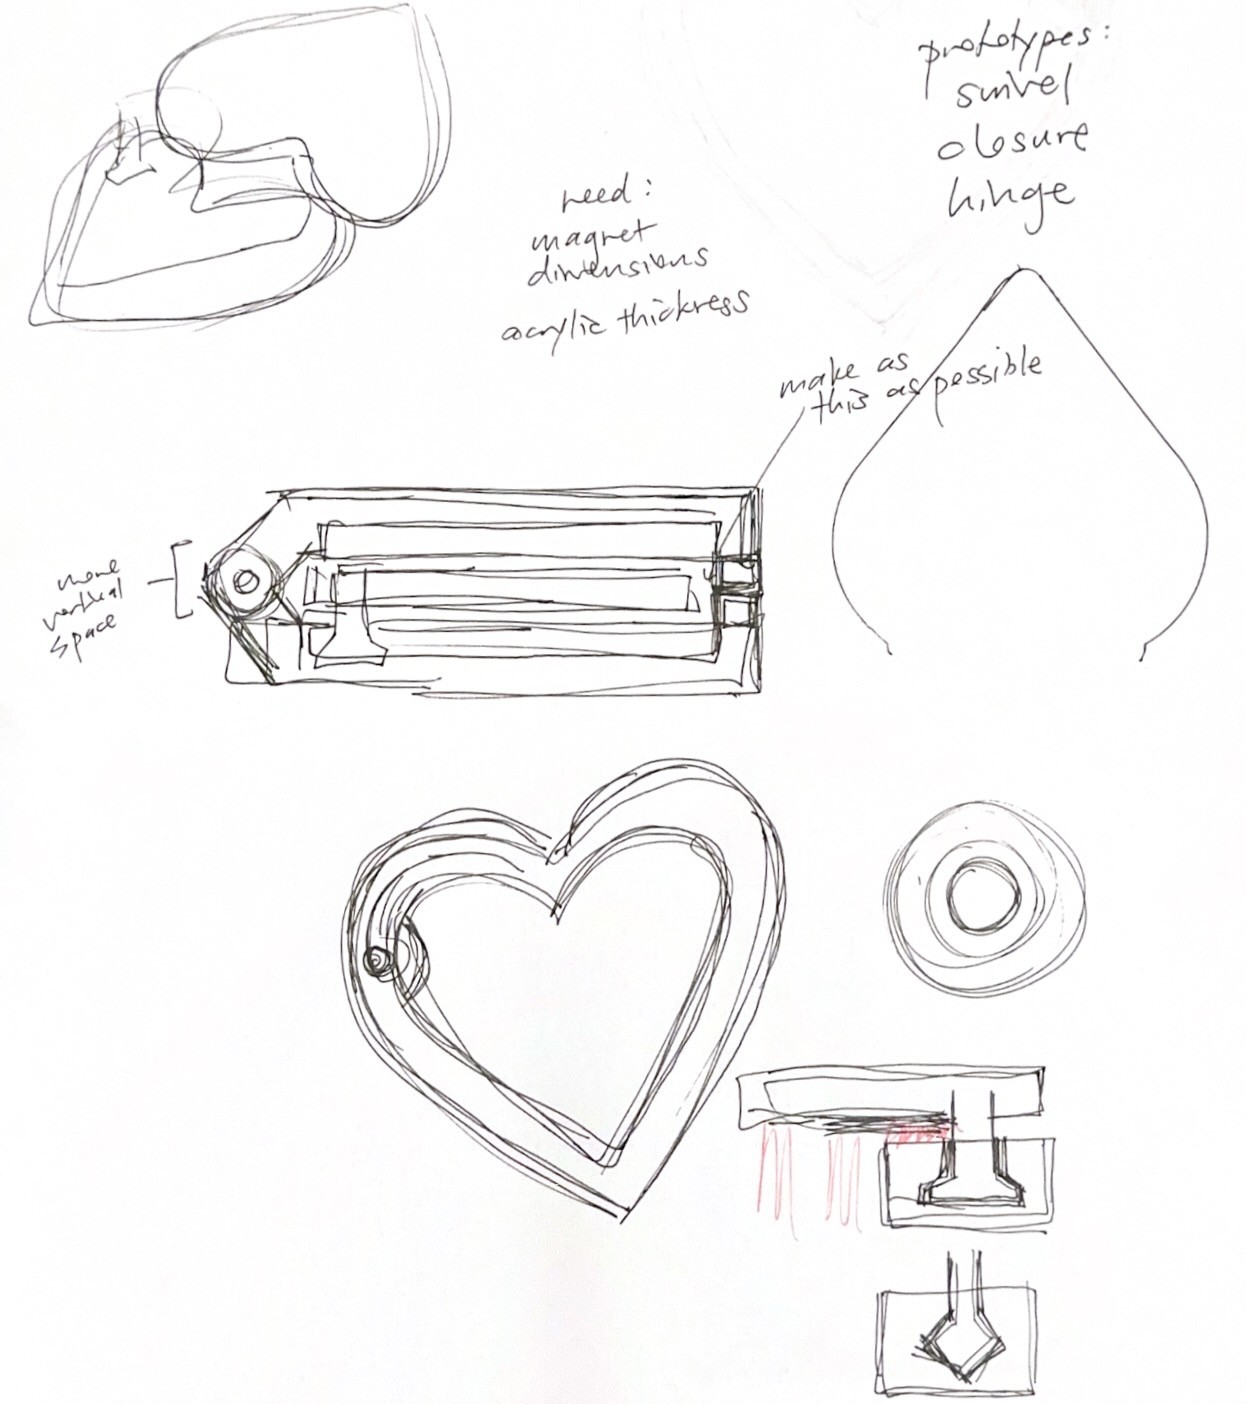
In my initial sketches I brainstormed:
Ways to incorporate a print-in-place hinge and swivel joint
How to embed magnets and mirror directly into the print
First CAD + Prototyping
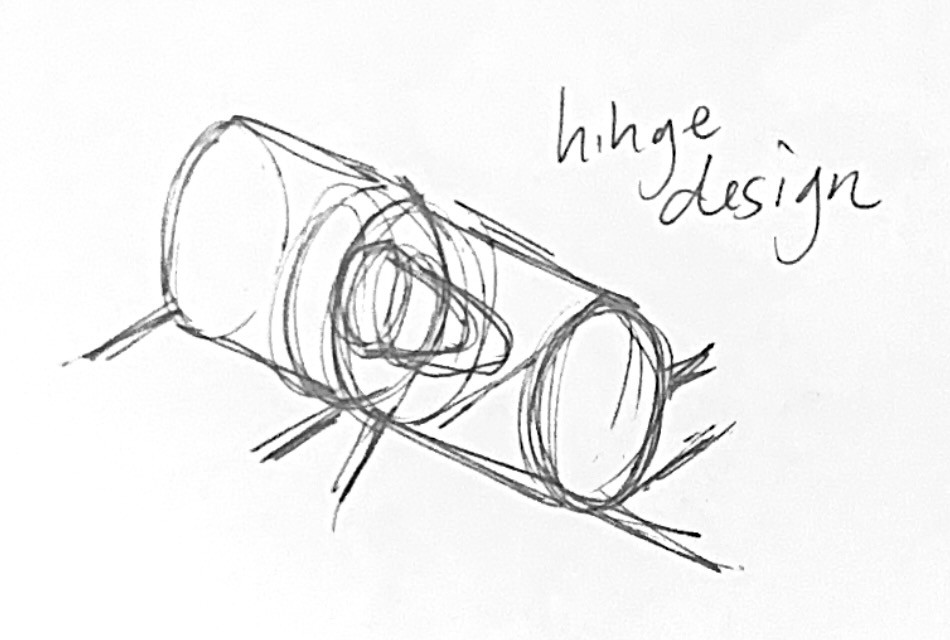
My first CAD focused on testing the print-in-place hinges. Below is a cross-section of the hinge design.
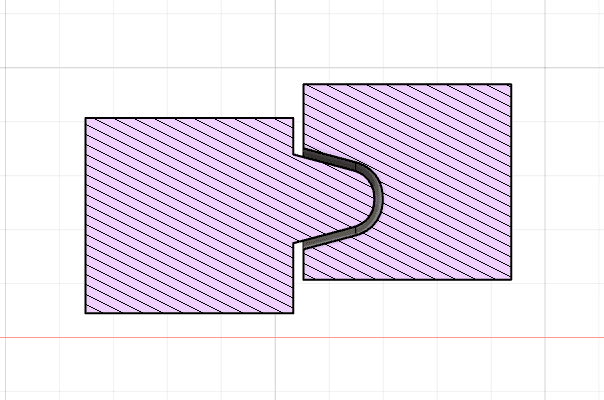
I printed my initial prototype on a Bambu X1E printer using PLA filament to test the clearance of the hinges. The tolerance was a bit tight, and while the hinges were able to move freely, the compact wasn’t able to fully close. For the next iteration, I scaled up the hinges and left a larger gap between the two halves of the compact to fix this.
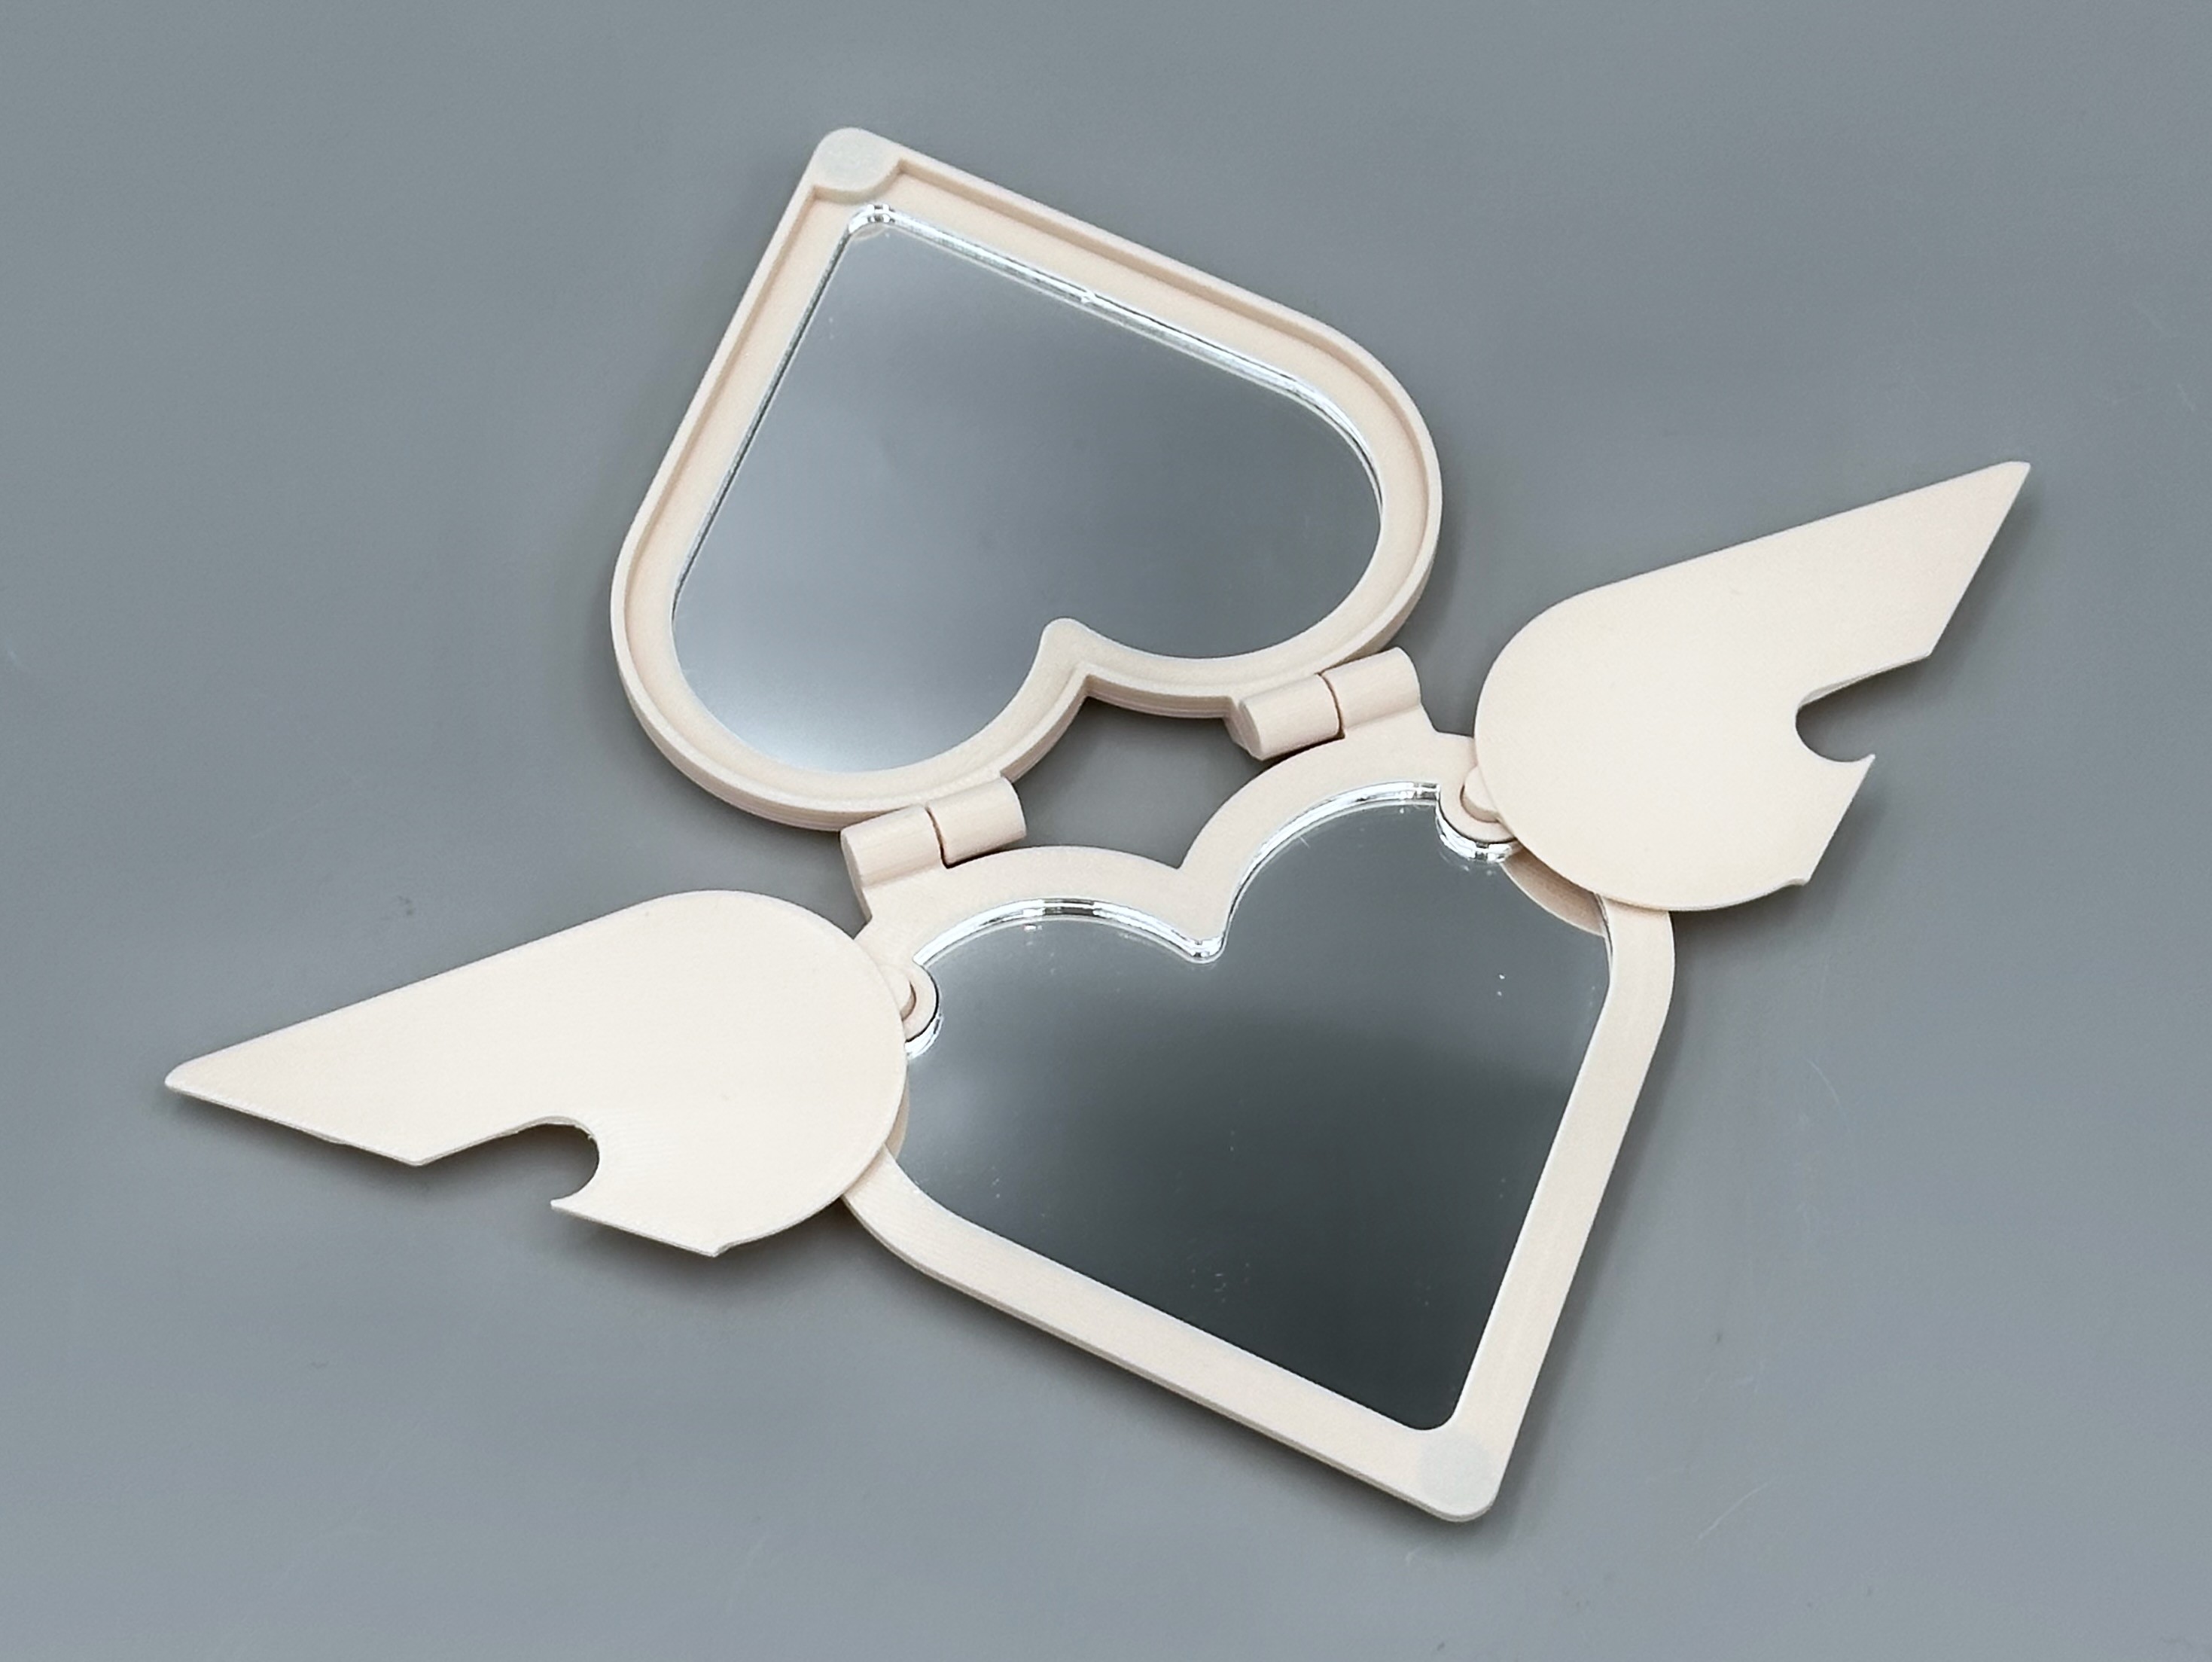
Second CAD
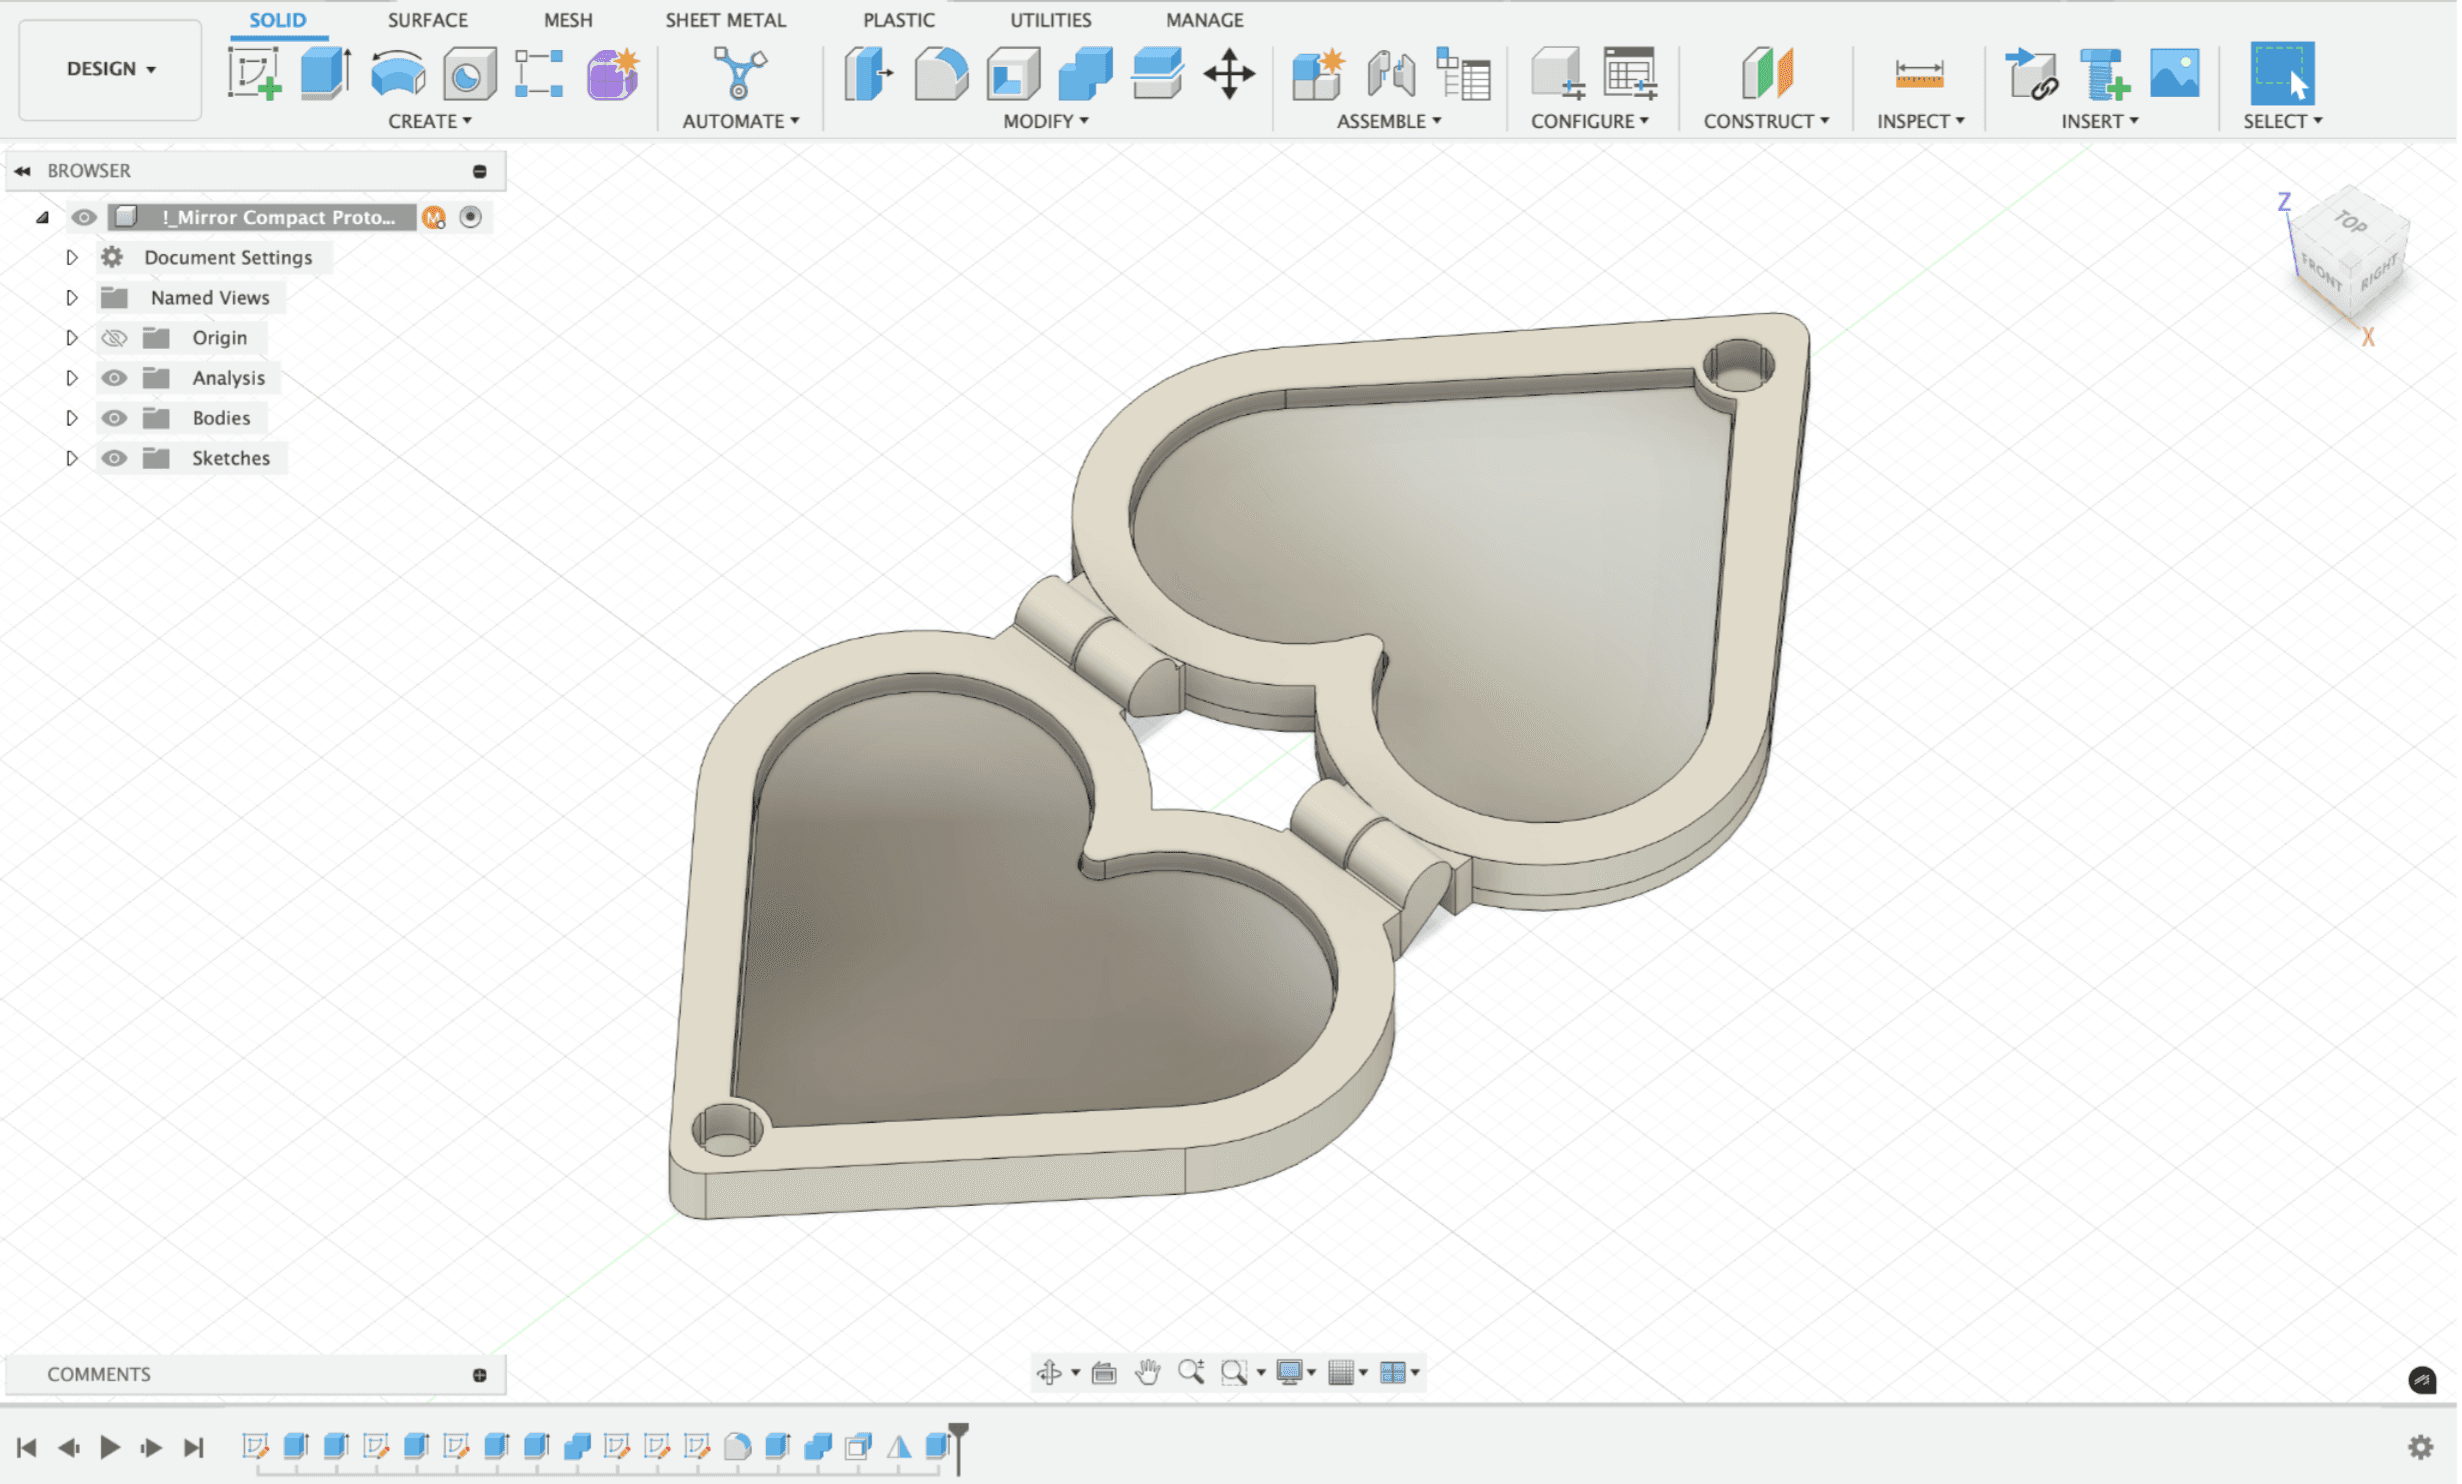
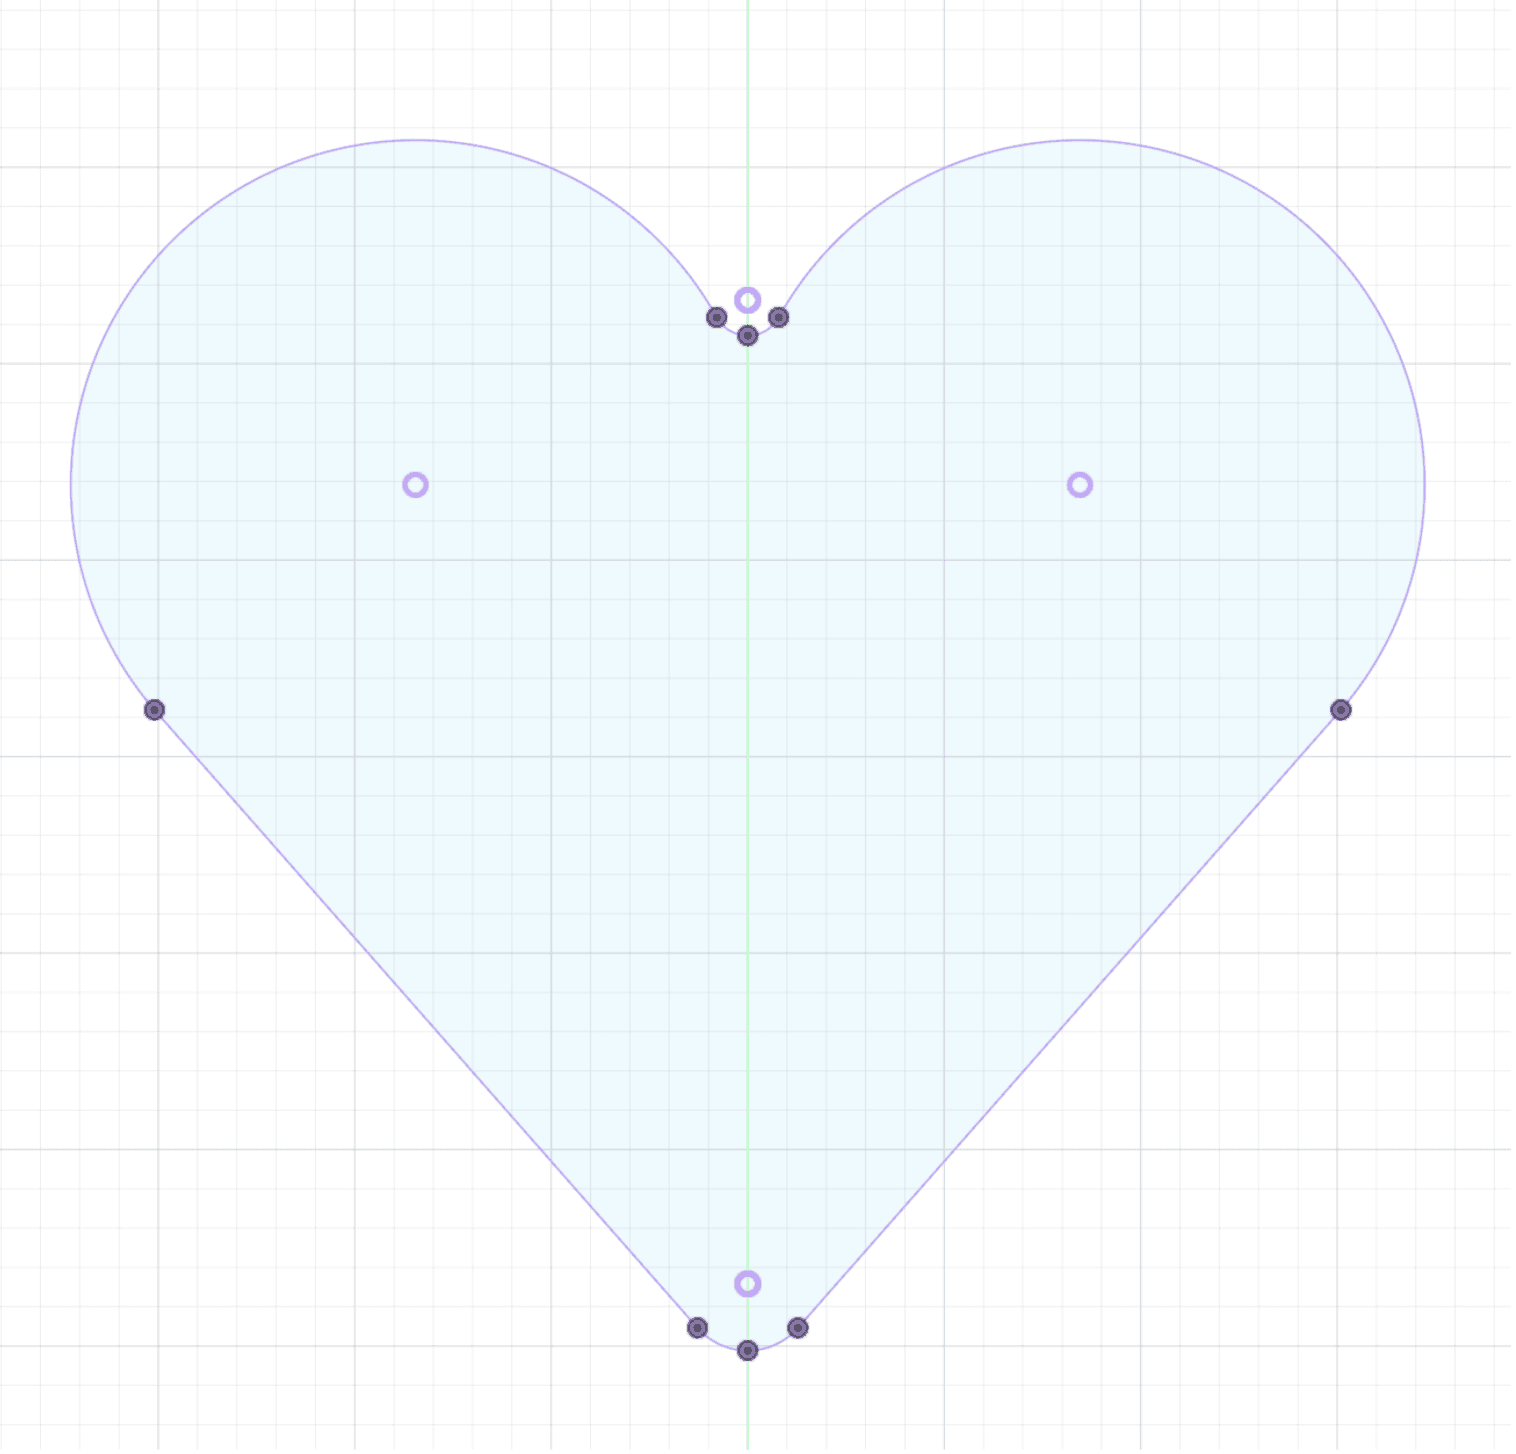
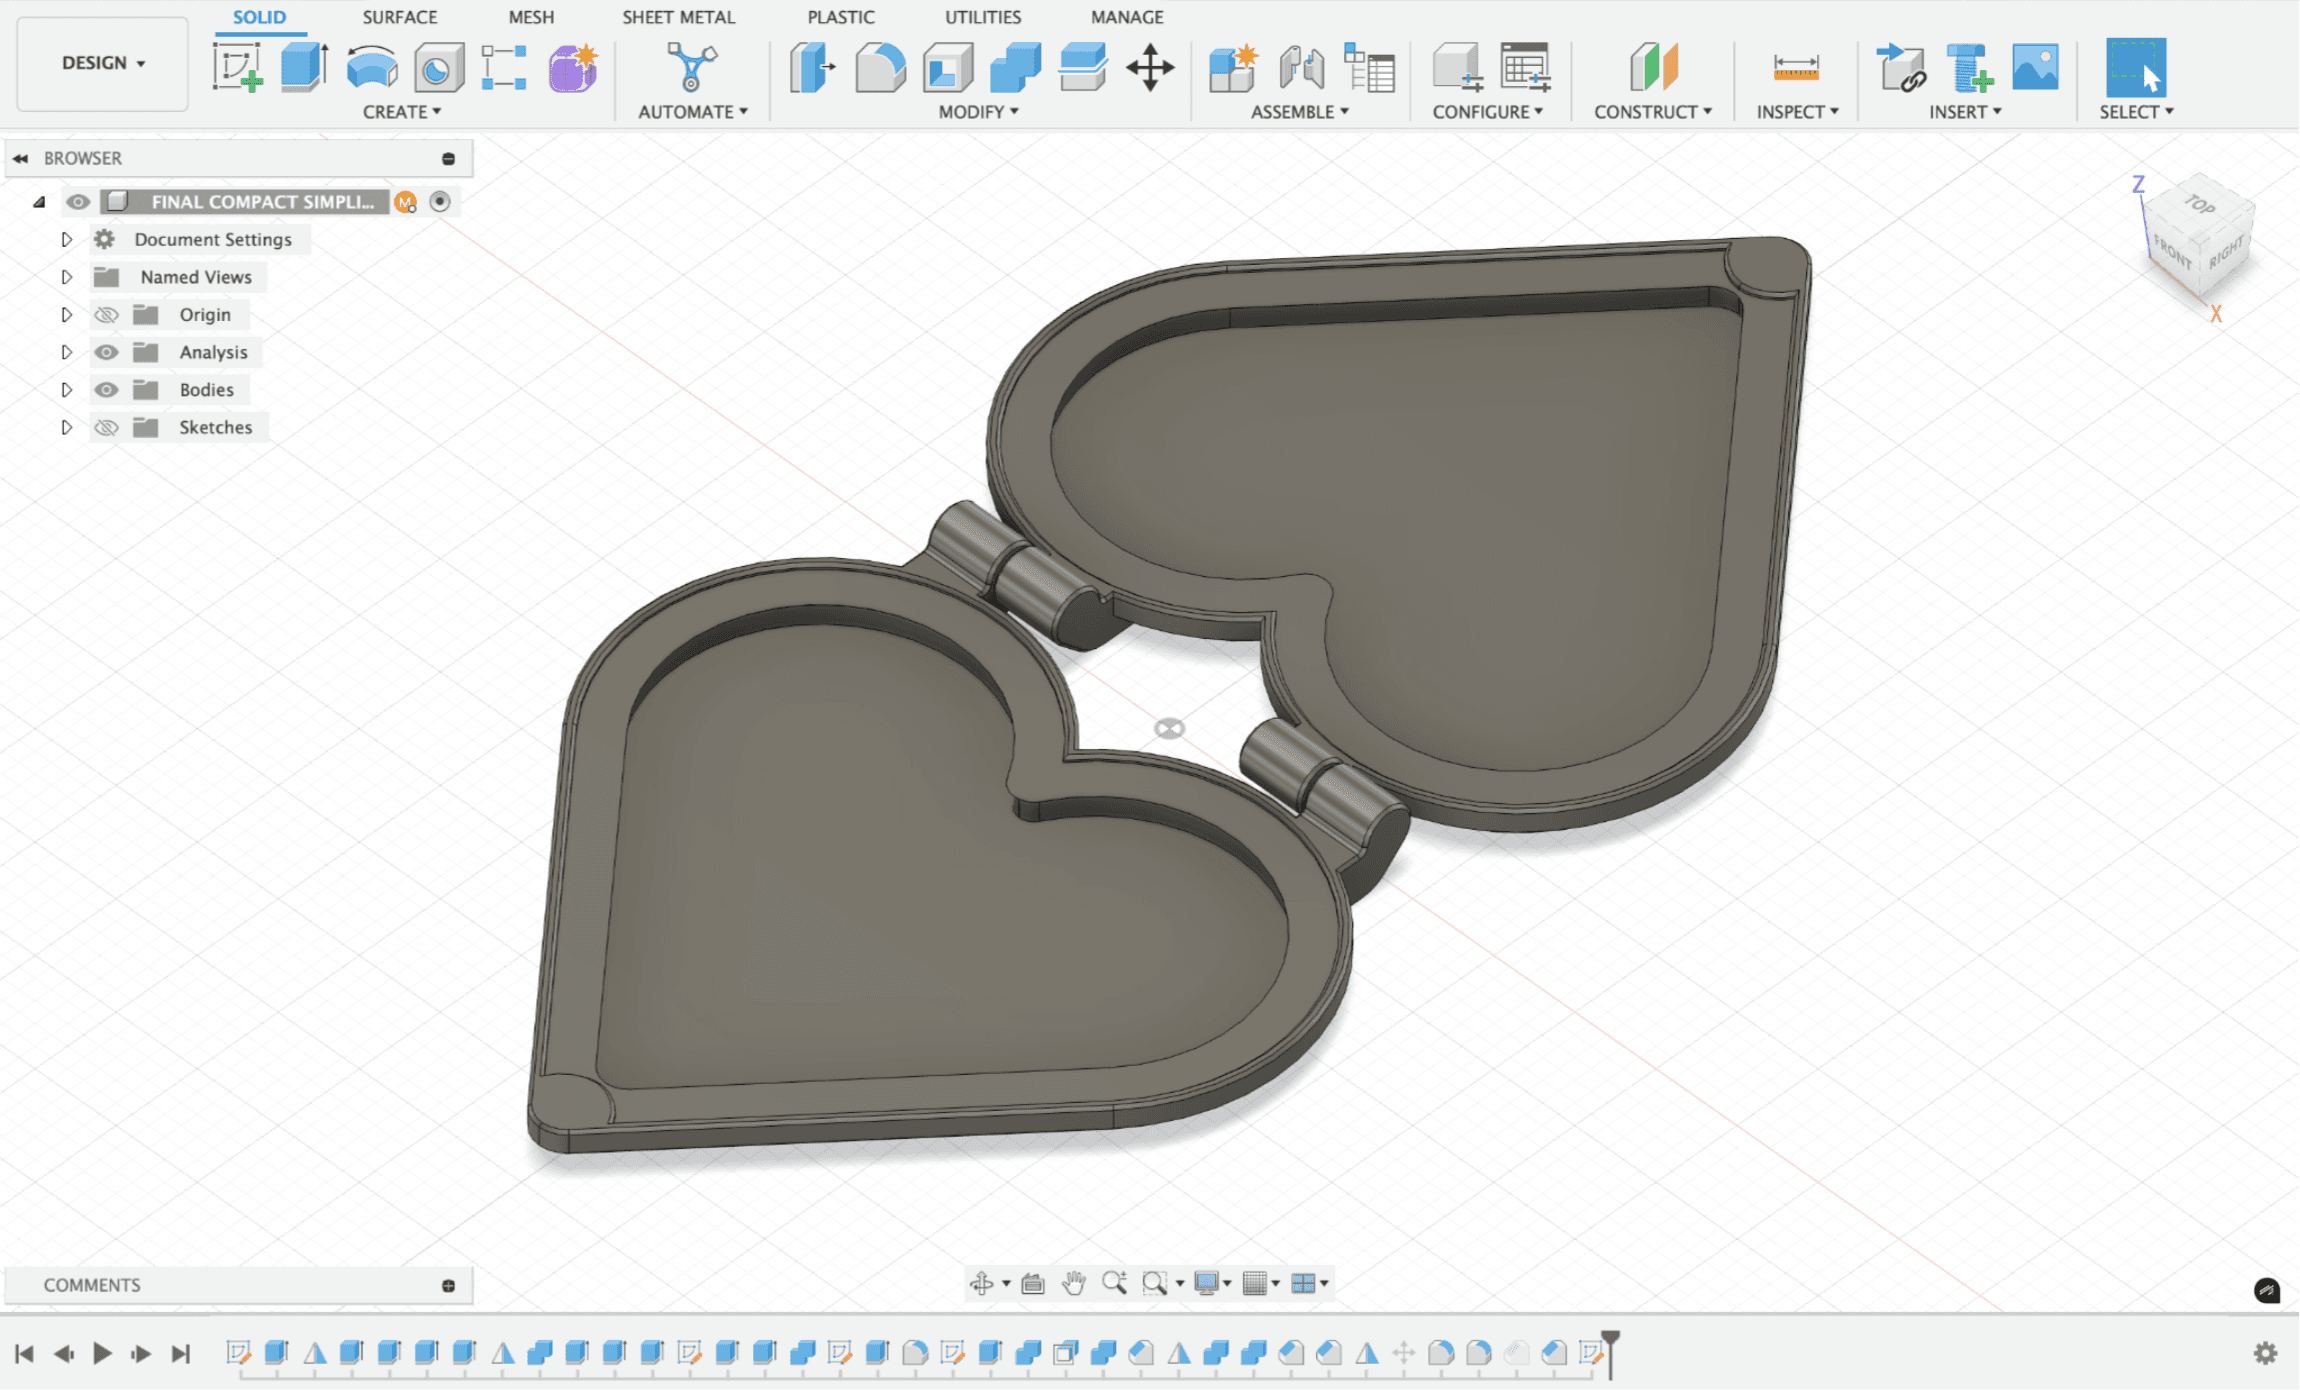
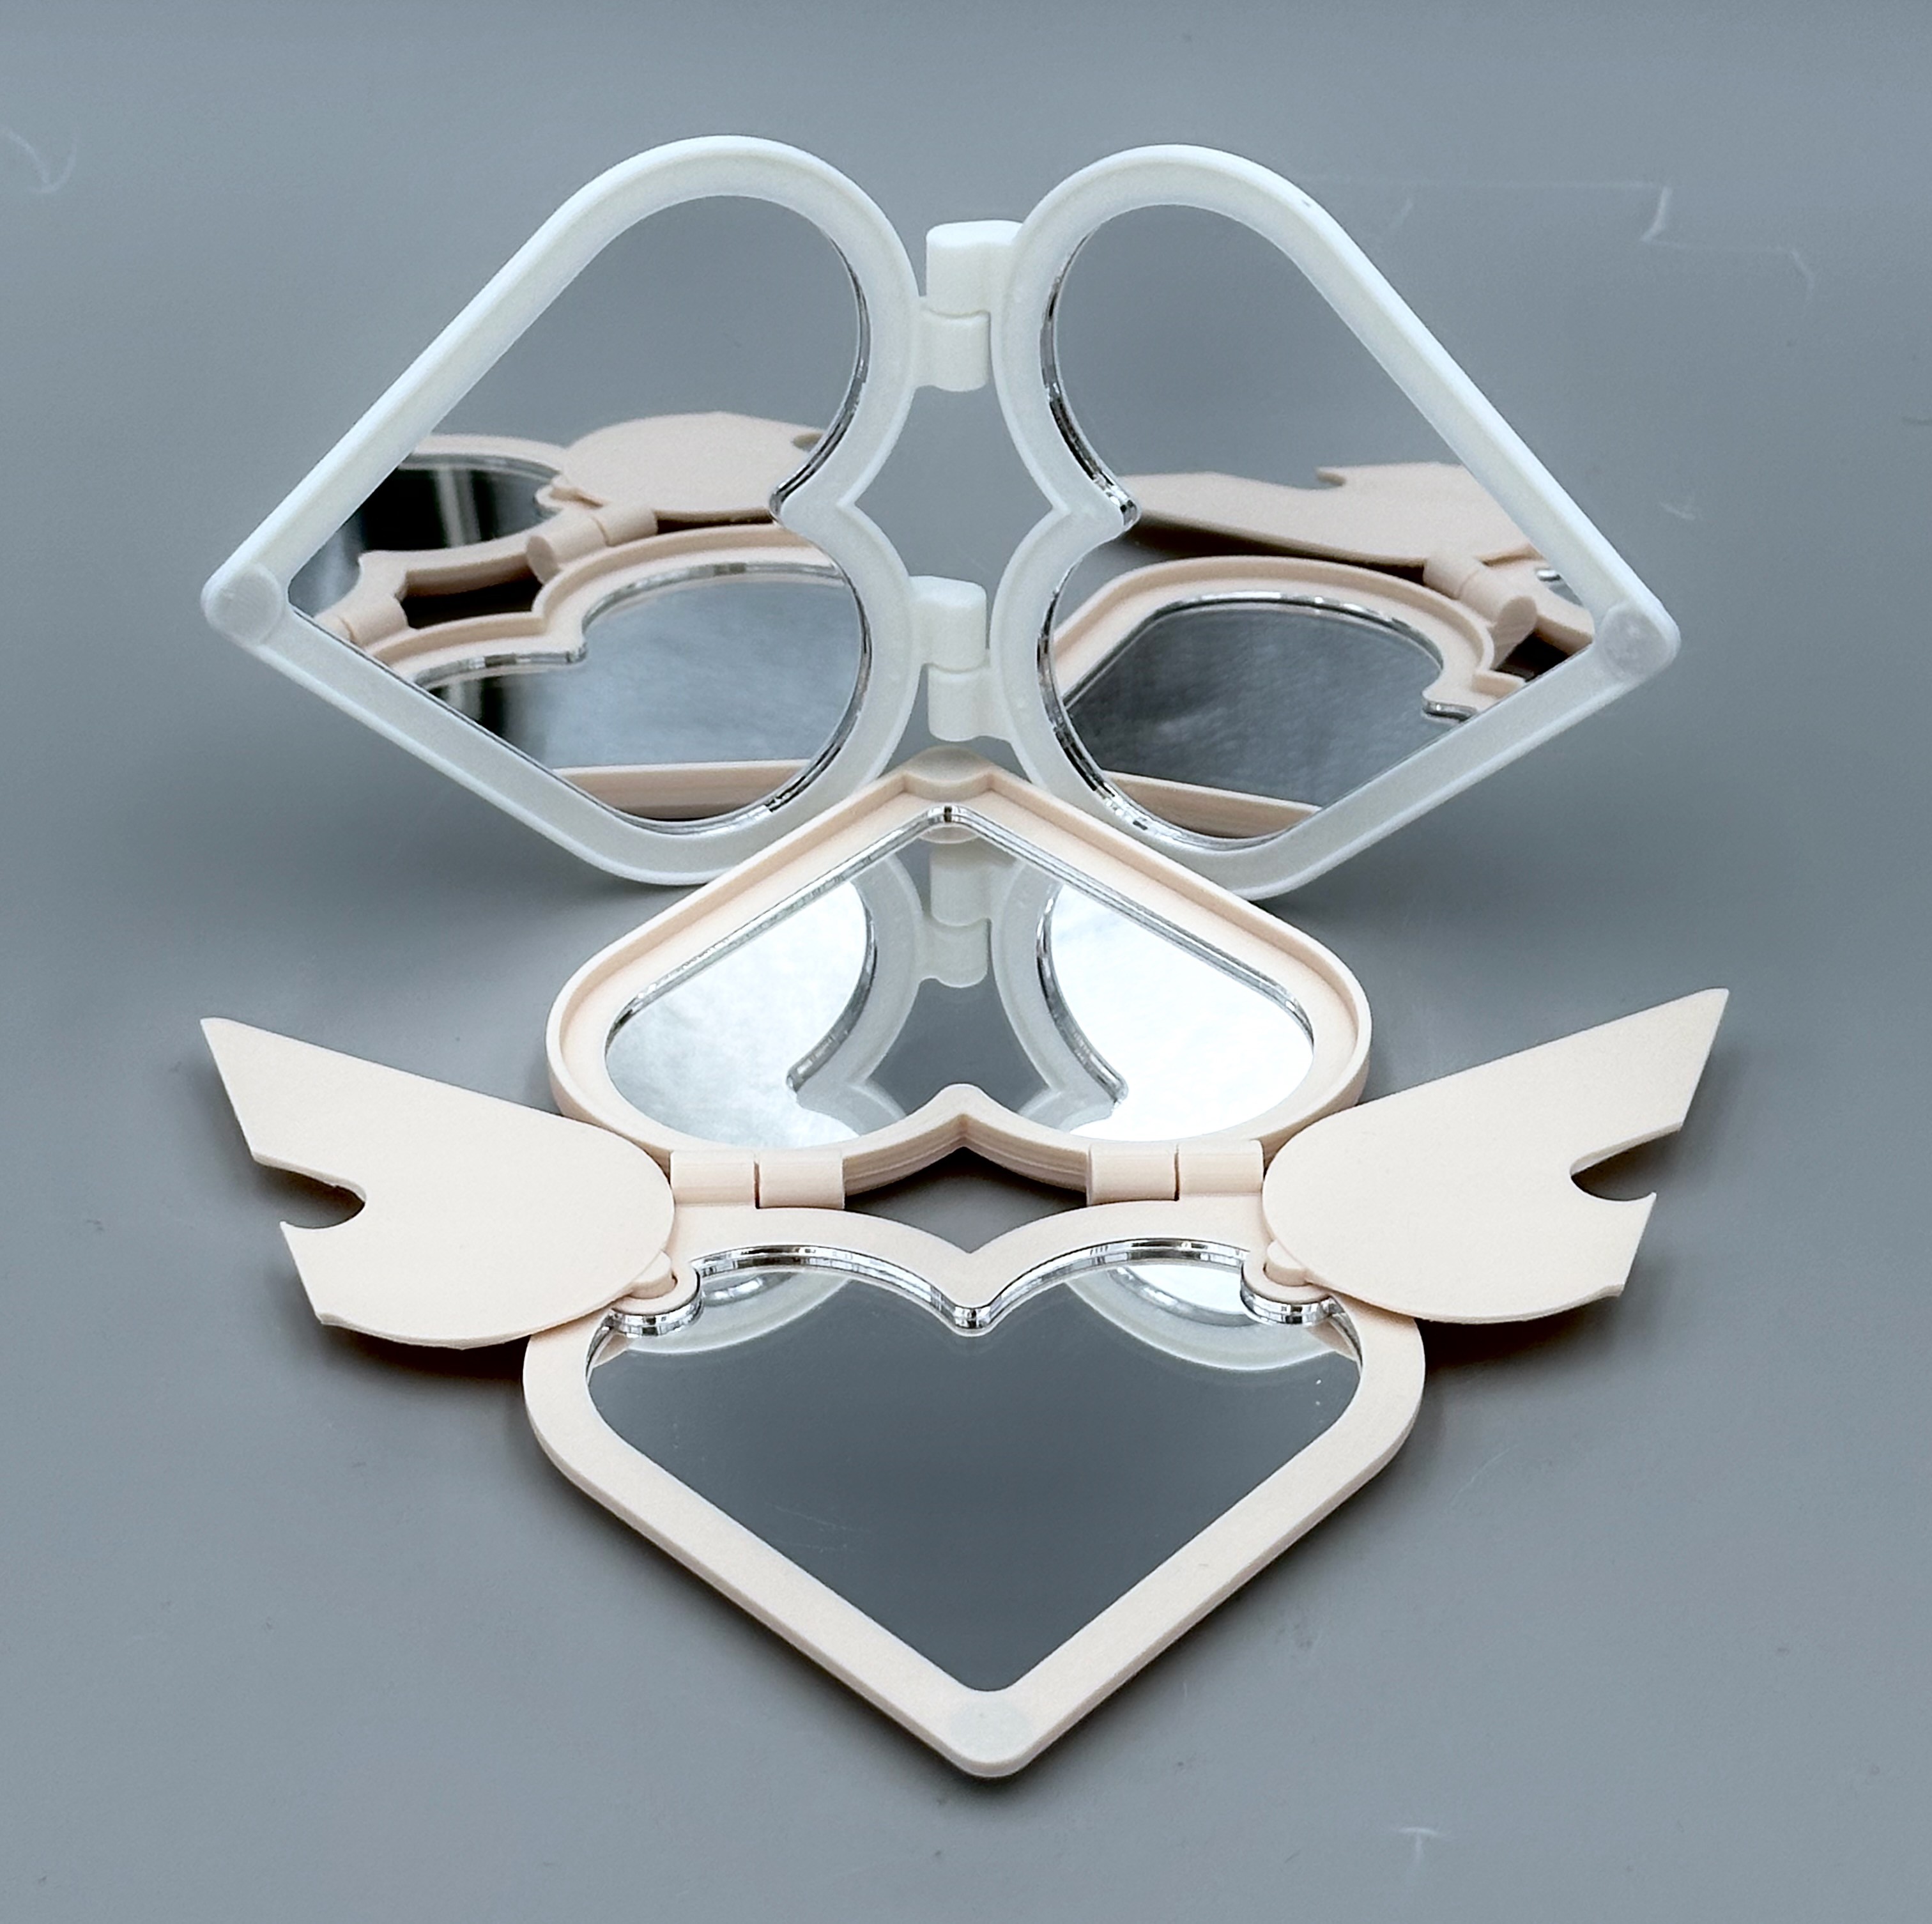
For my second CAD, I worked out the necessary wall heights and tolerances to ensure that the compact fully closed and the two halves would properly meet once the magnets were embedded. I also modeled small ledges that would allow the mirrors to be fully embedded and added two "wings" with ball joints to create a swiveling cover for the mirror.
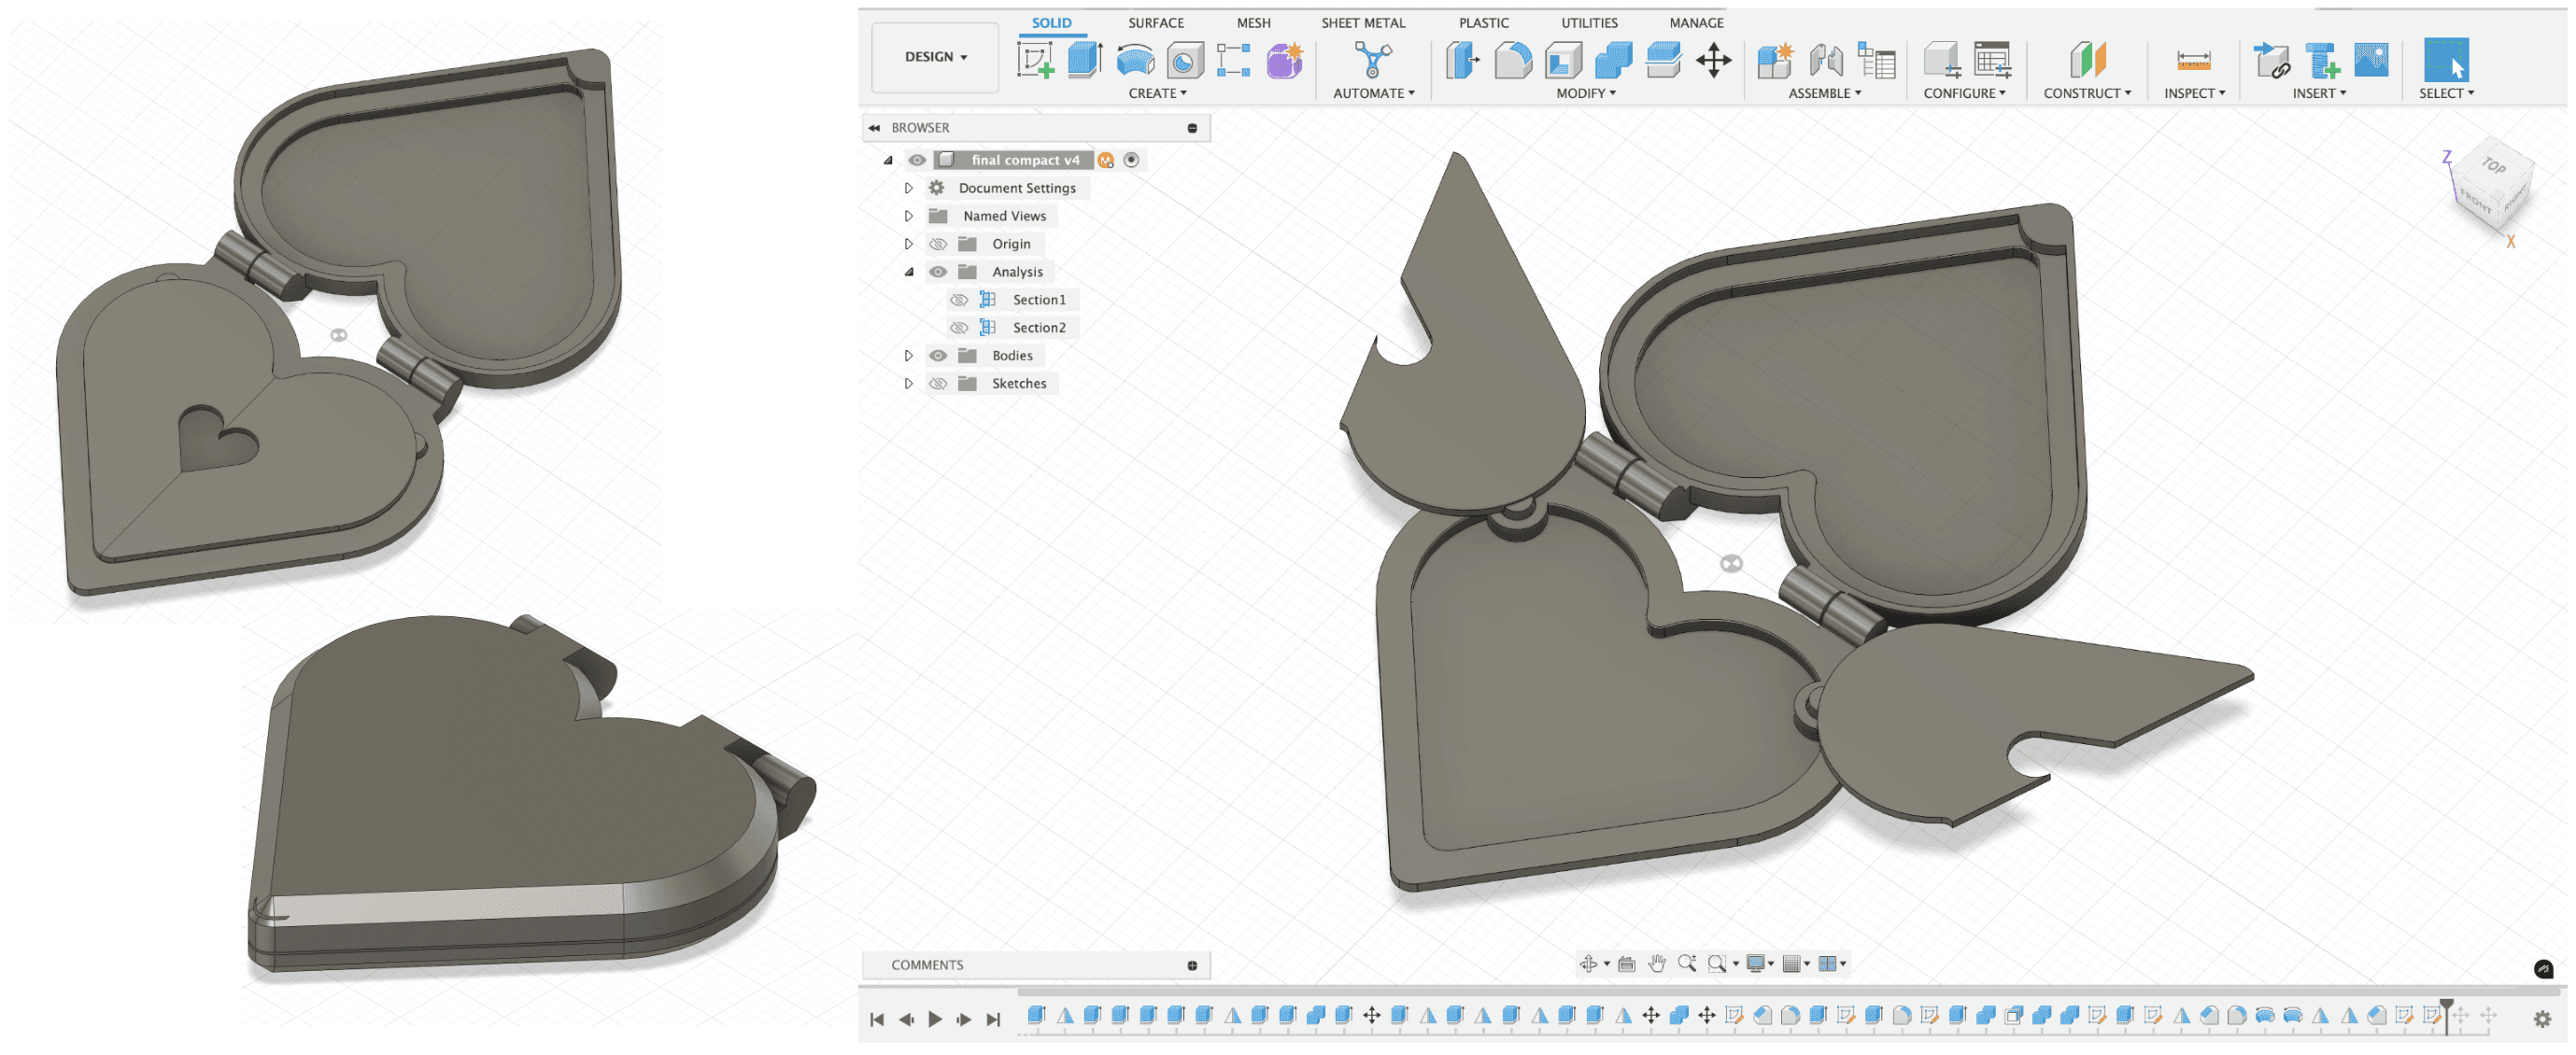
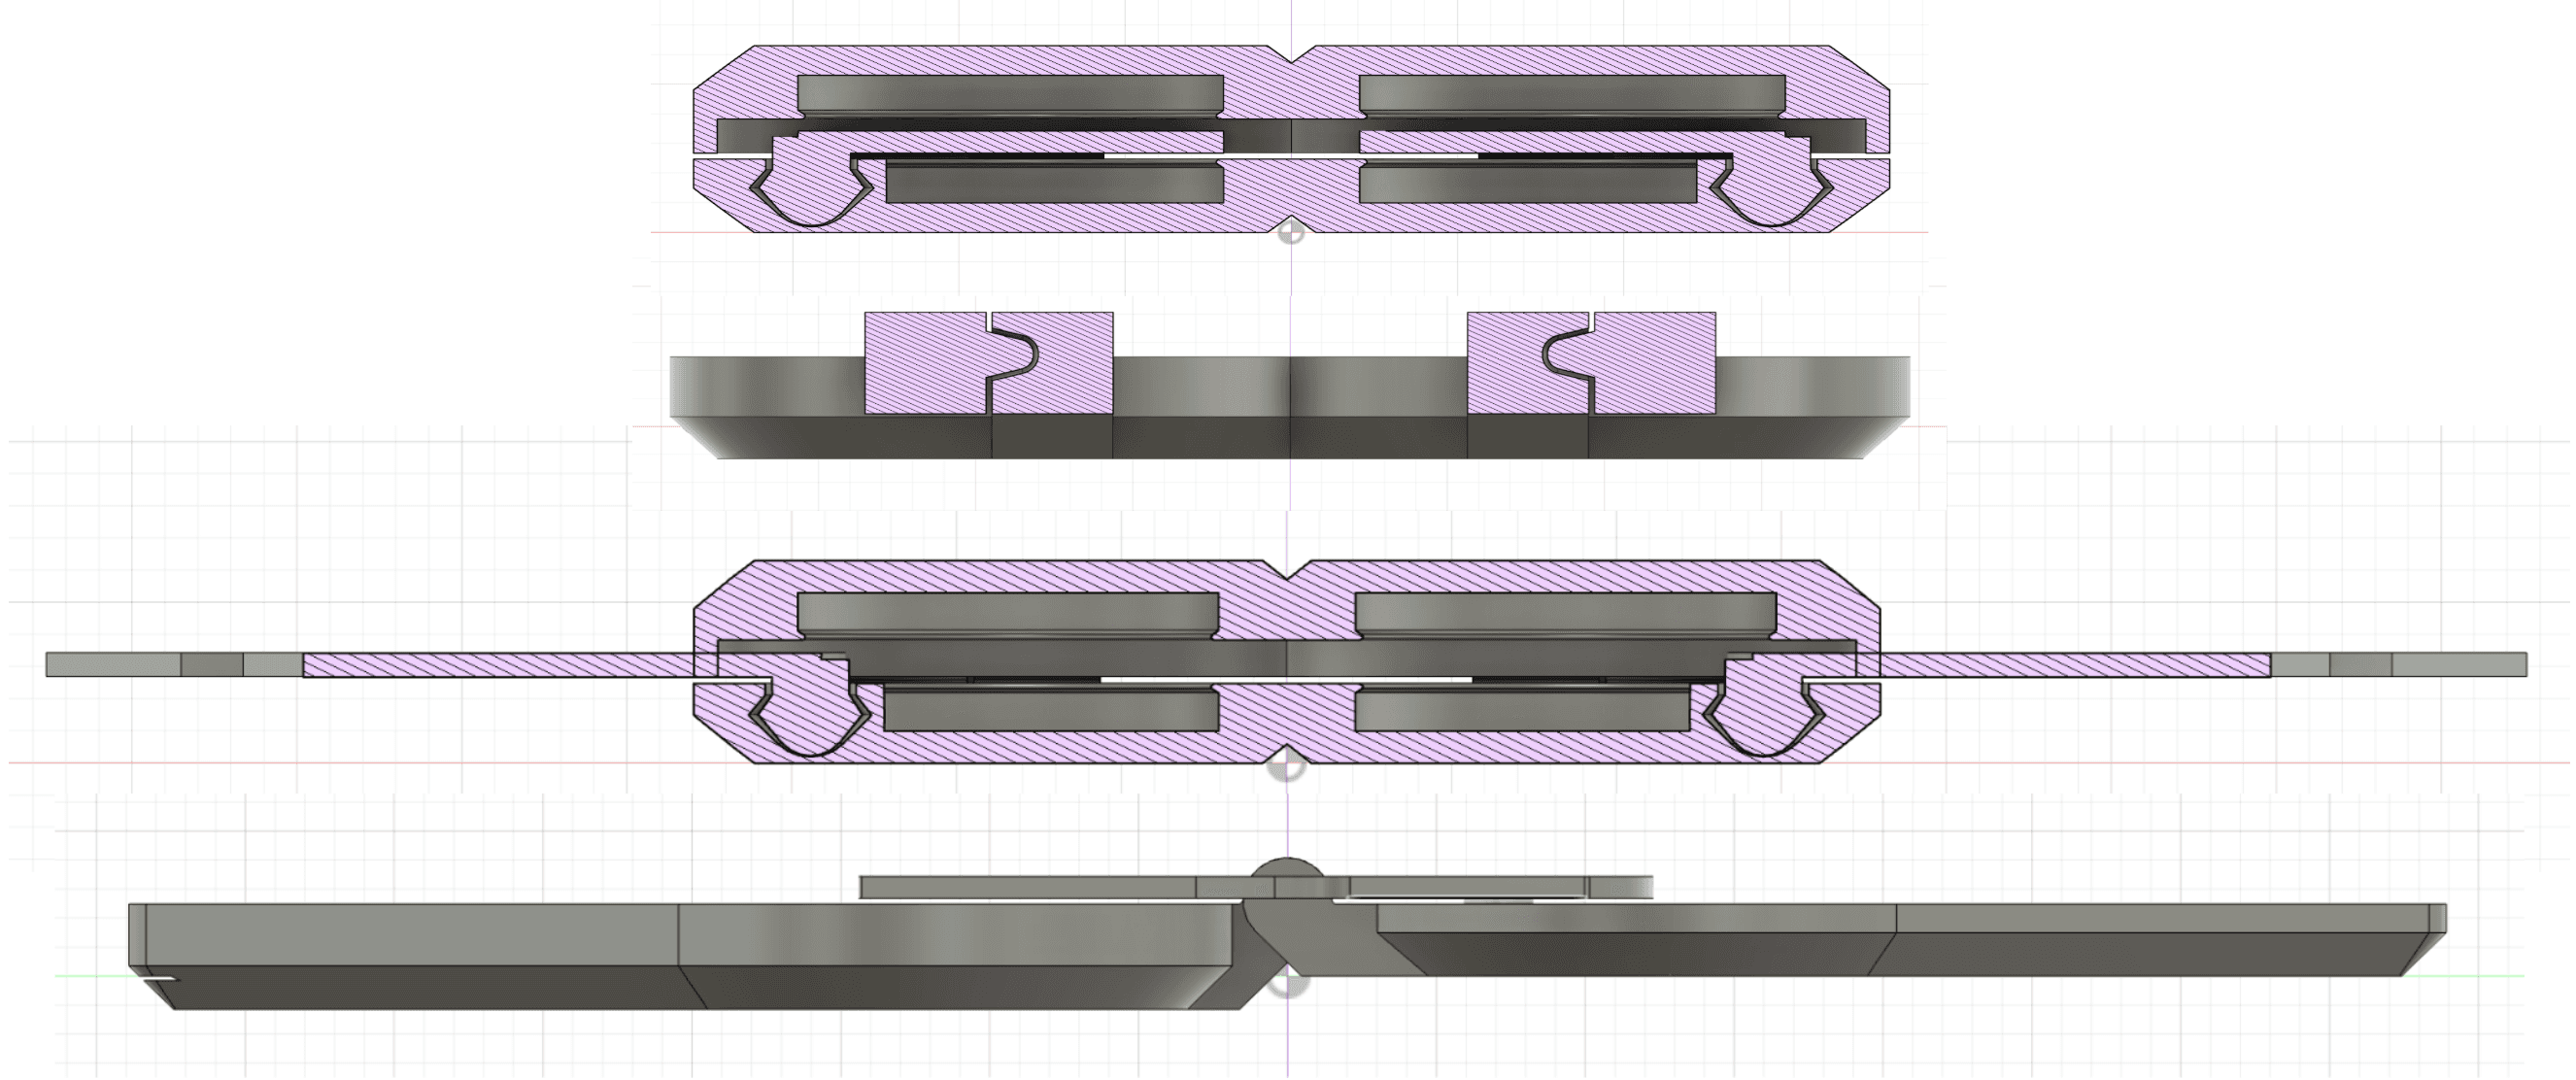
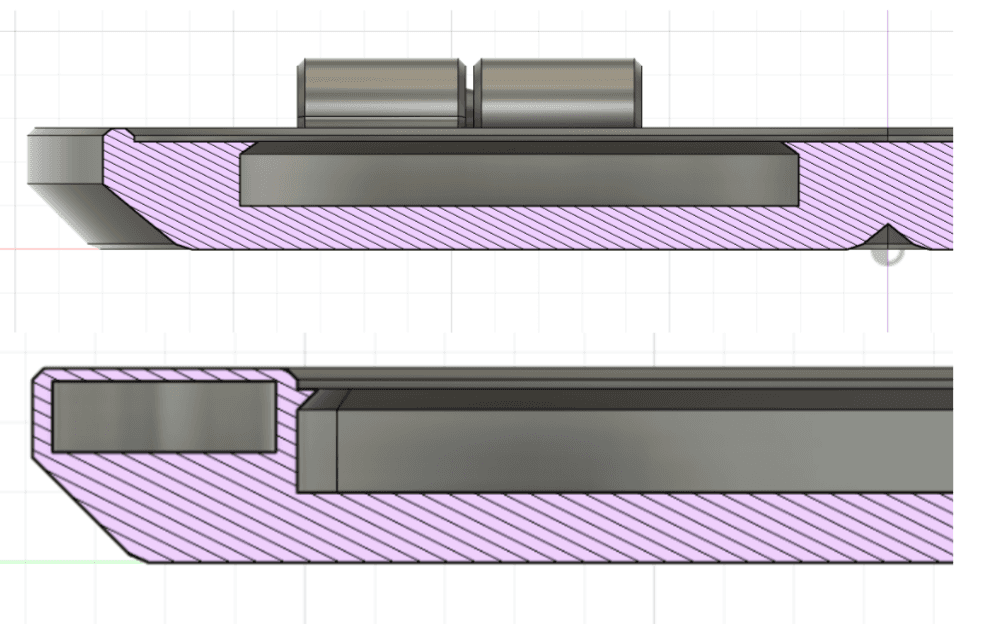
Below are the cross sections in Fusion showing the geometry of (1) the closed compact, (2) the hinges, (3) the compact with the wings opened, and (4) the overall side profile of the open compact. Due to the left half being thicker than the right, this version of the compact had floating regions that needed significant support during printing.
Laser Cutting
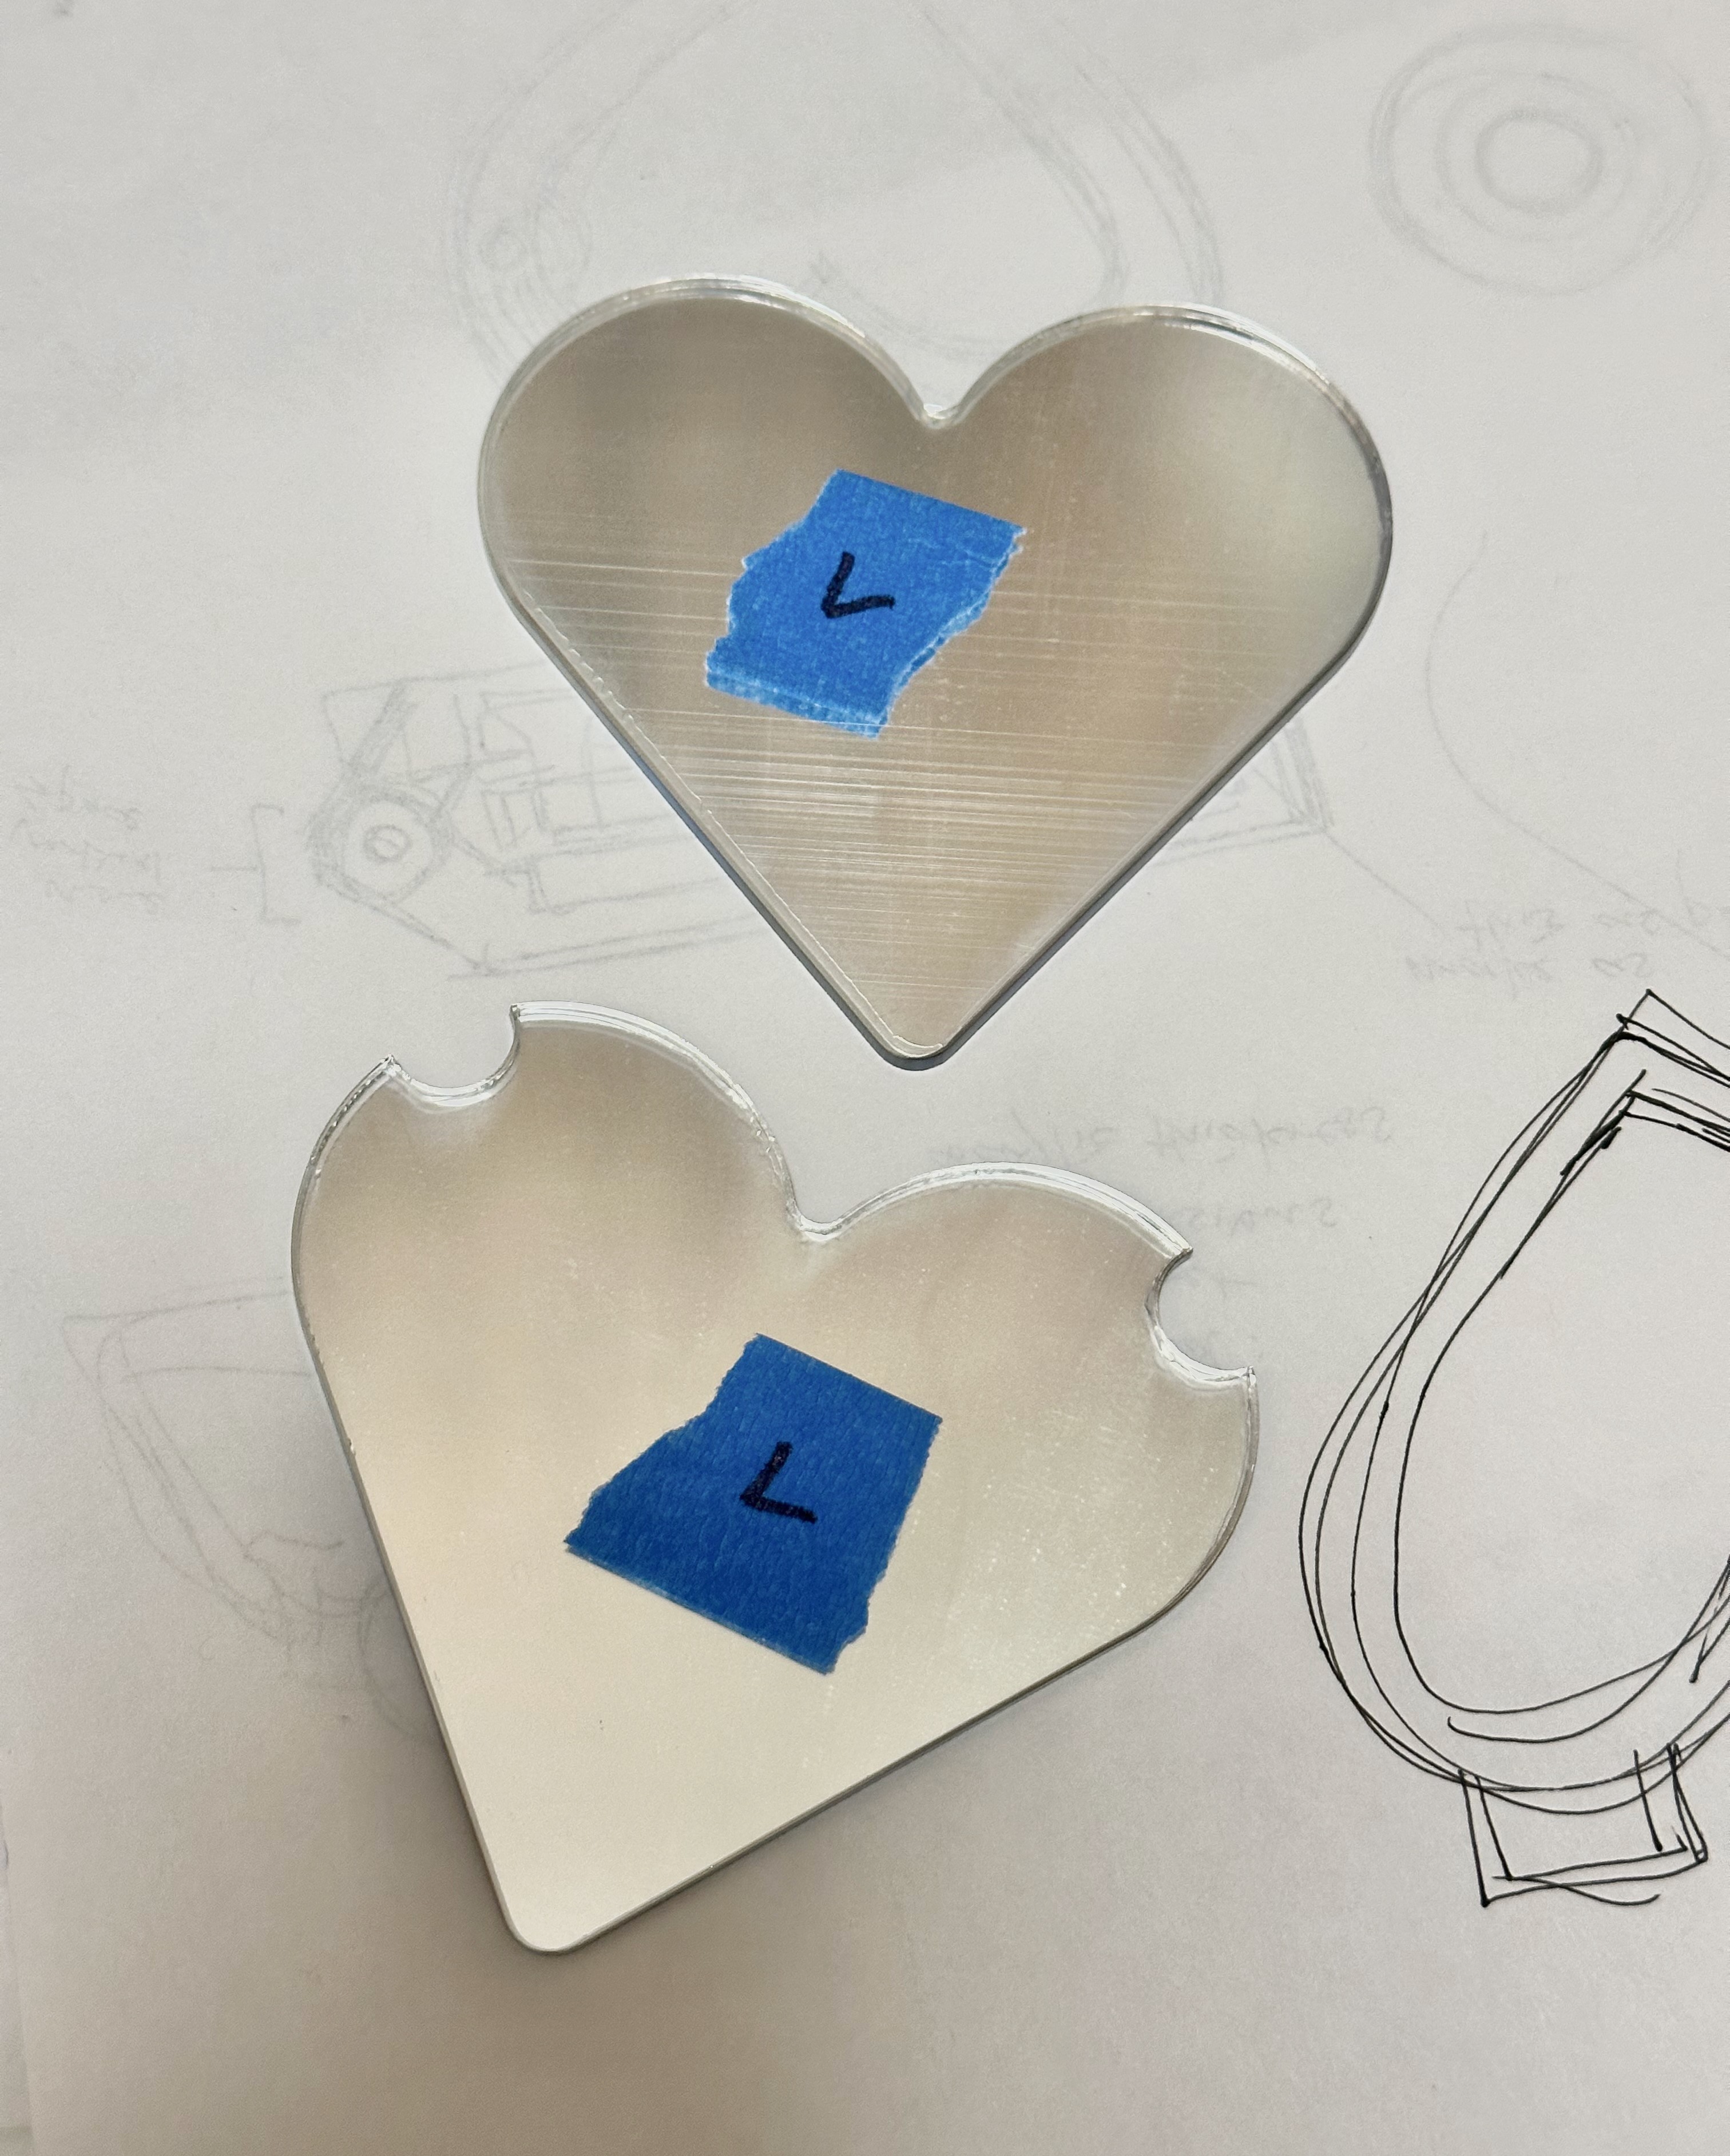
To create the mirrors, I projected the geometries from my CAD as .dxf files and laser cut them in a sheet of mirror acrylic. I tested two different sizes of mirrors (0.2mm offset) to determine what tolerance would allow for a snug press-fit when inserted into the print.
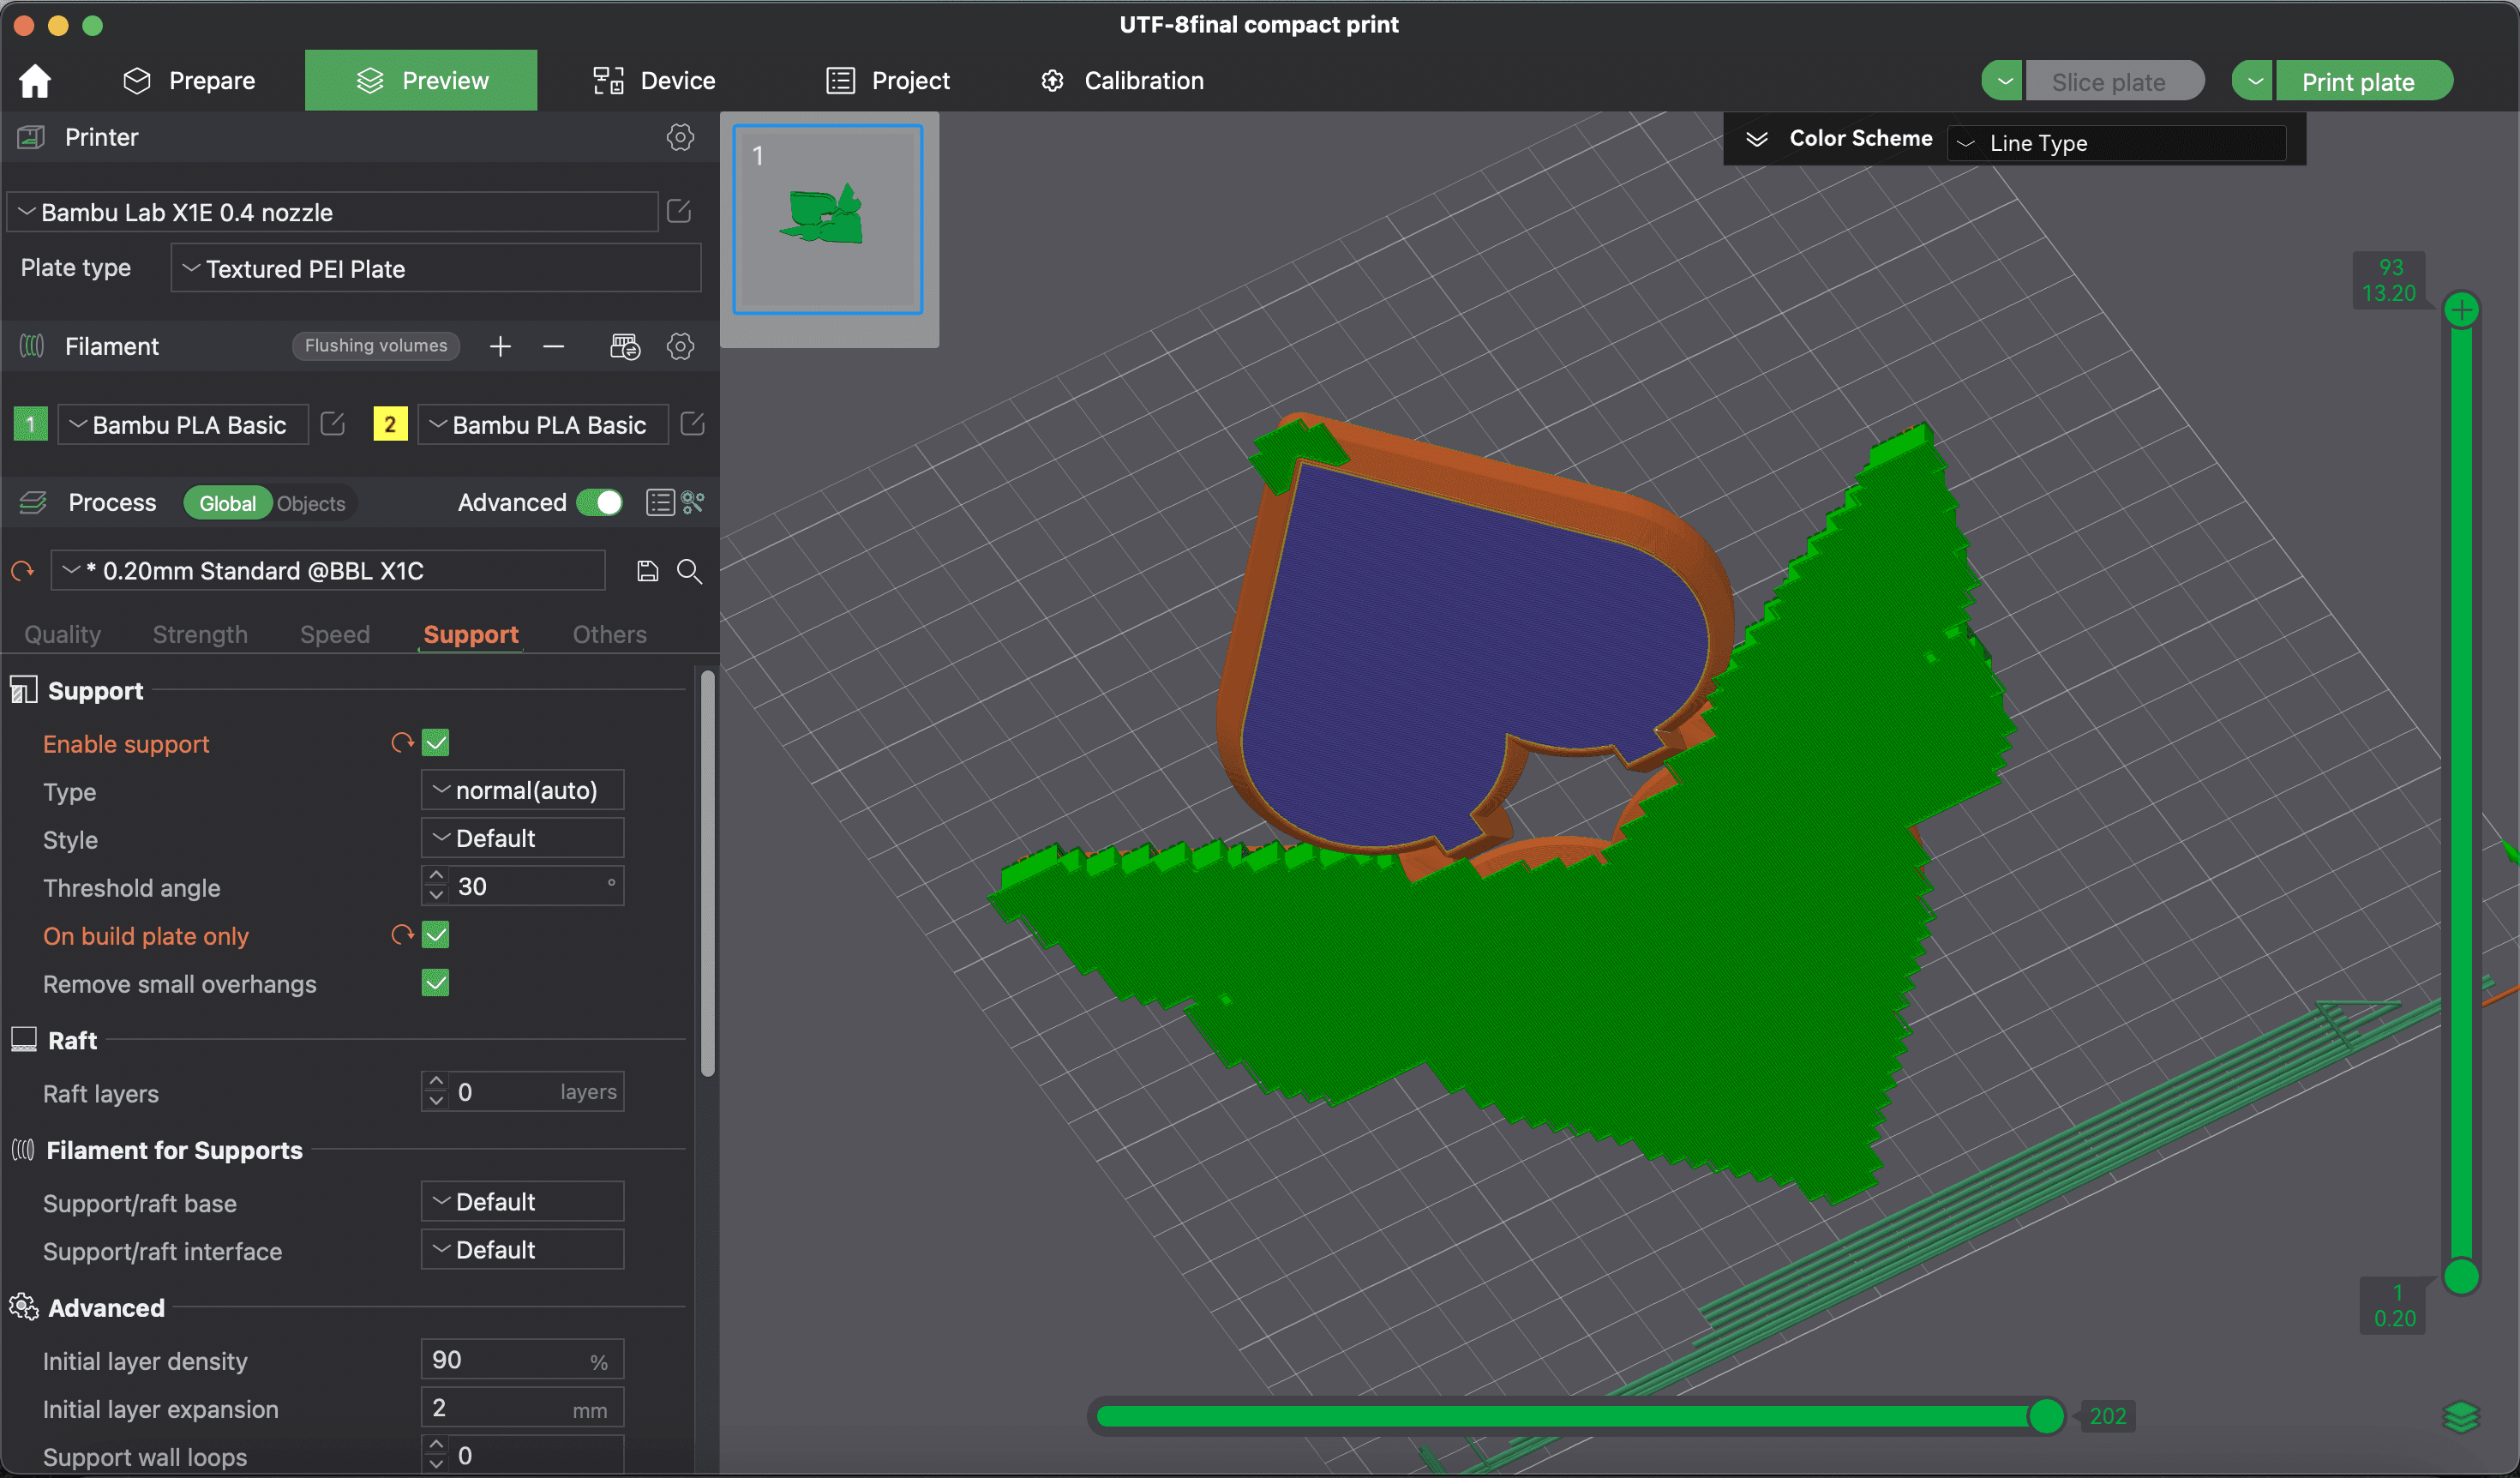
Second Slice
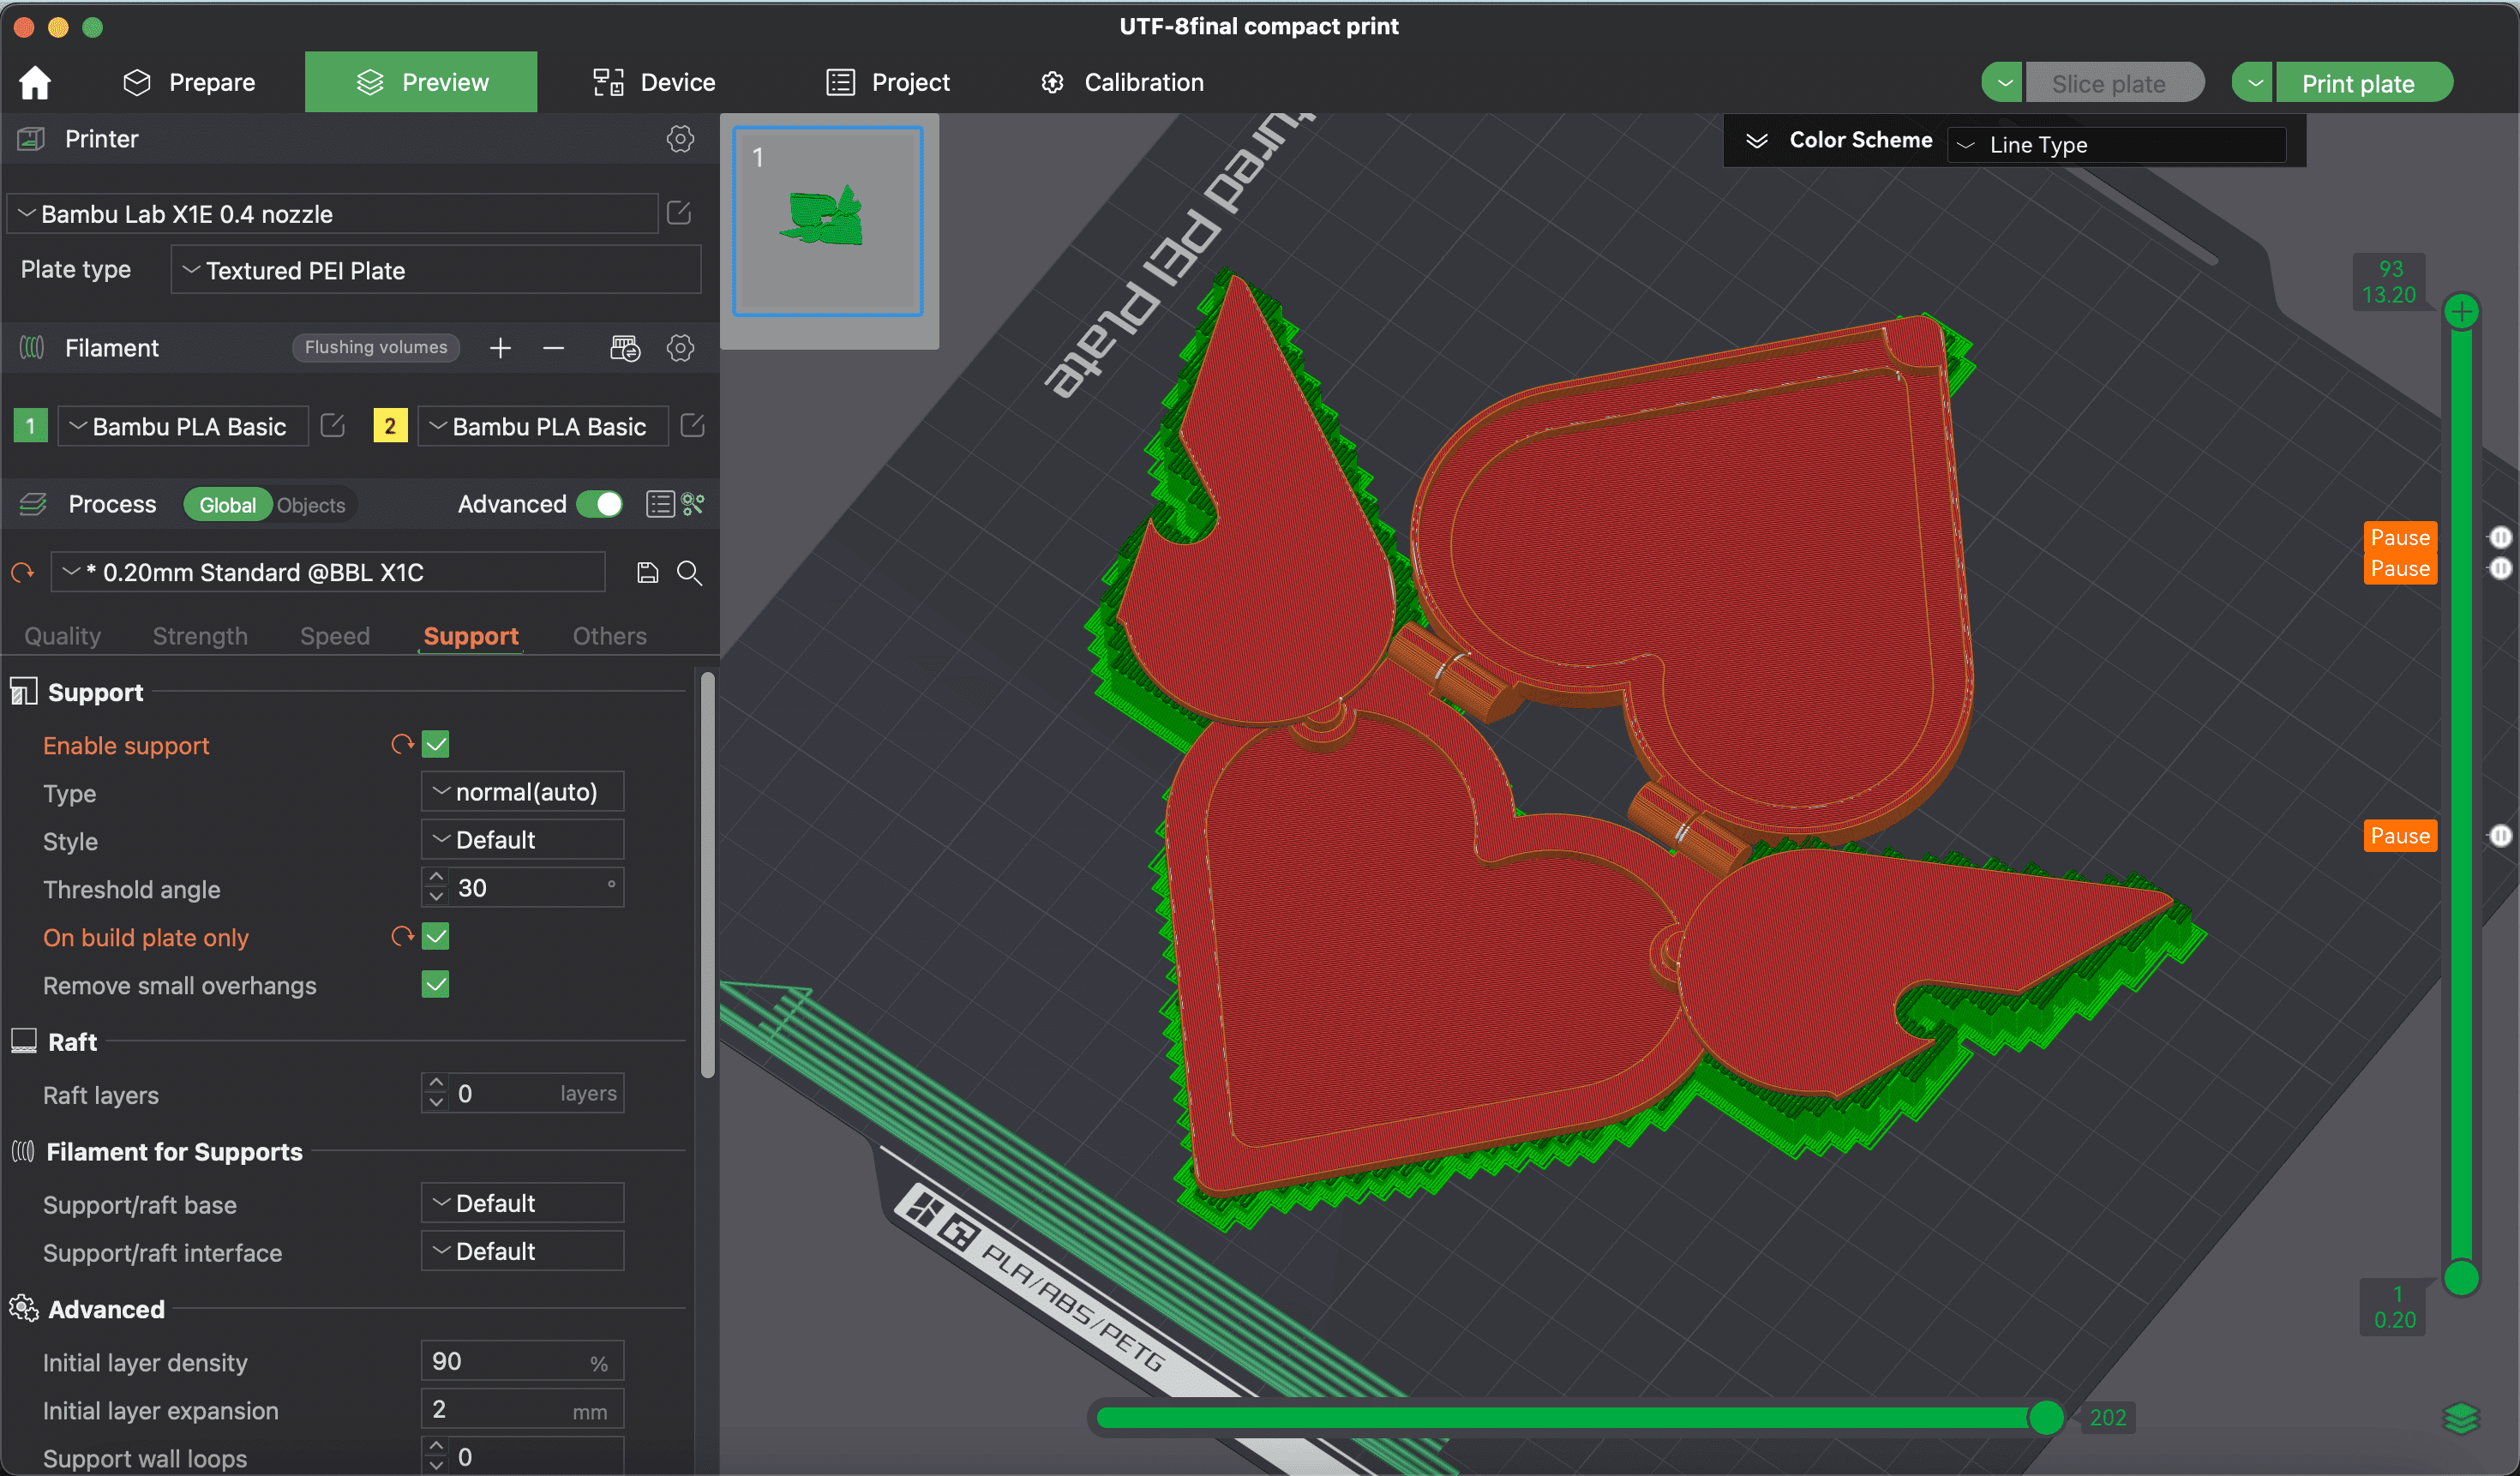
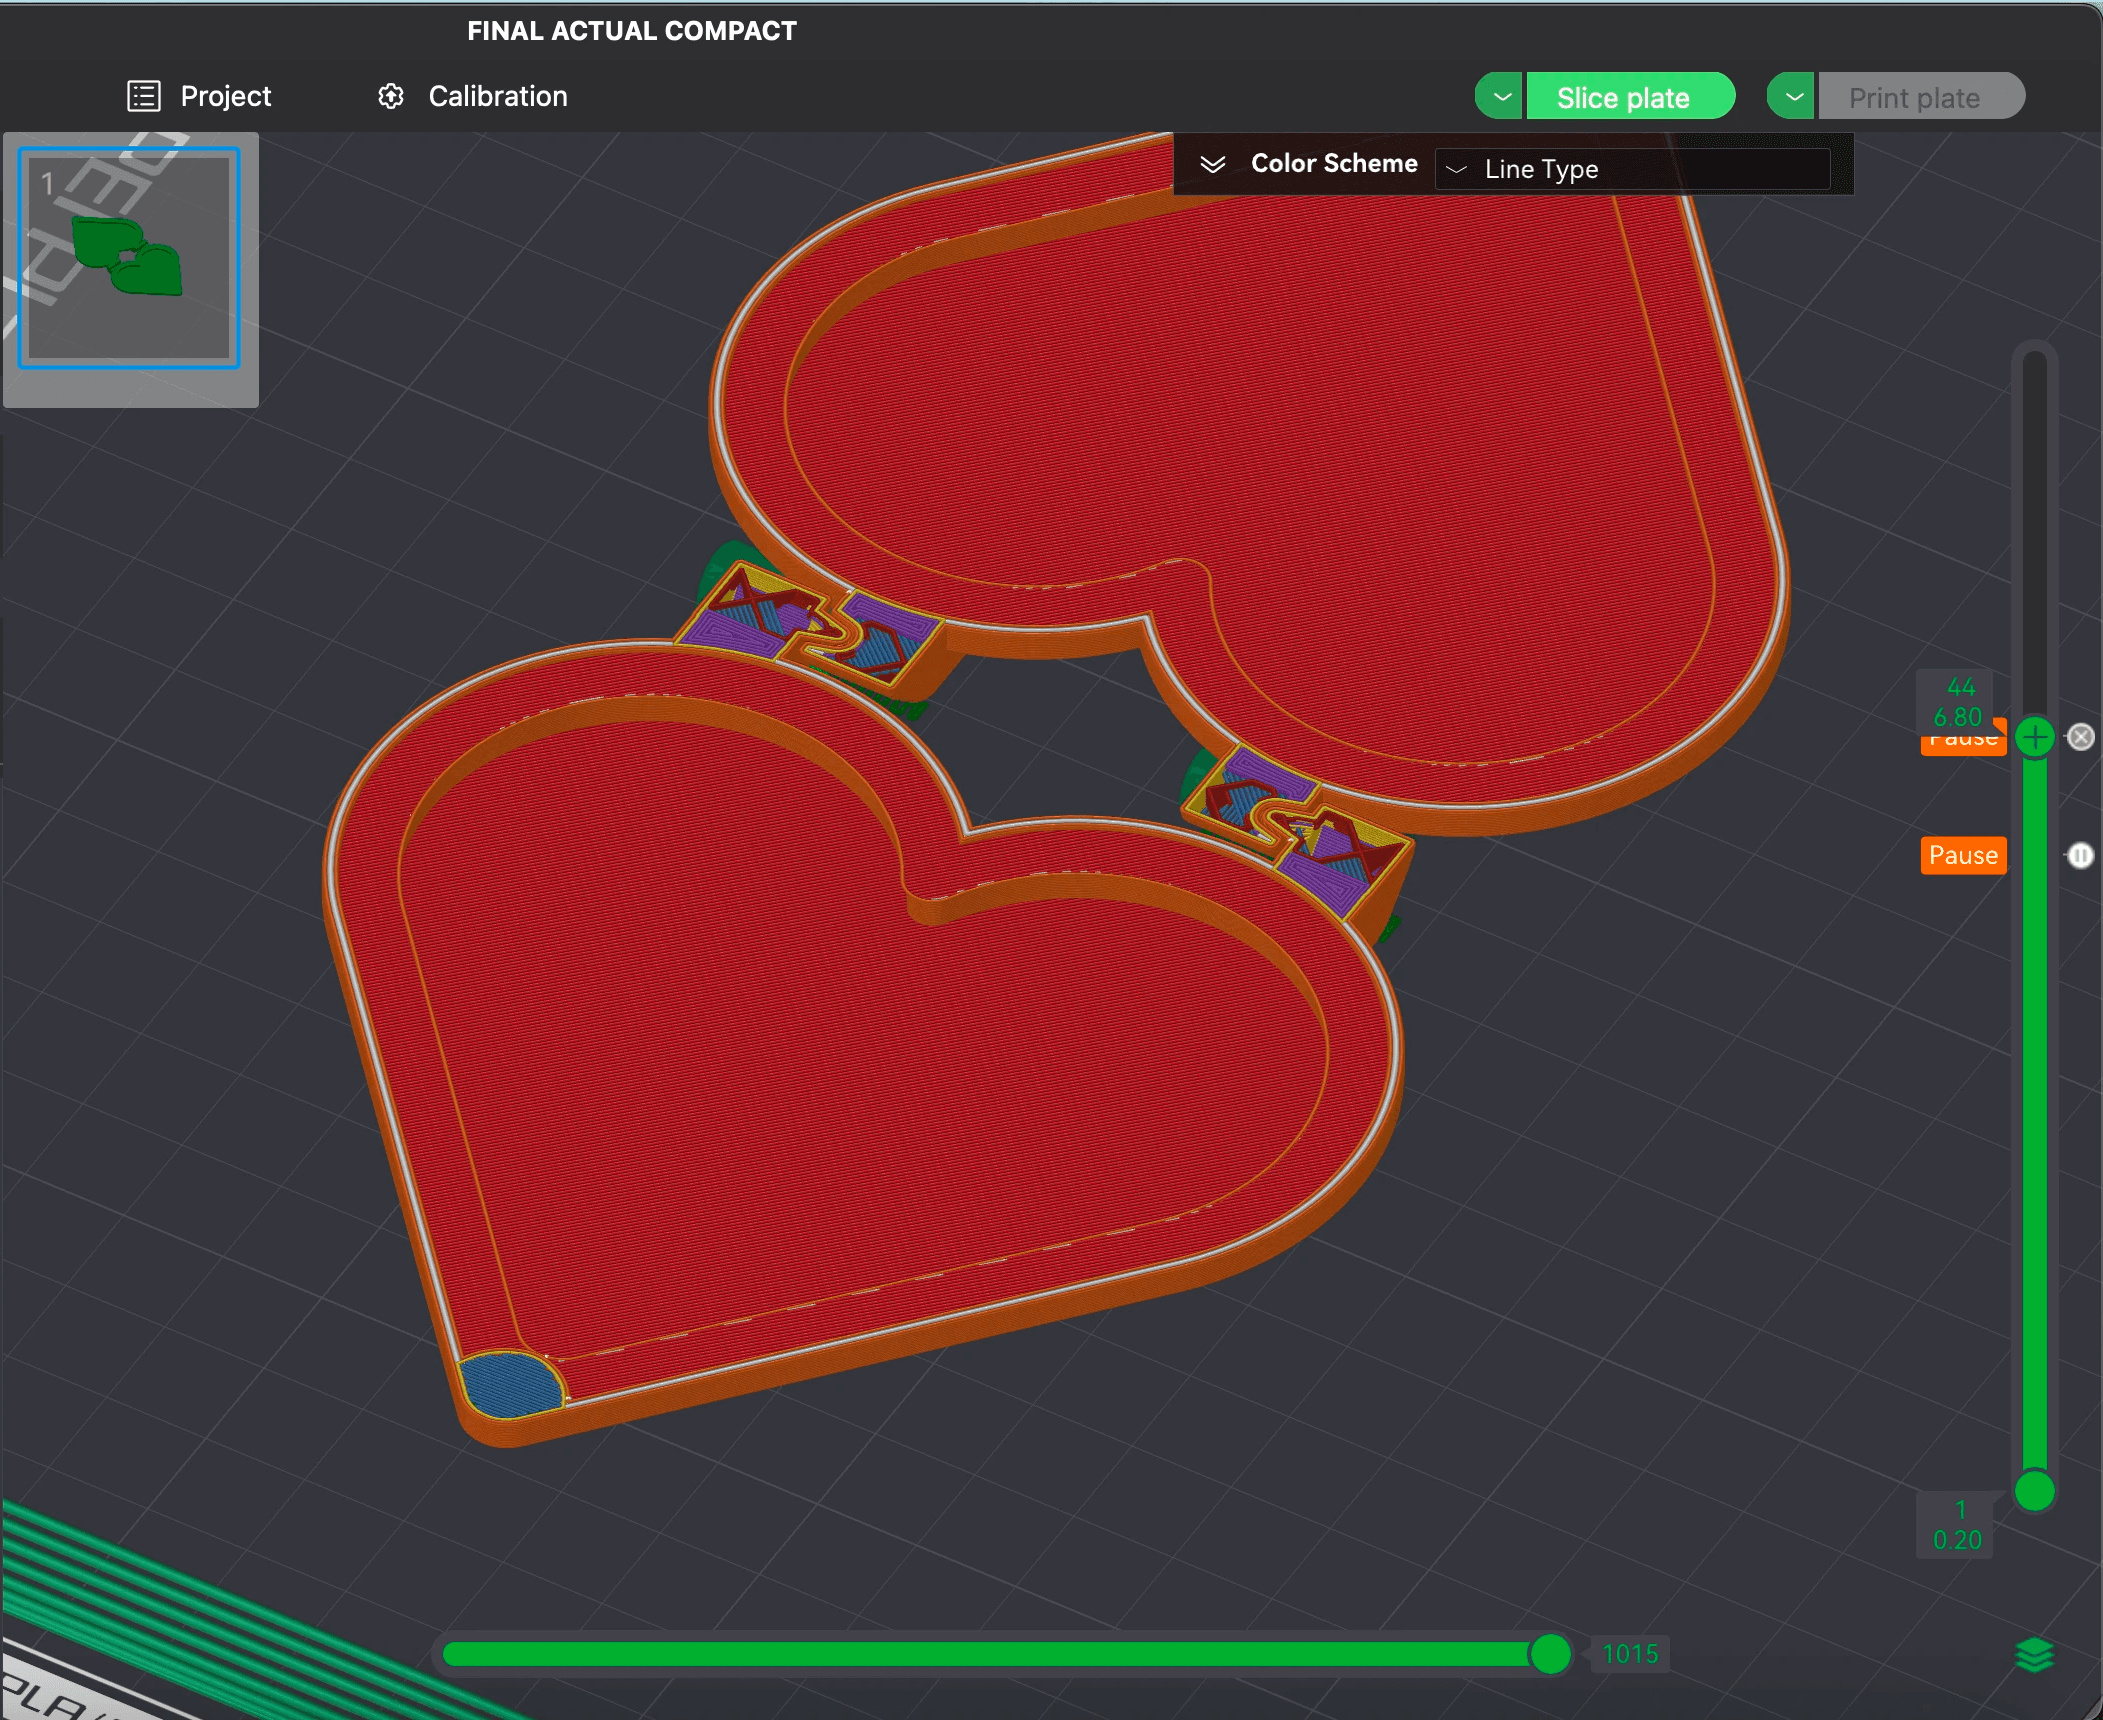
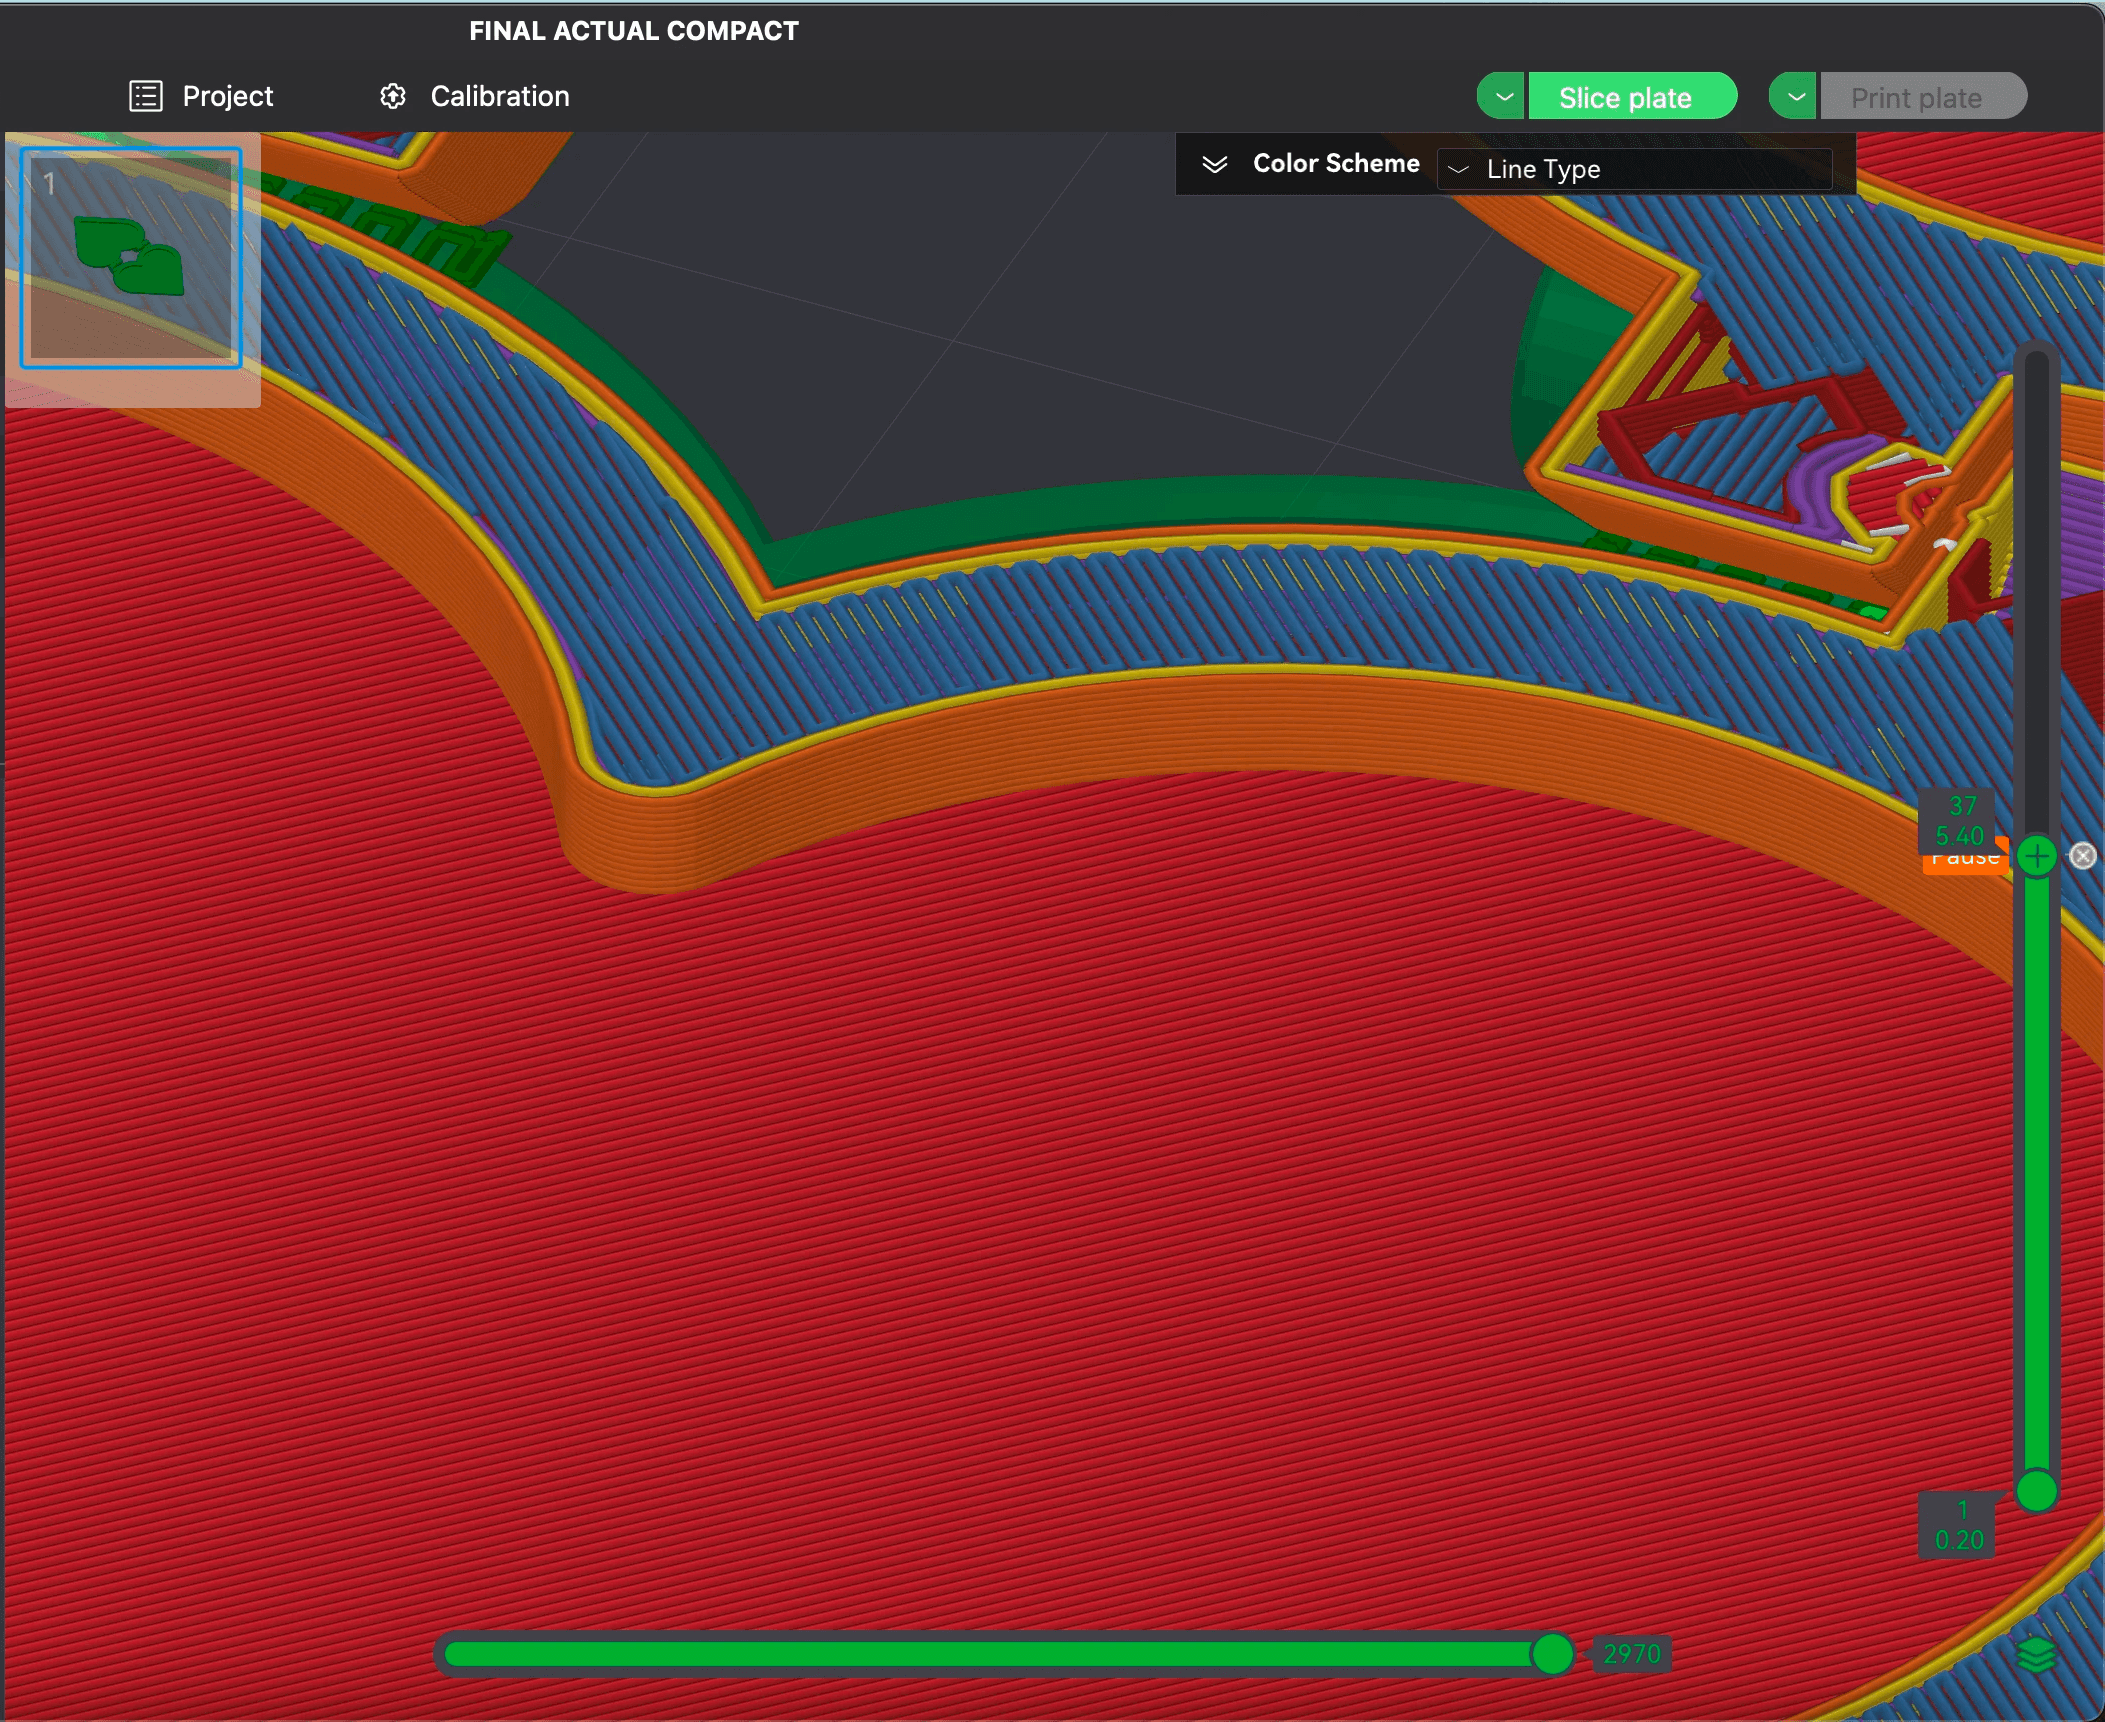
I ran into many challenges with slicing due to supports being generated in places that would block the mirror. I solved this by selecting the supports to be “on build plate only,” however it became clear that the surface finish under the supports would be quite rough. The slice included three pauses for the mid-print-insertion of the mirrors (one for each) and the magnets.
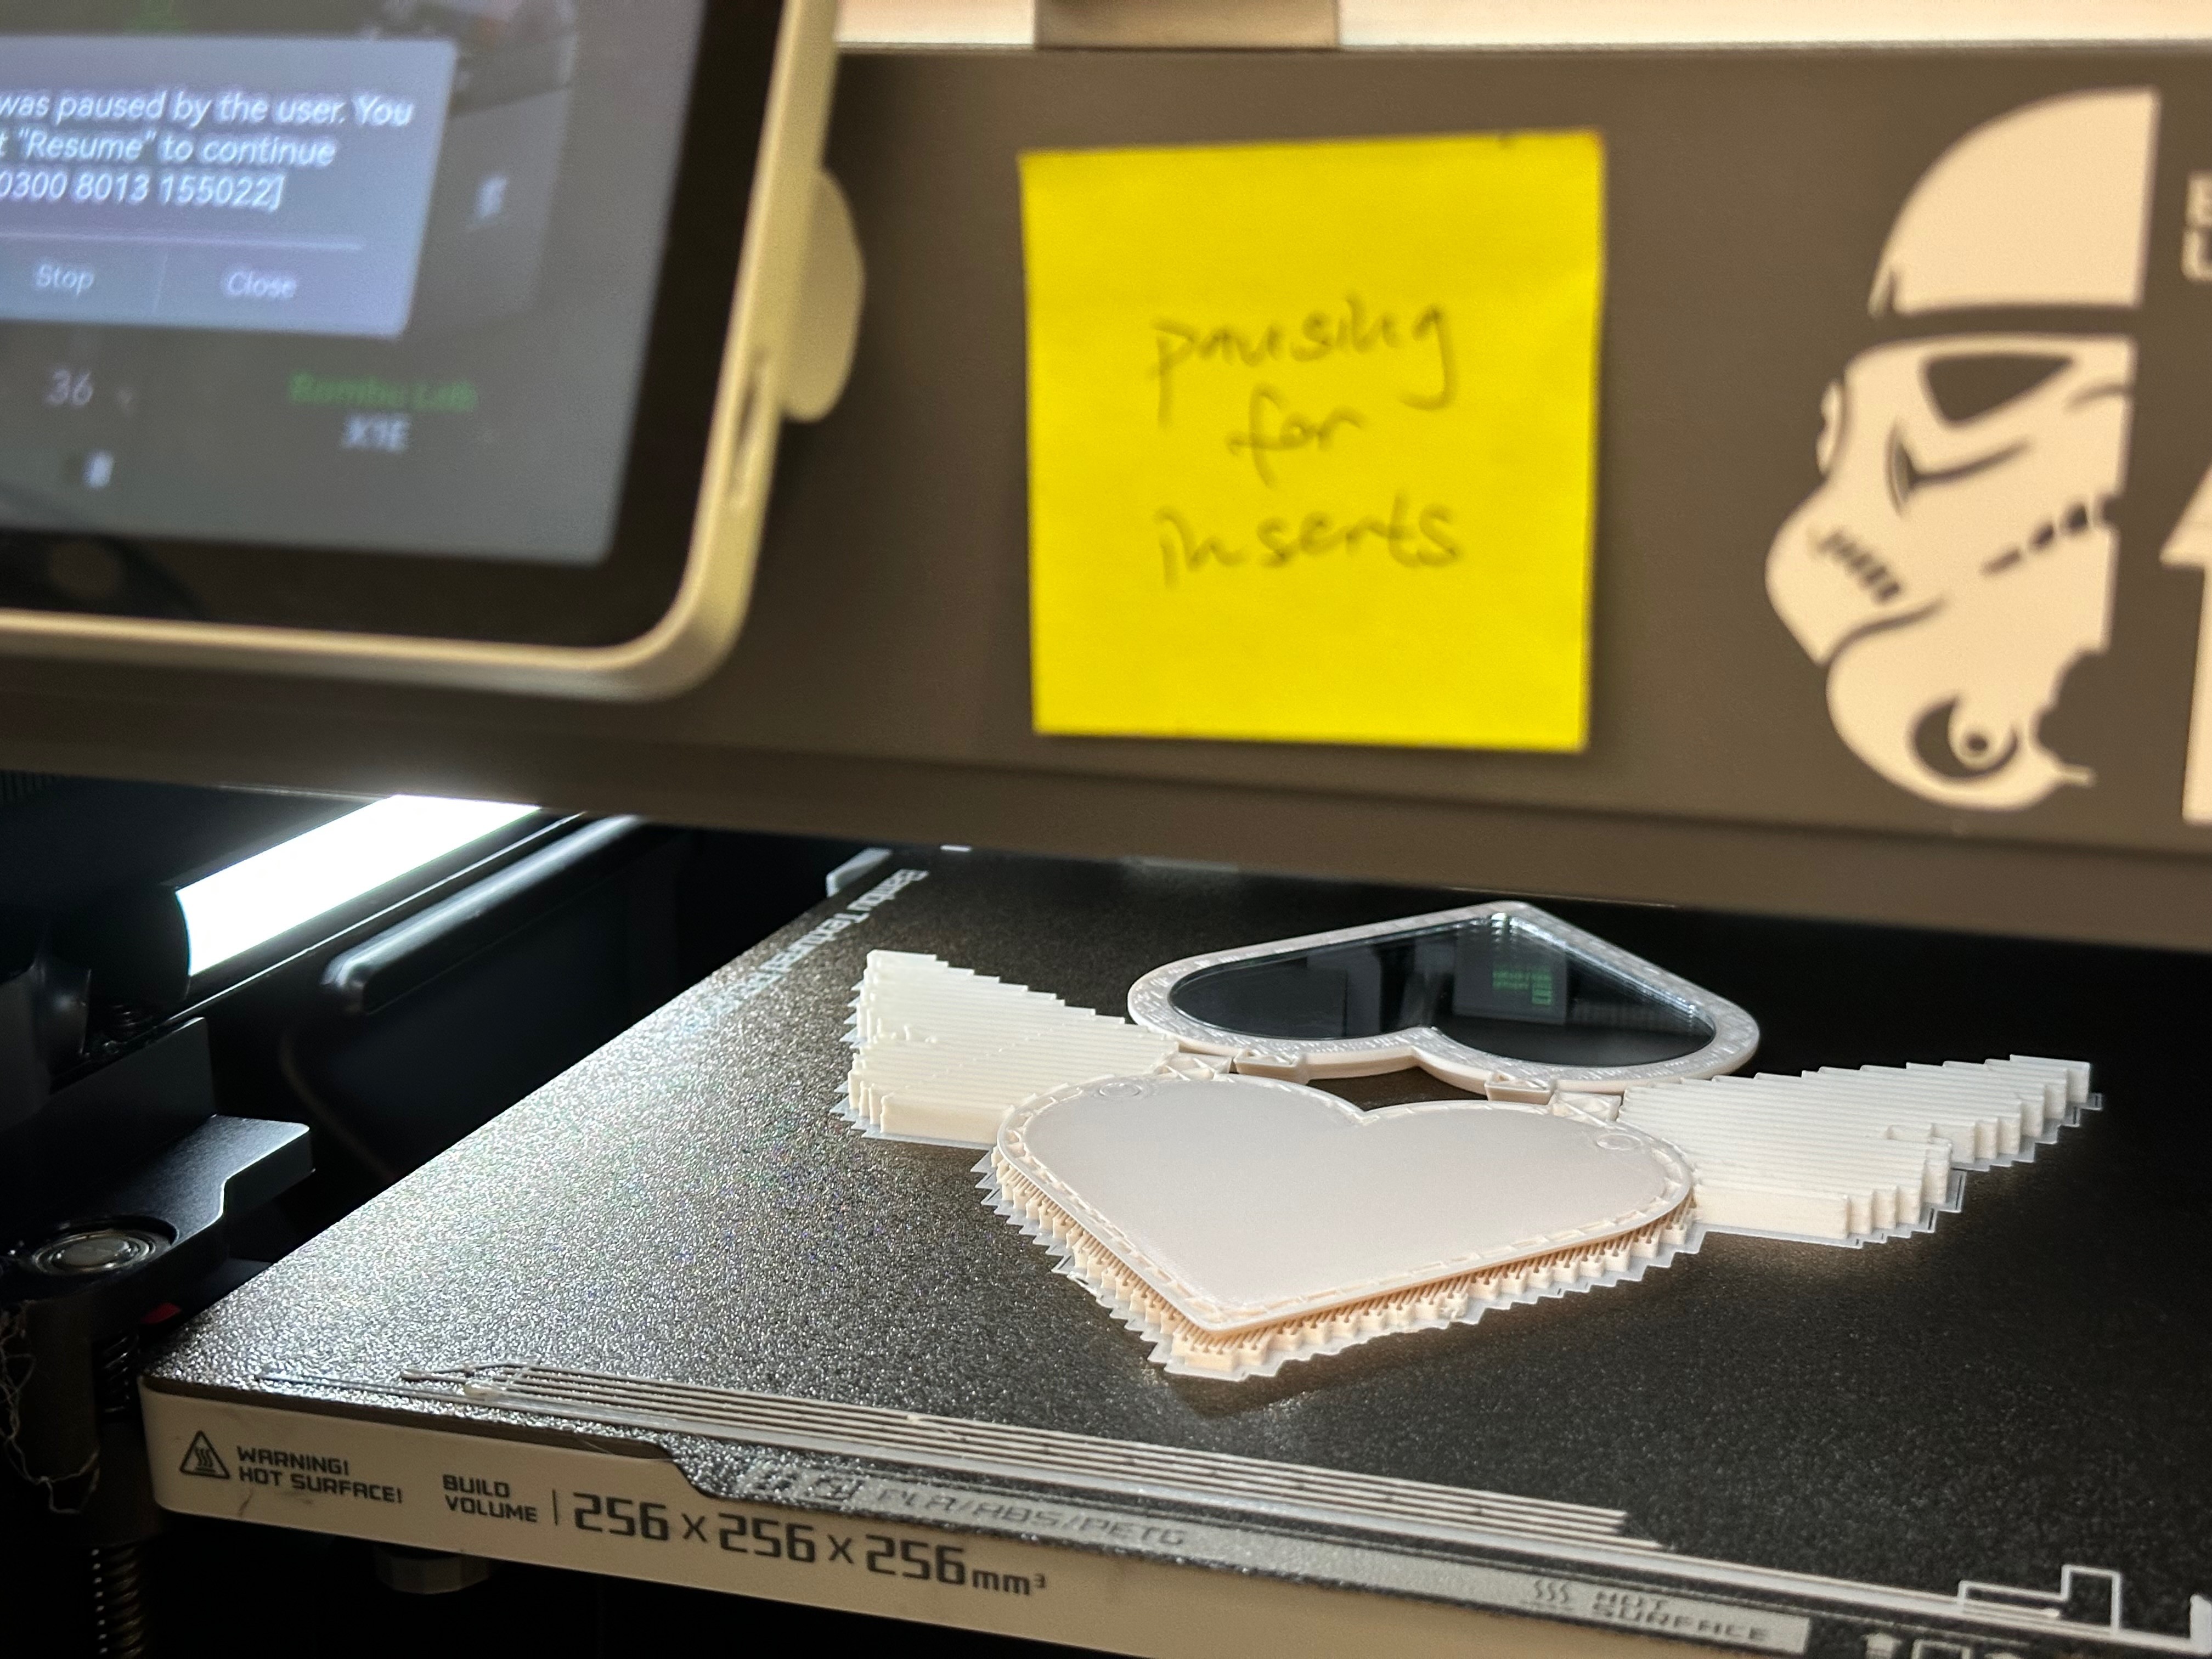
Second Print
I paused the print at the following layers:
The first layers of each of the magnet enclosure (to press fit the magnets)
The first layer of the acrylic enclosure (to press fit the mirrors)
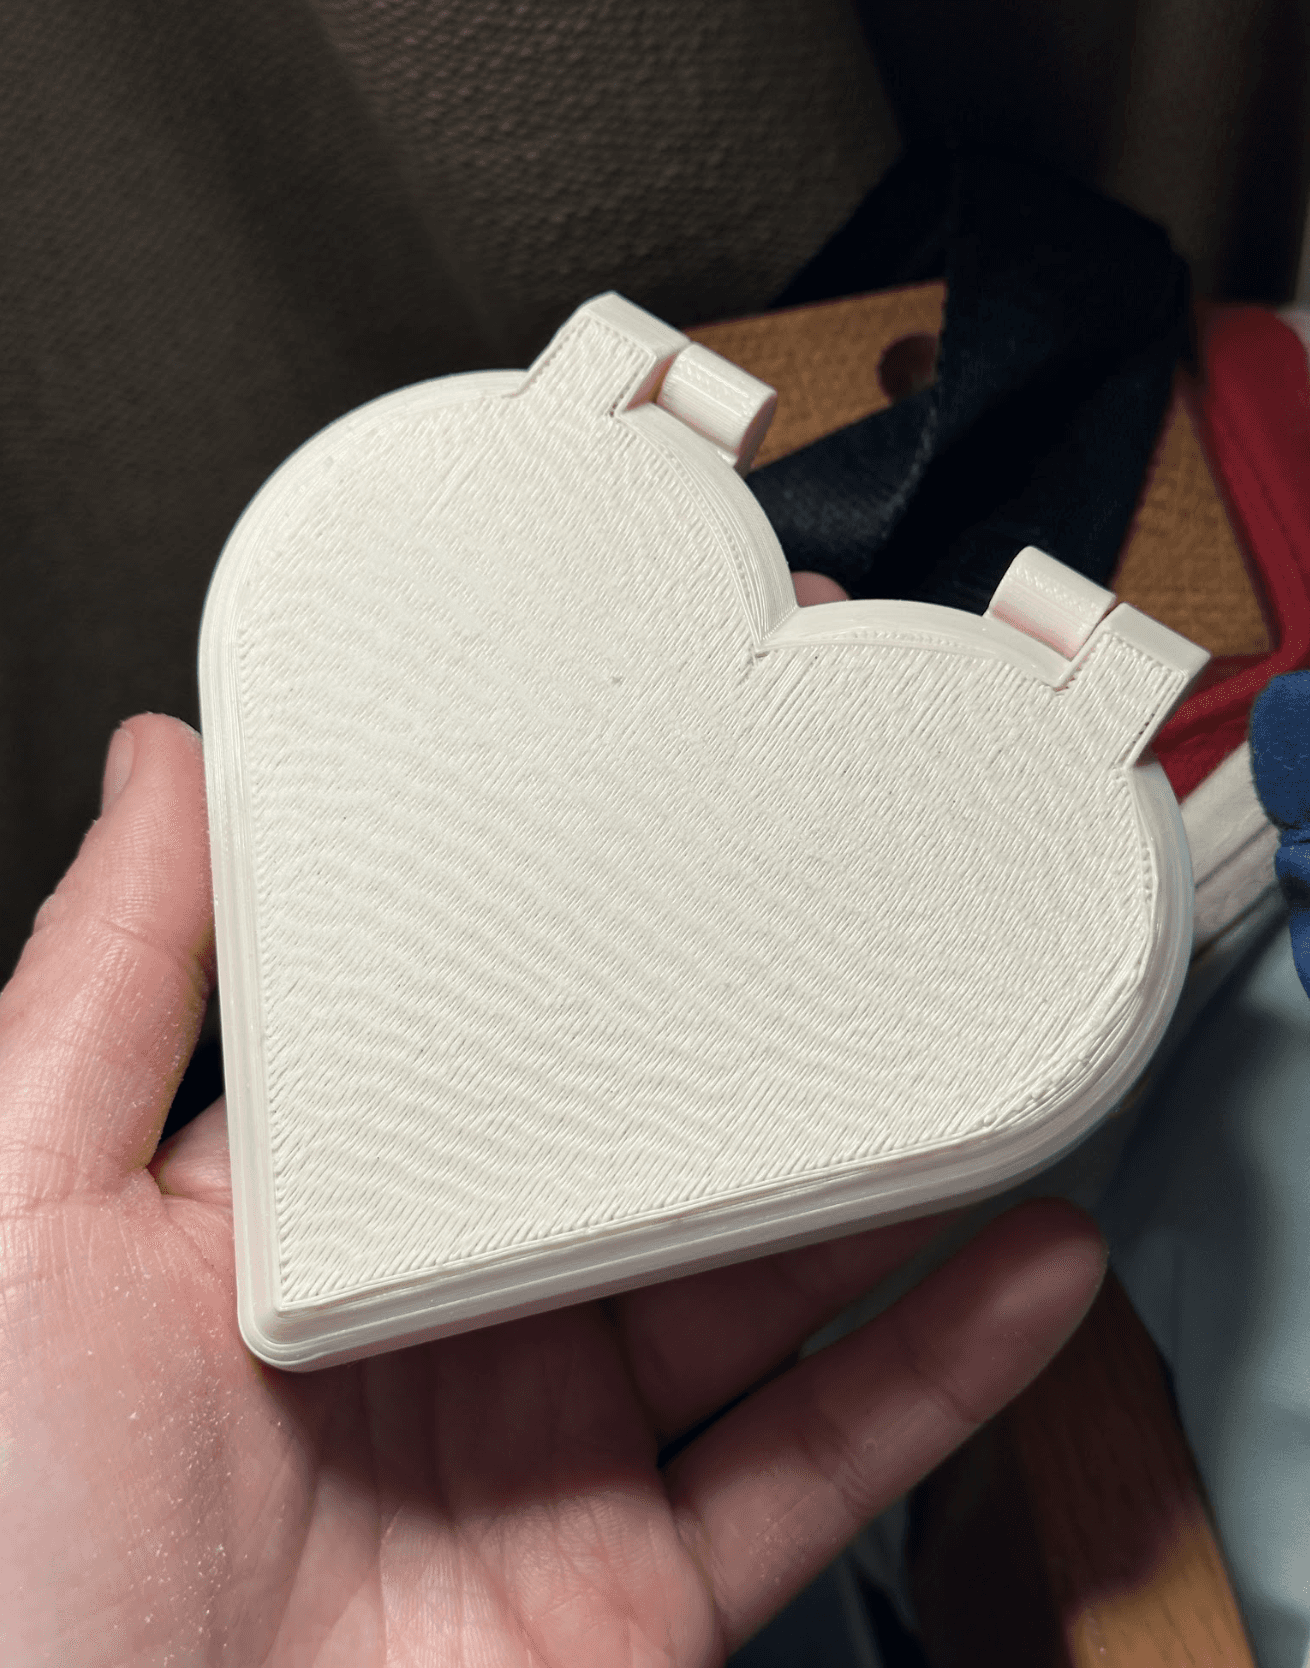
The second print went smoothly overall and all of the joints were able to move, however the hinges and swivels were all quite loose. The magnets had good adhesion and the mirrors did not rattle around, however I was slightly bothered by the rough surface finish on the bottom face and sought to fix this in my final iteration.
Final CAD
From what I learned, I made the following changes:
Make the compact slimmer (remove the swivel, which would make it possible to reduce the overall height of the walls)
Make the compact symmetrical so both faces lie flat on the build plate (reduce supports)
Reduce tolerance by 0.05" to make the joints tighter

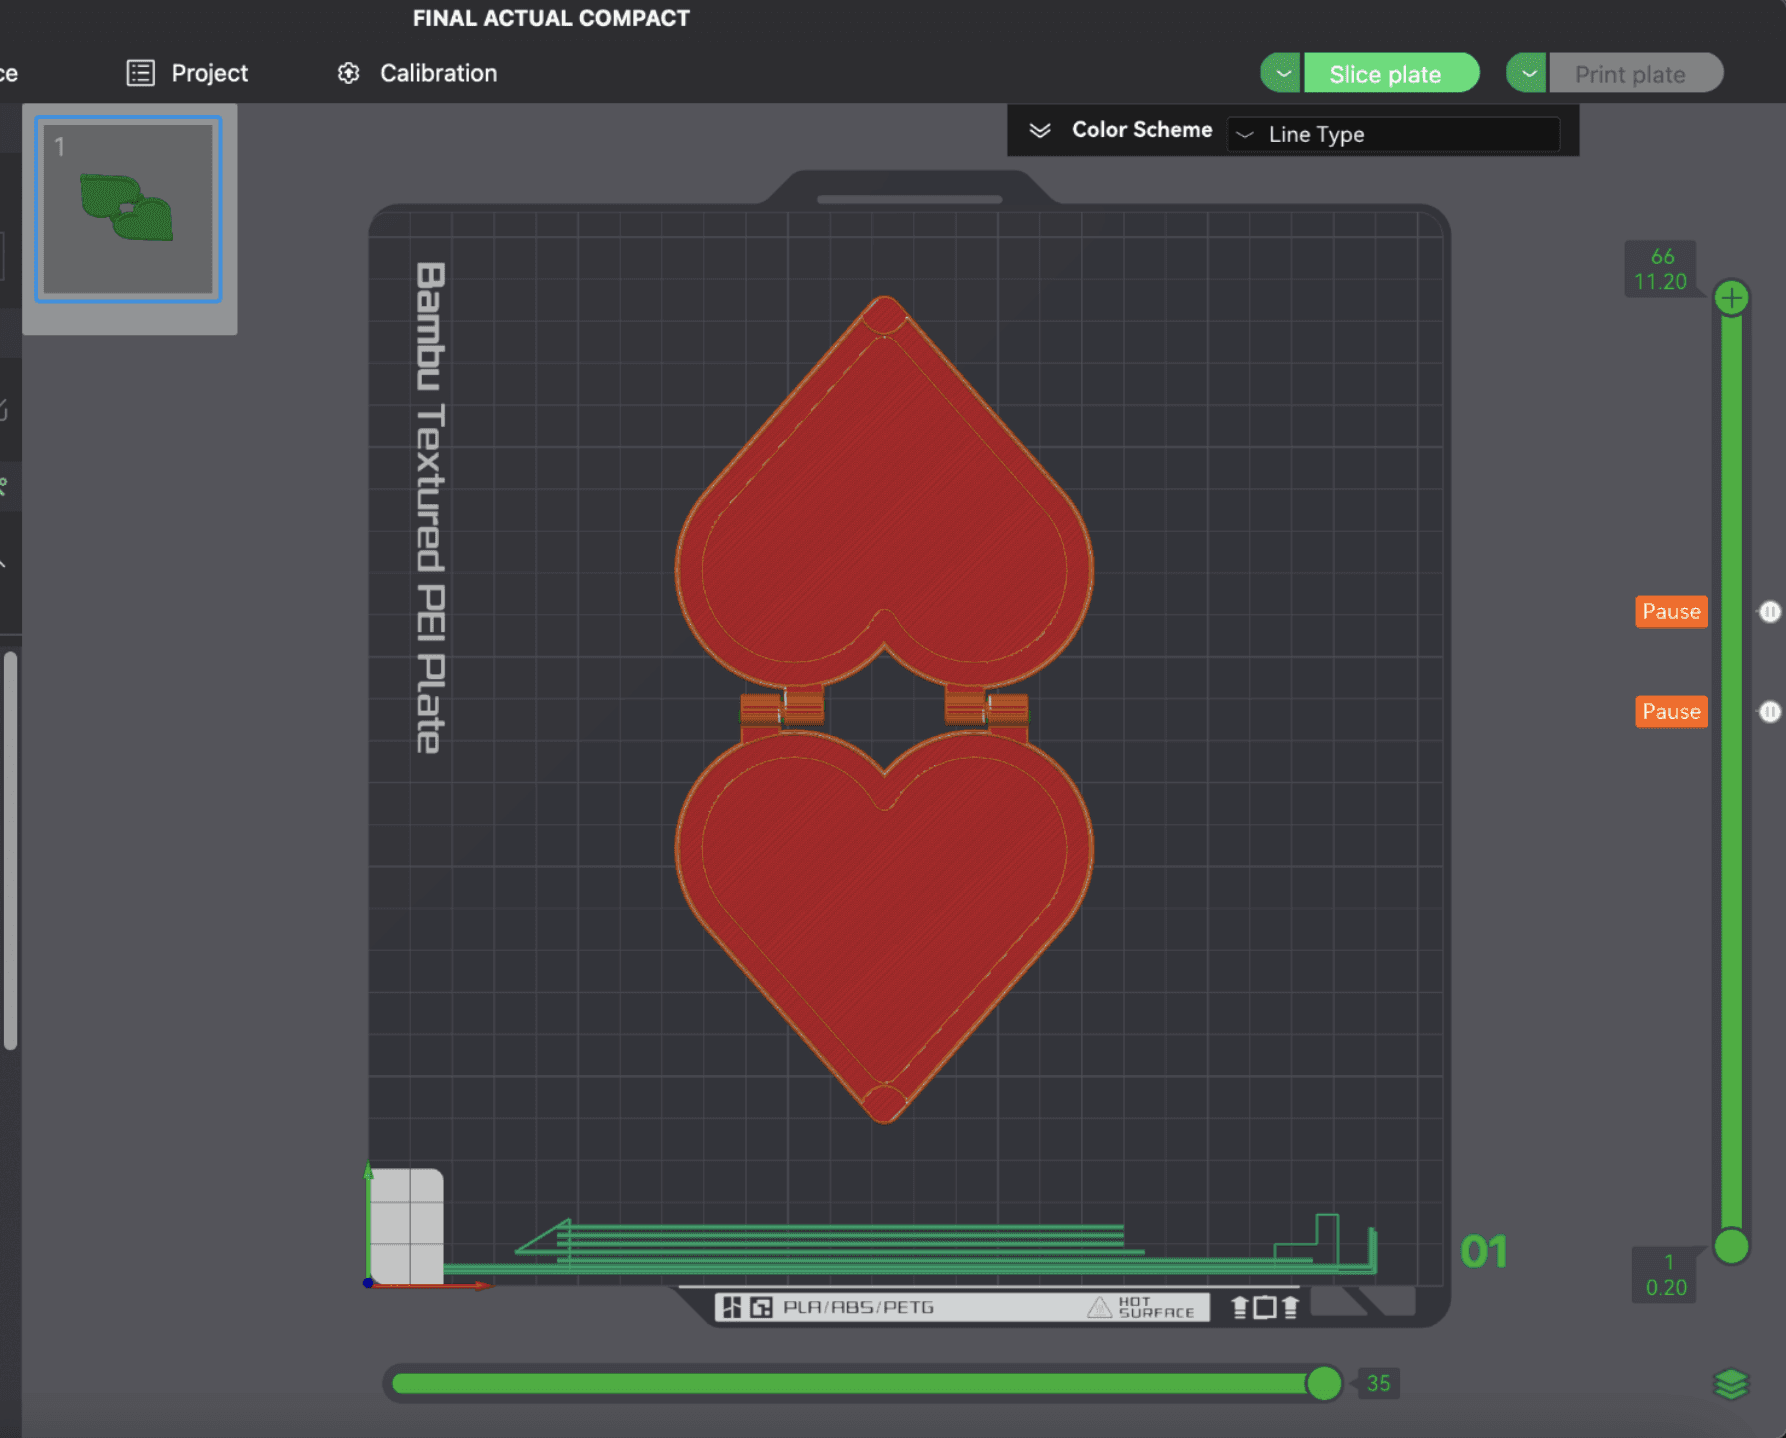
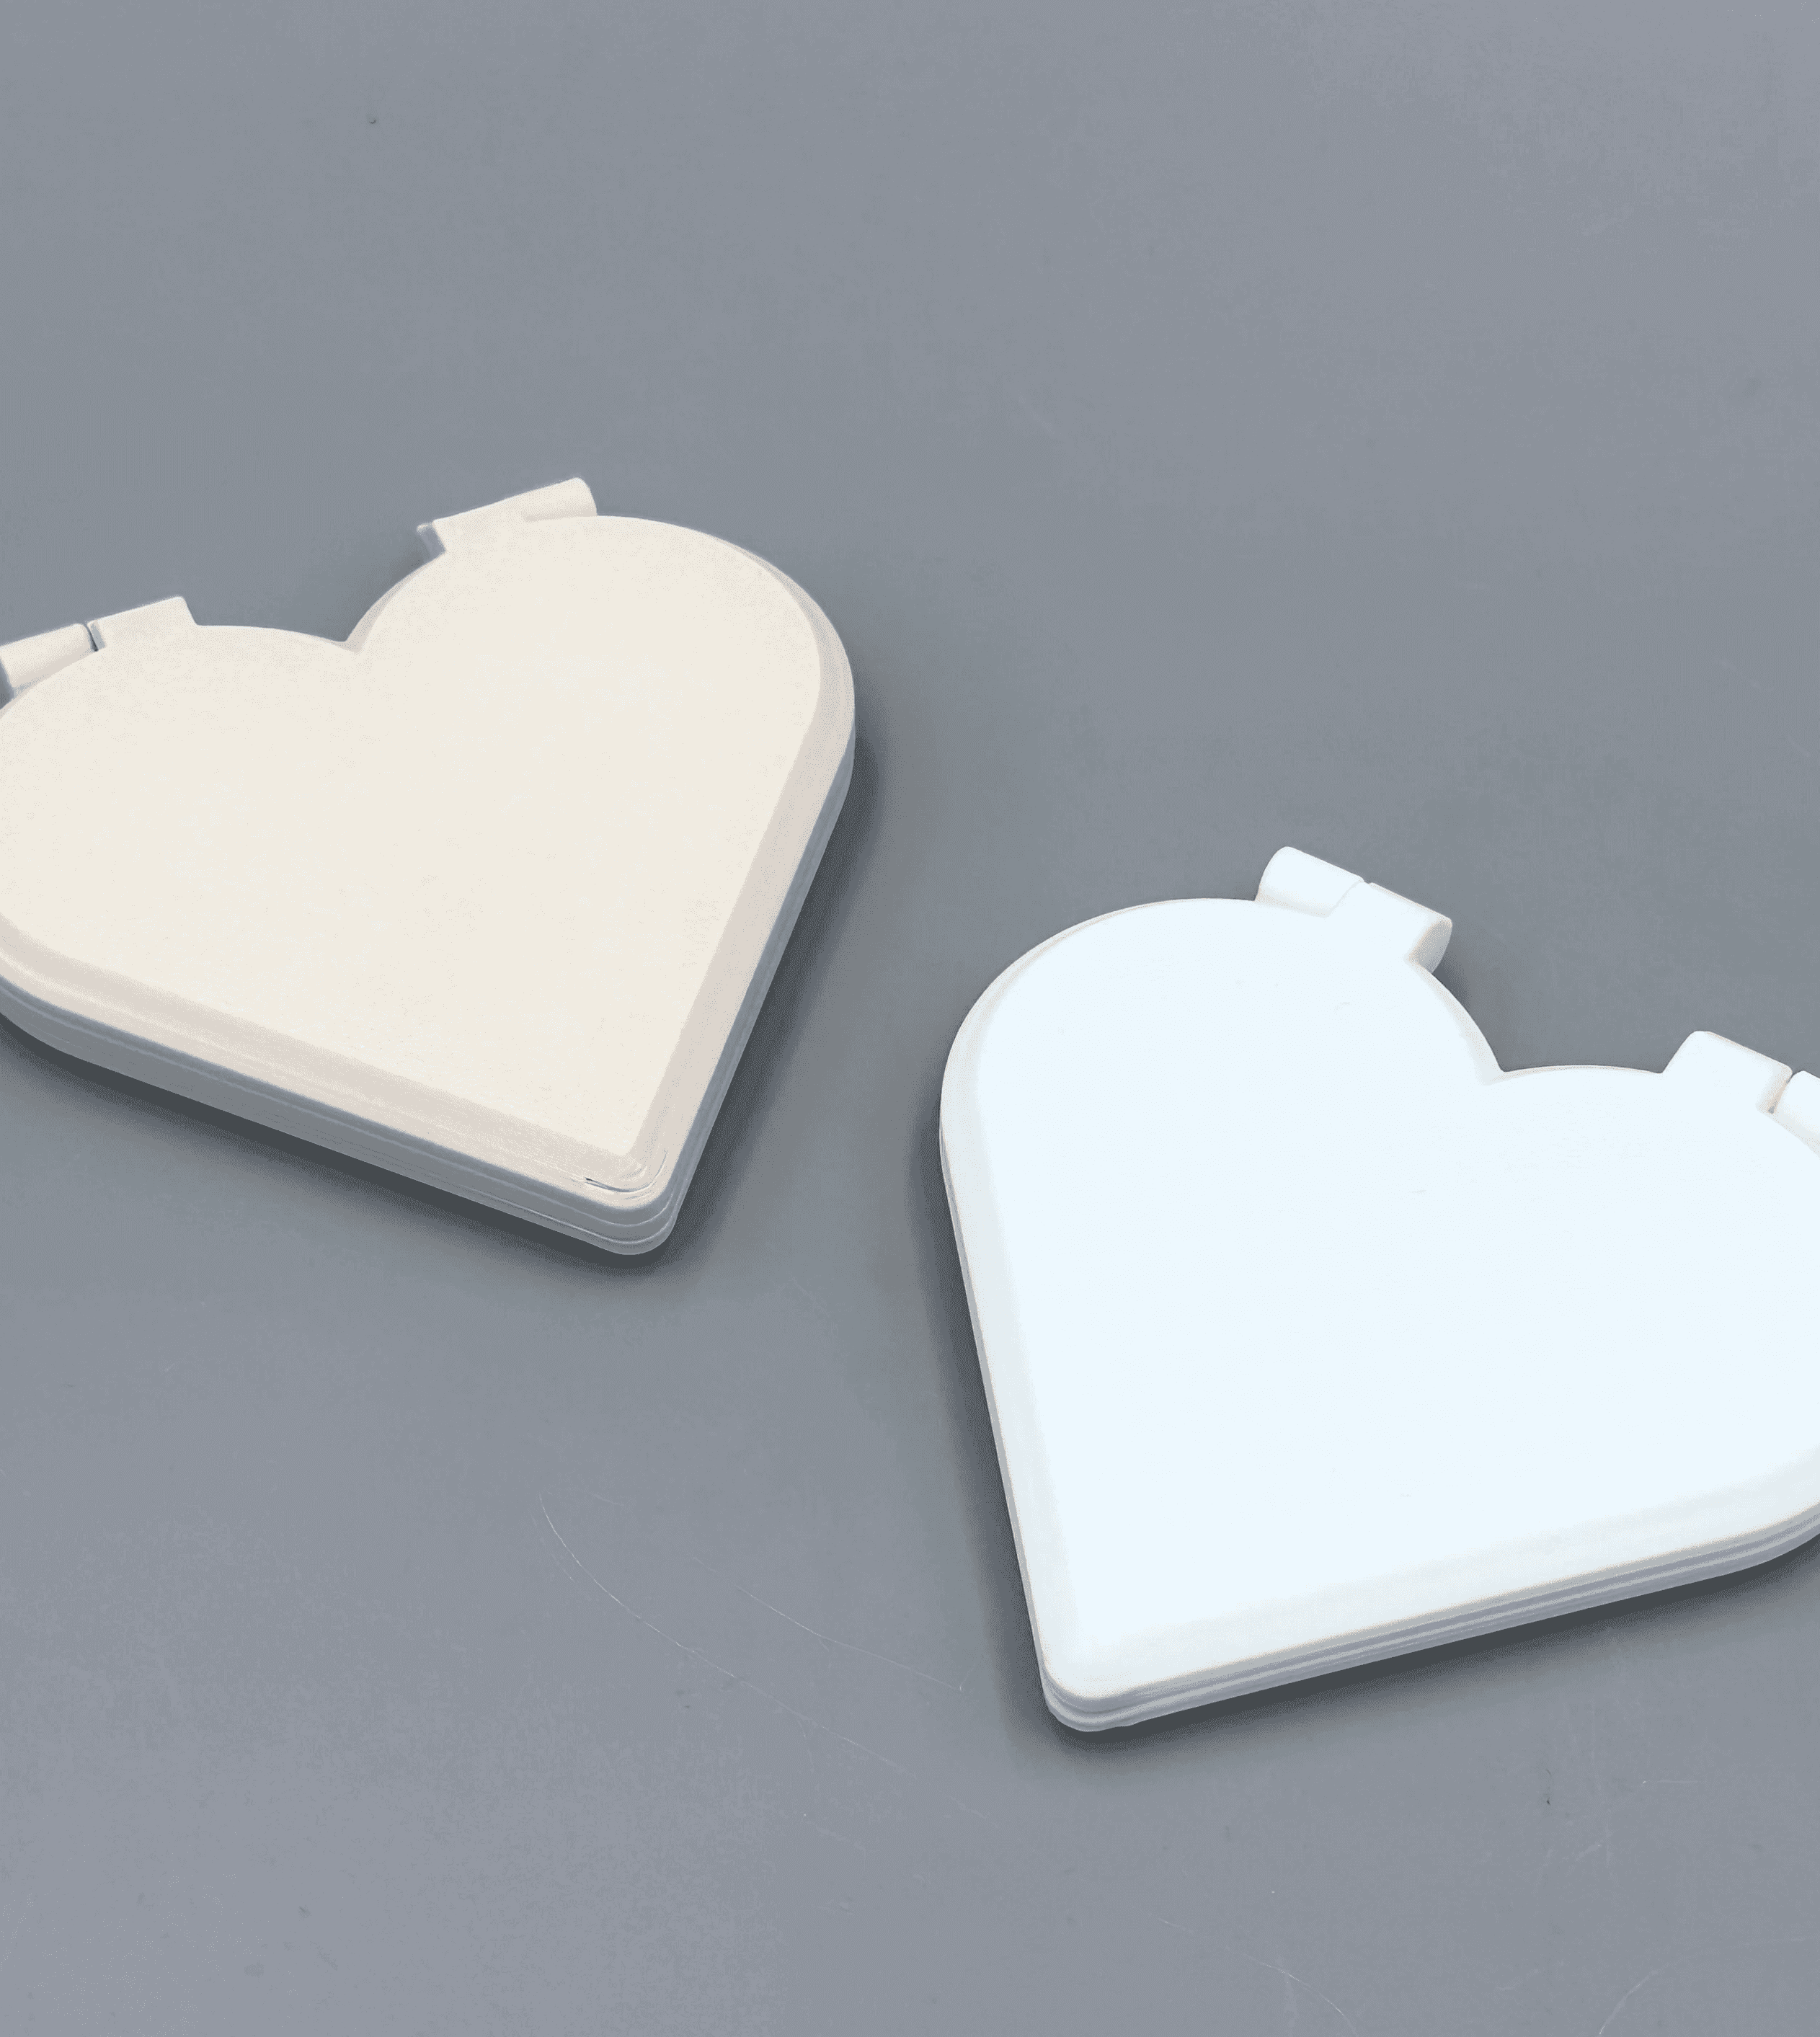
Final Slice + Print
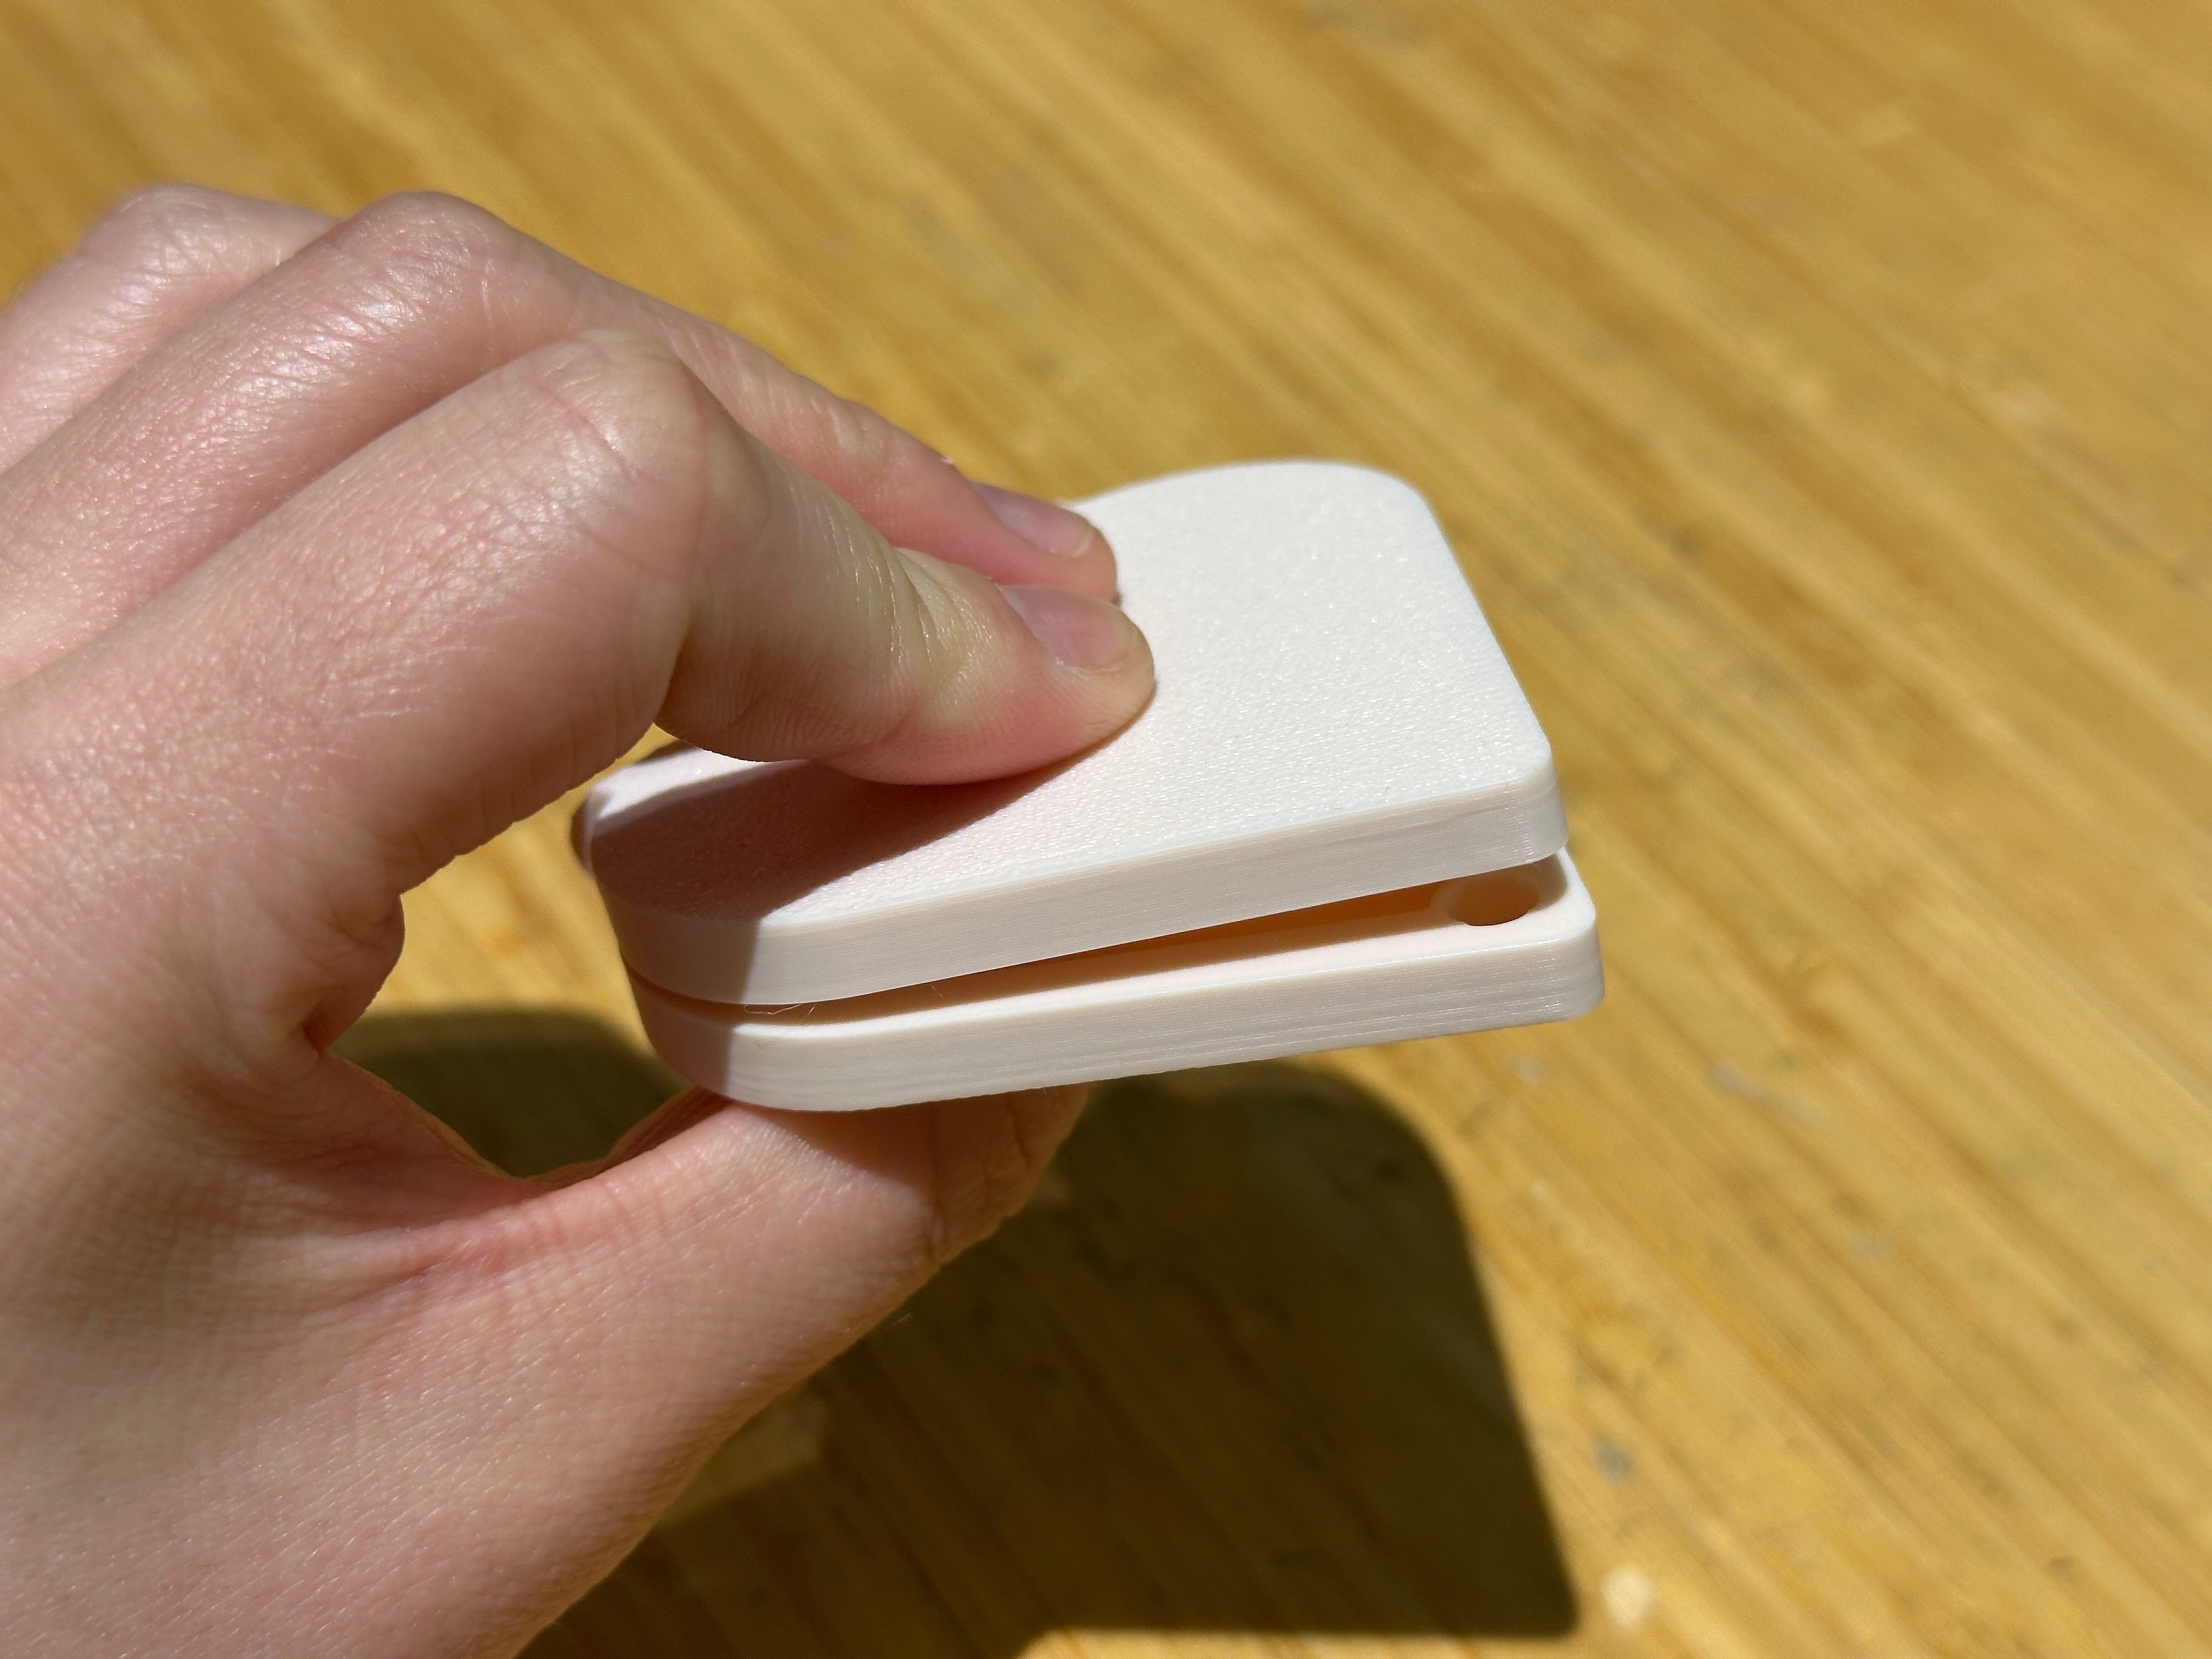
This new simplified design significantly reduced the amount of excess support material needed (almost to zero), and cut down on the print time by about half (from 2 hours to 1 hour).
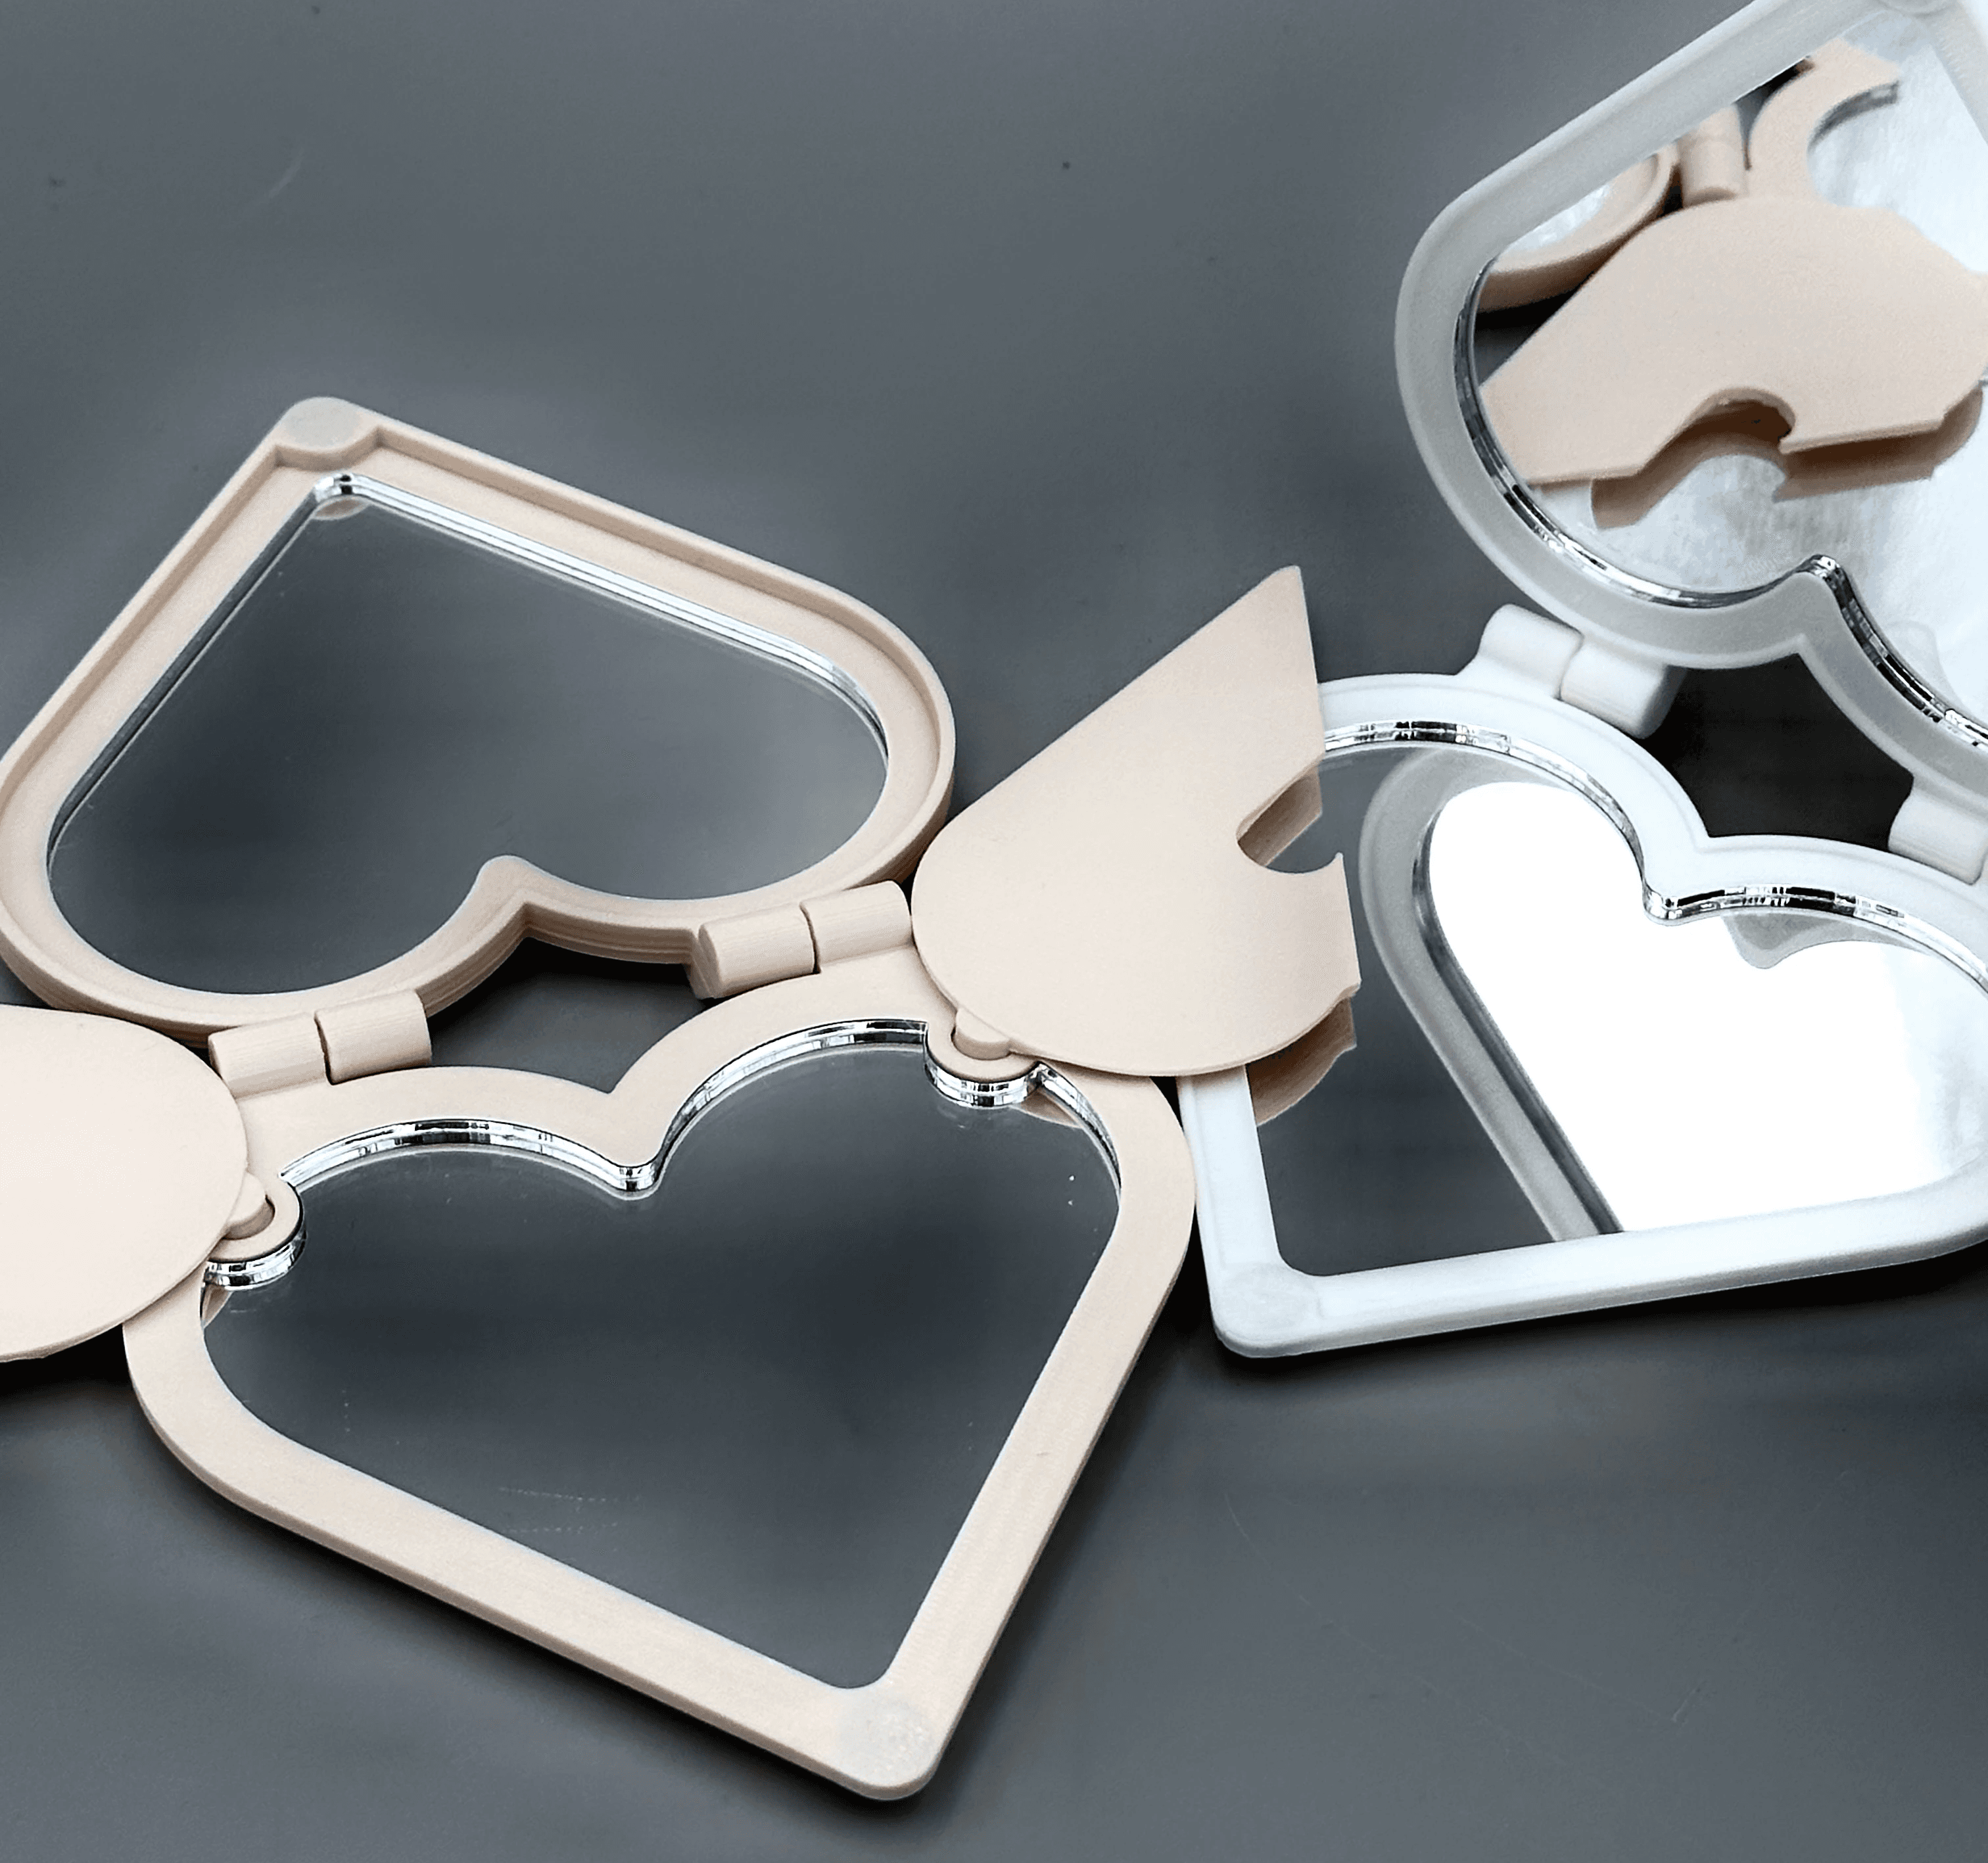
I felt this simplified version was much nicer in terms of being less bulky, easier to hold, and slim enough to fit into small bags while still preserving the overall function of the hinges, mirrors, and magnets.

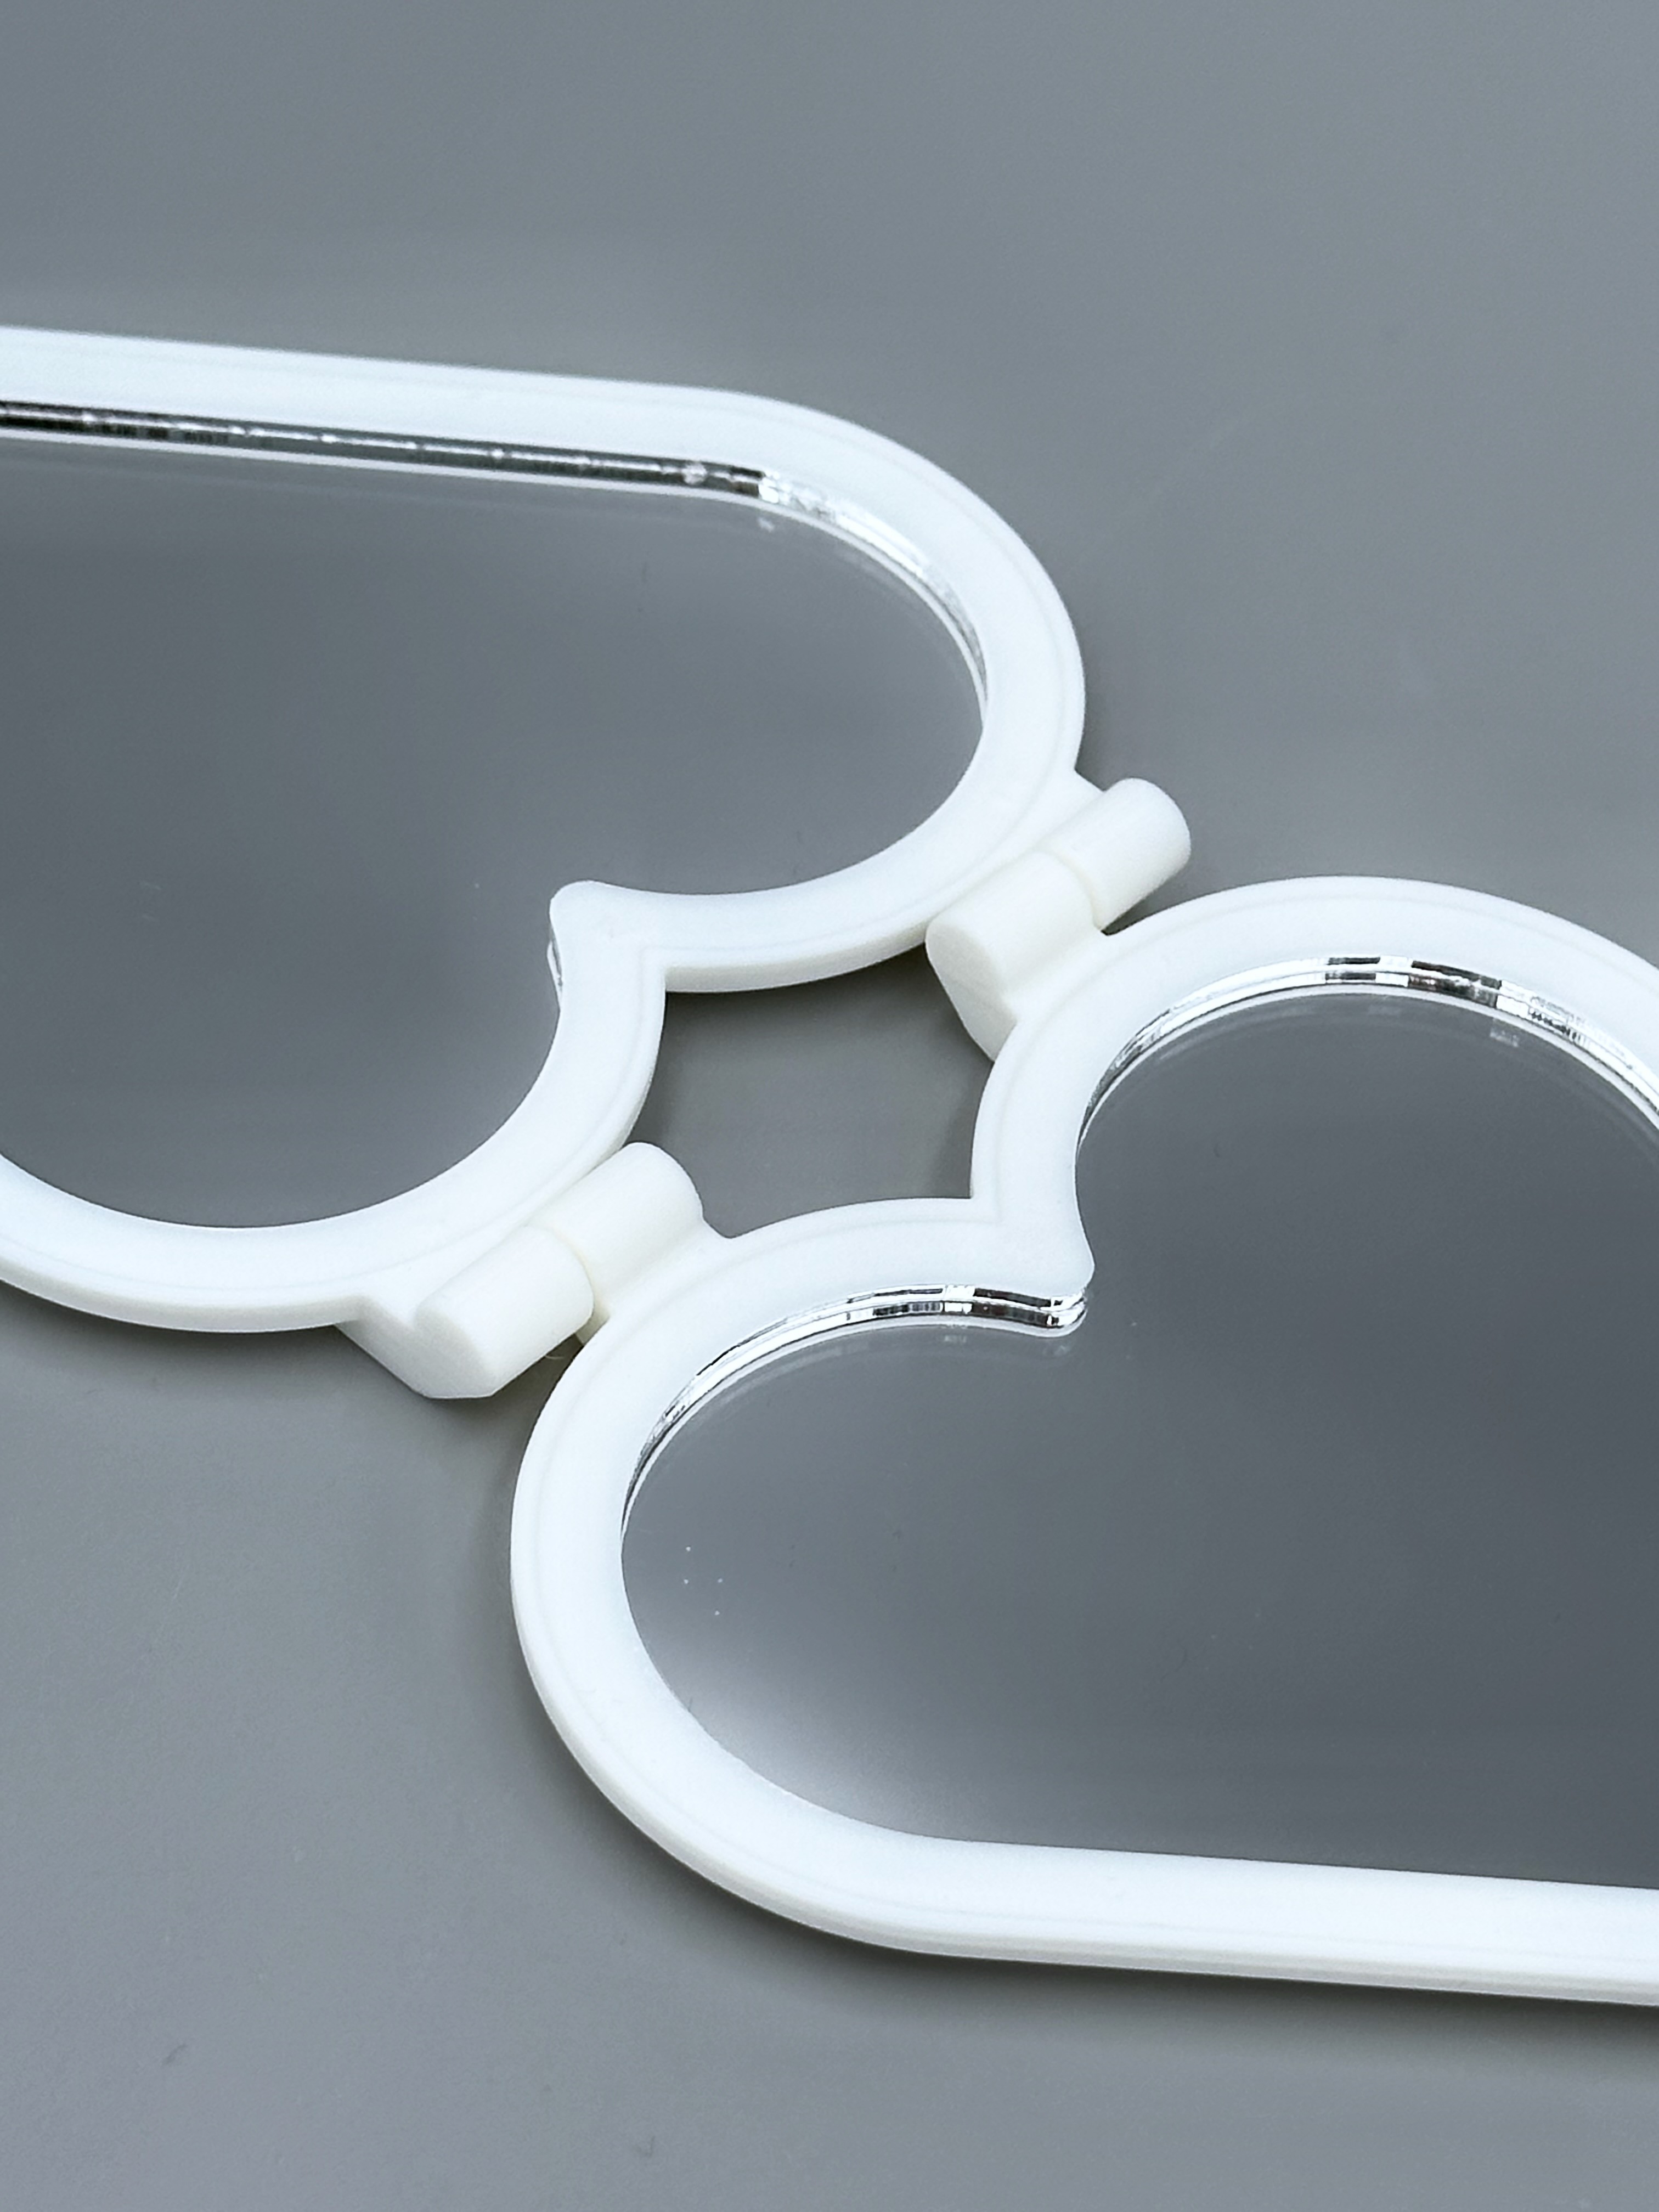
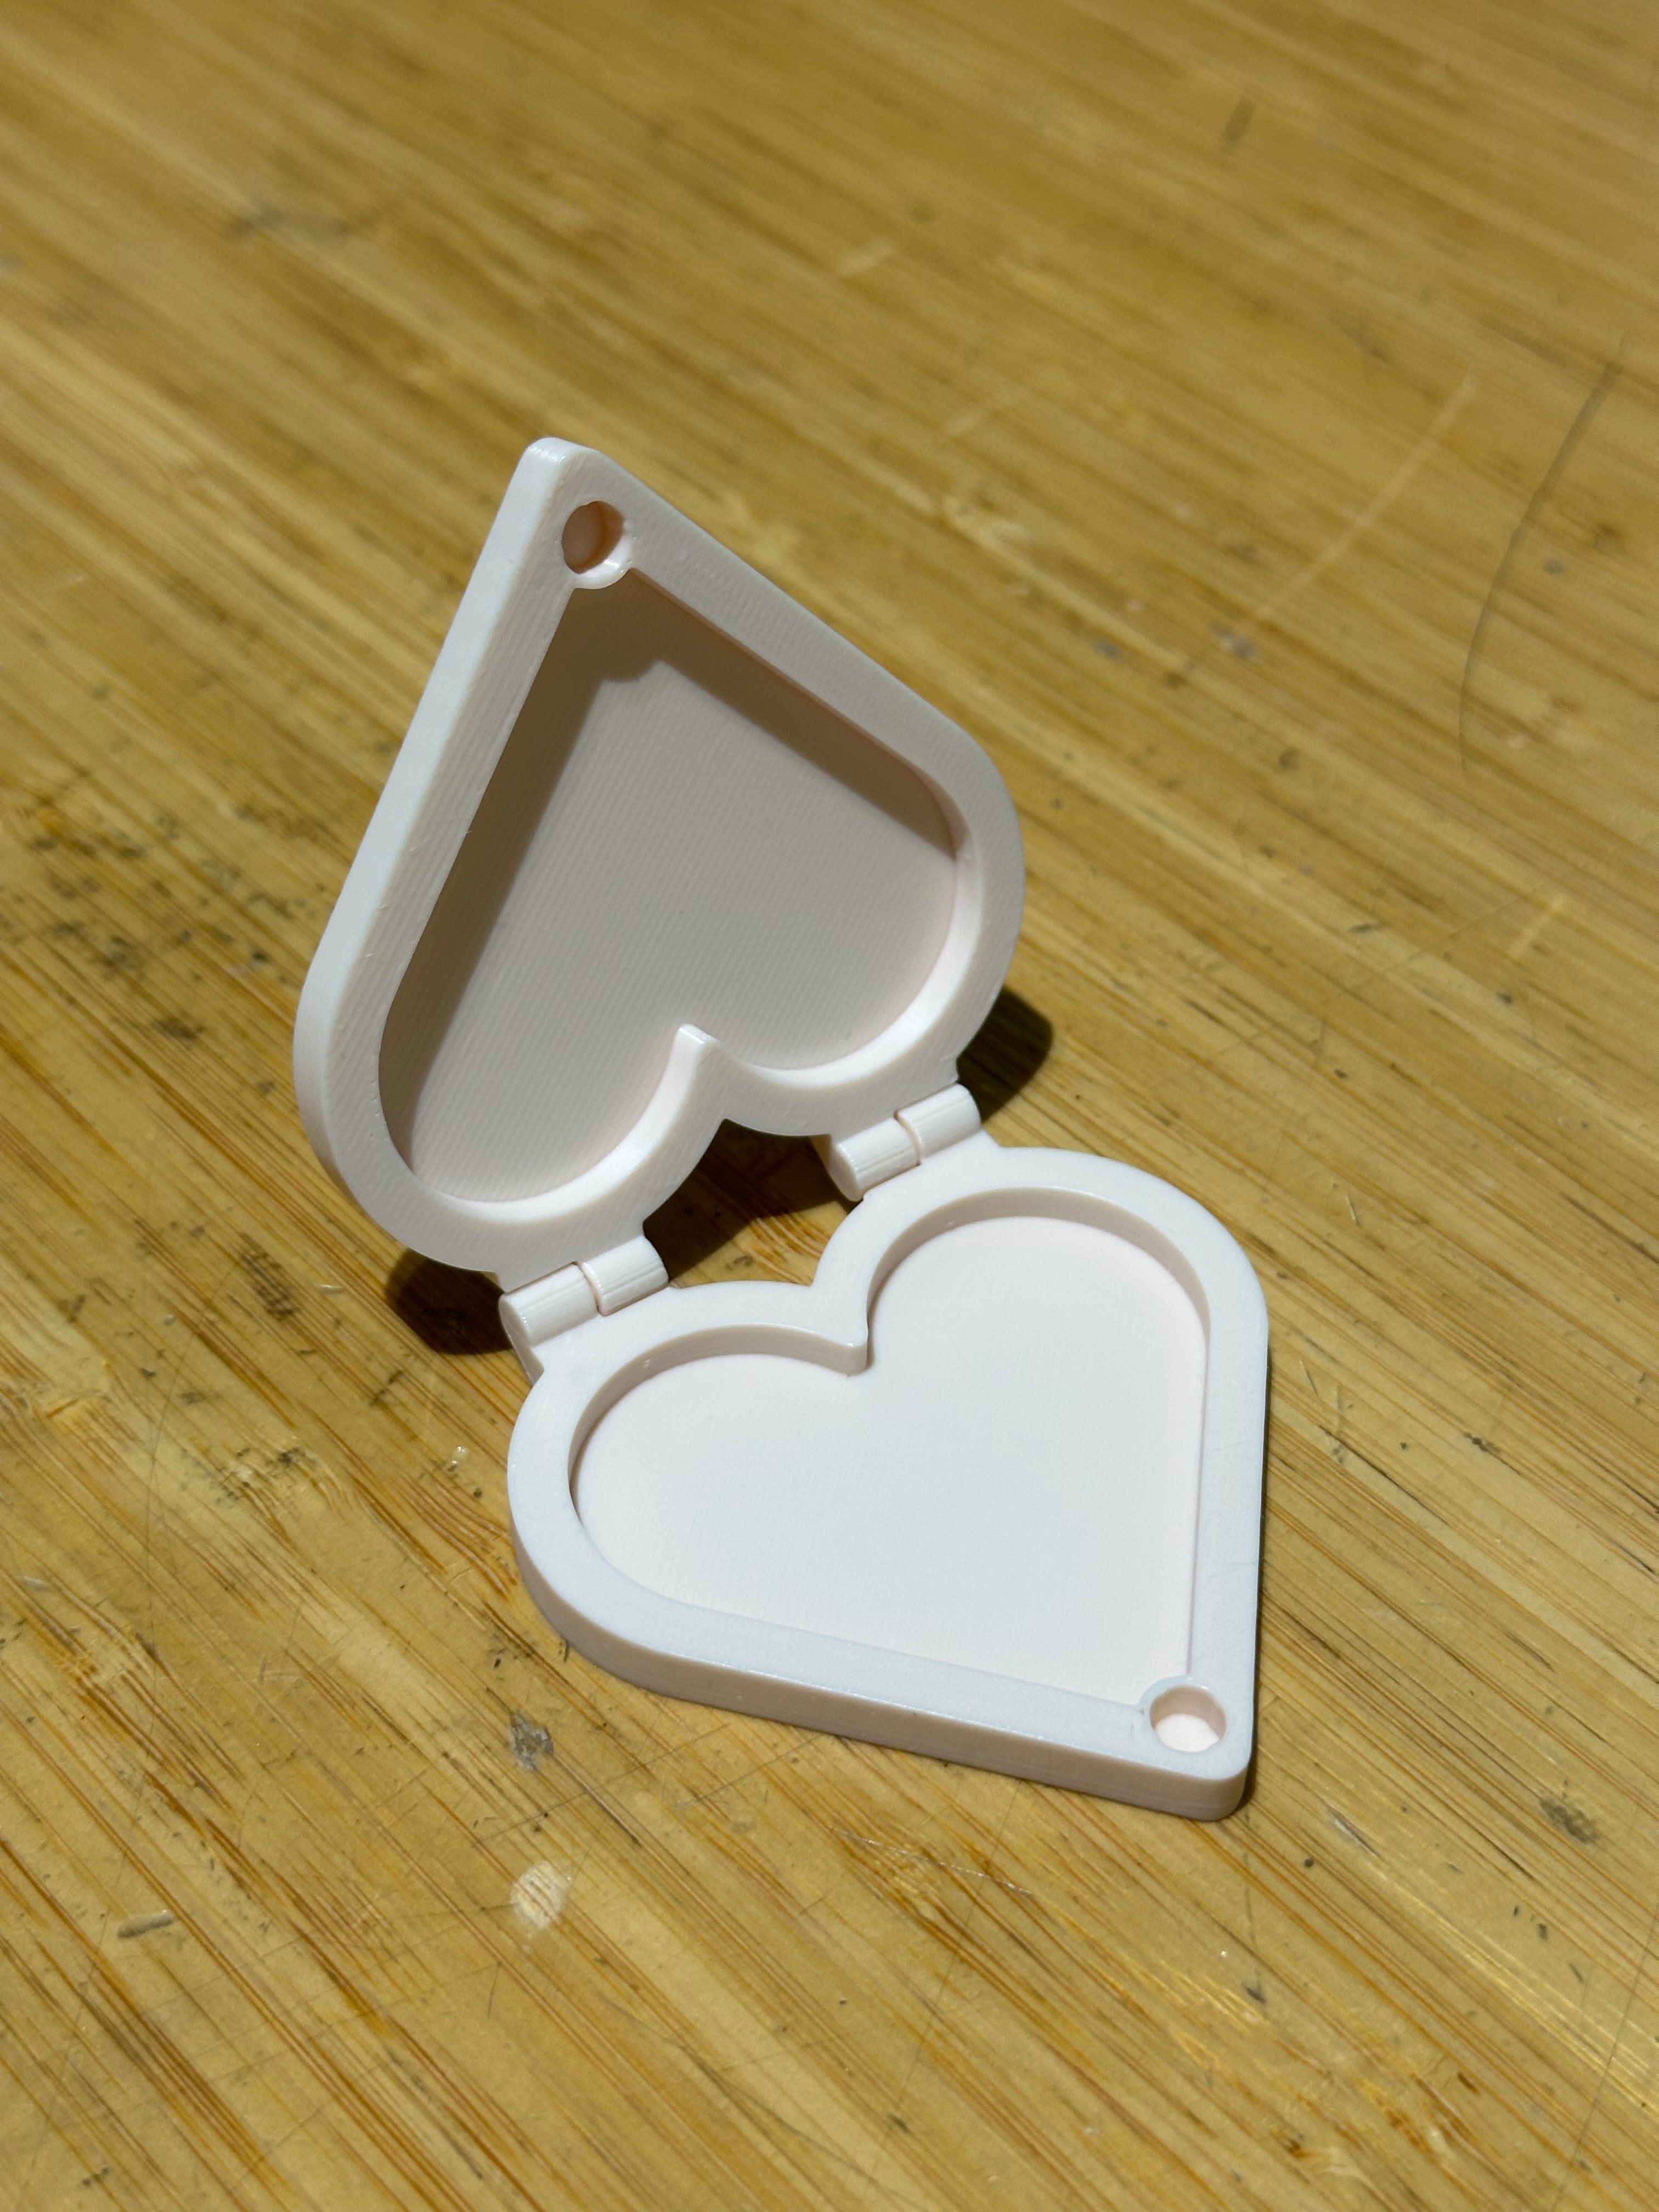
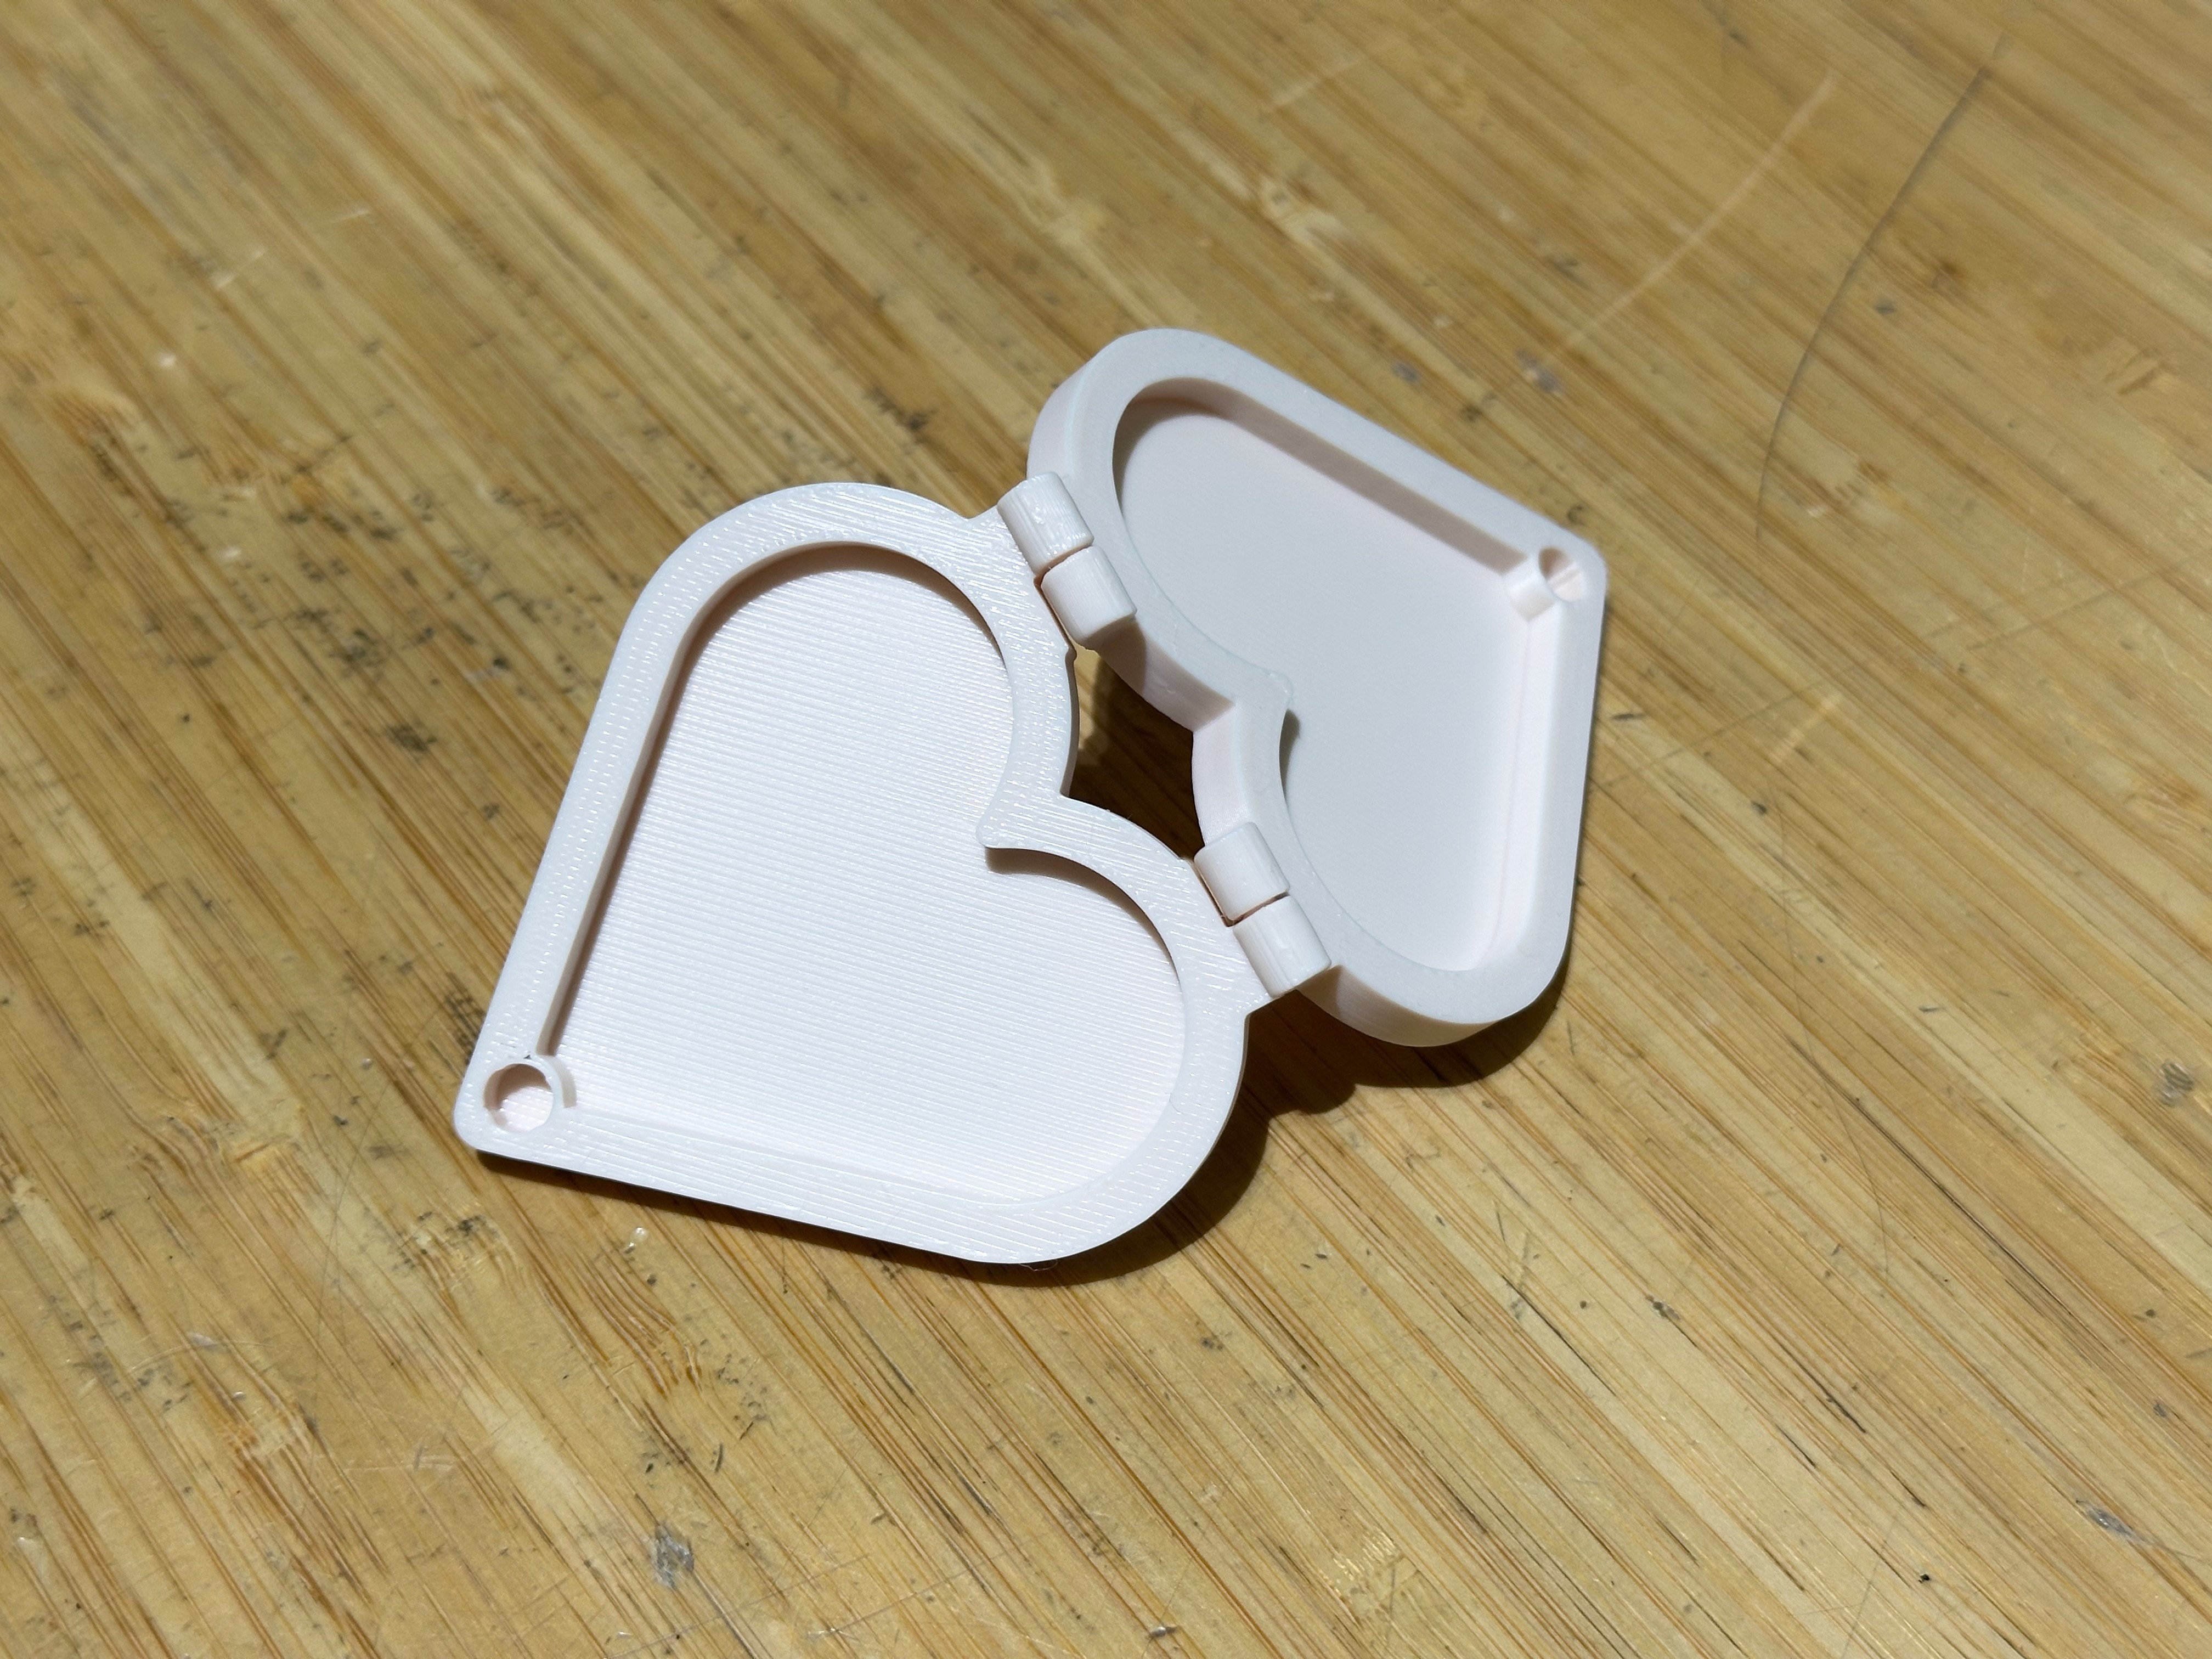
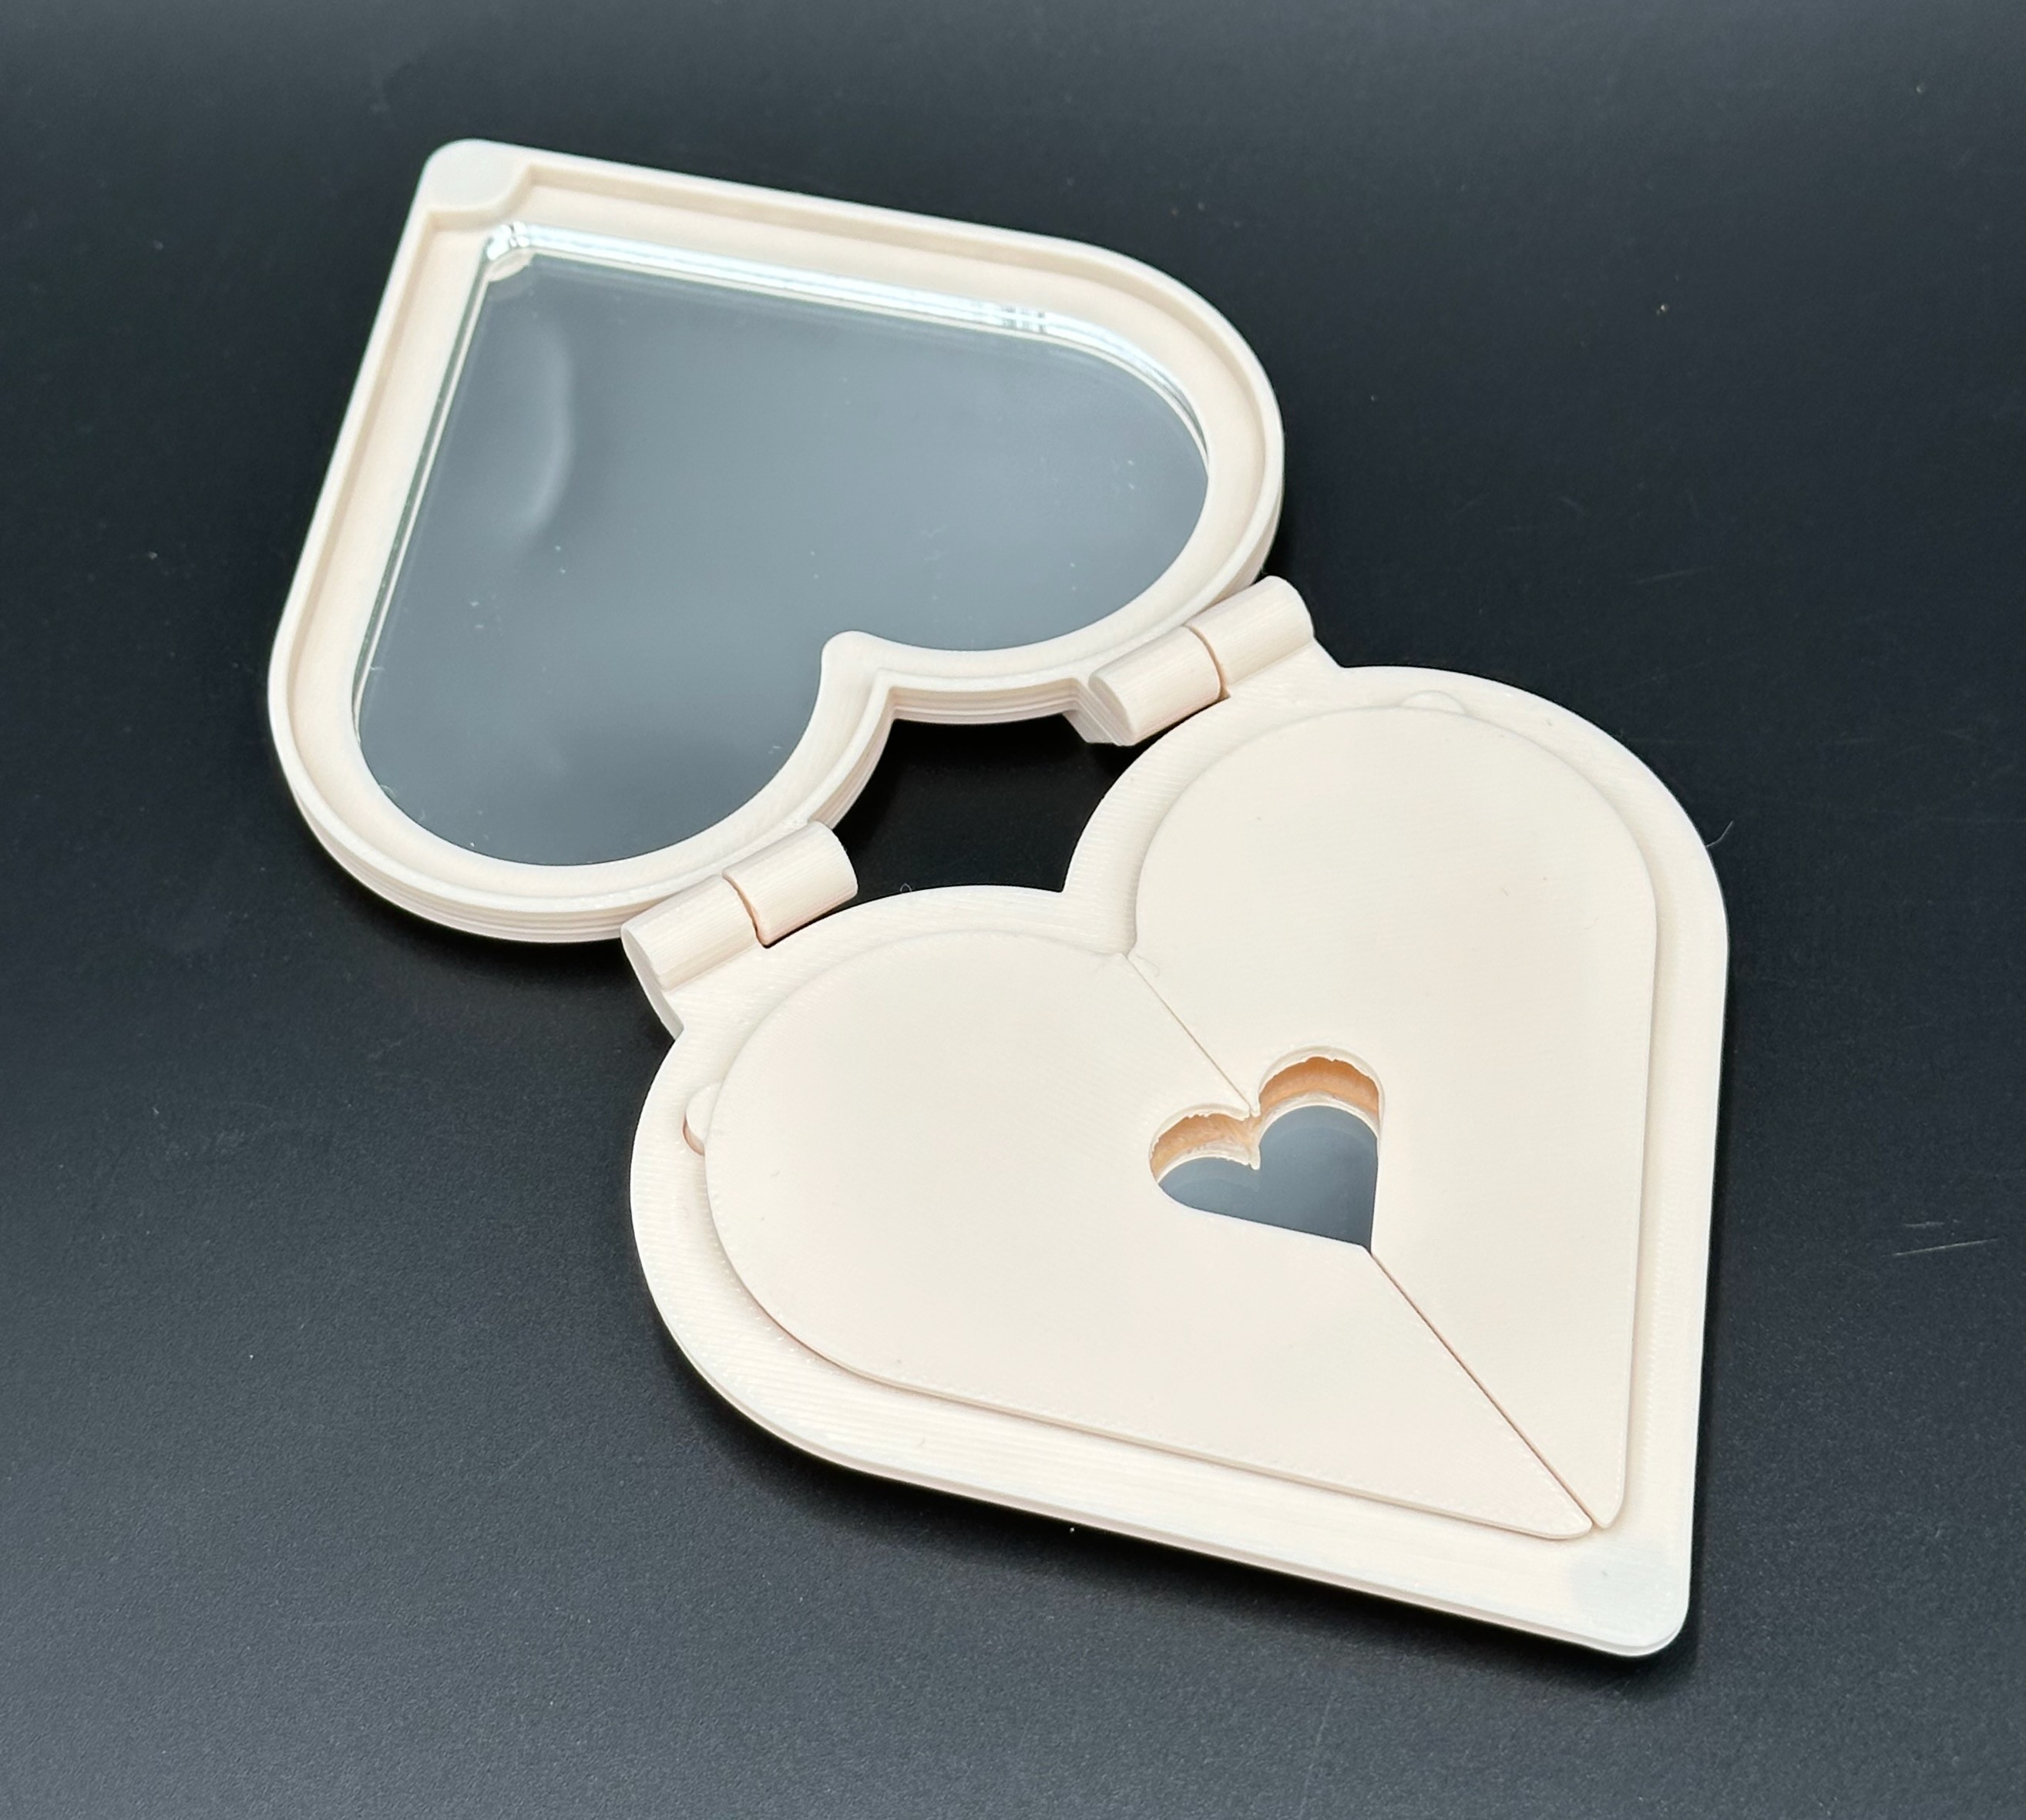
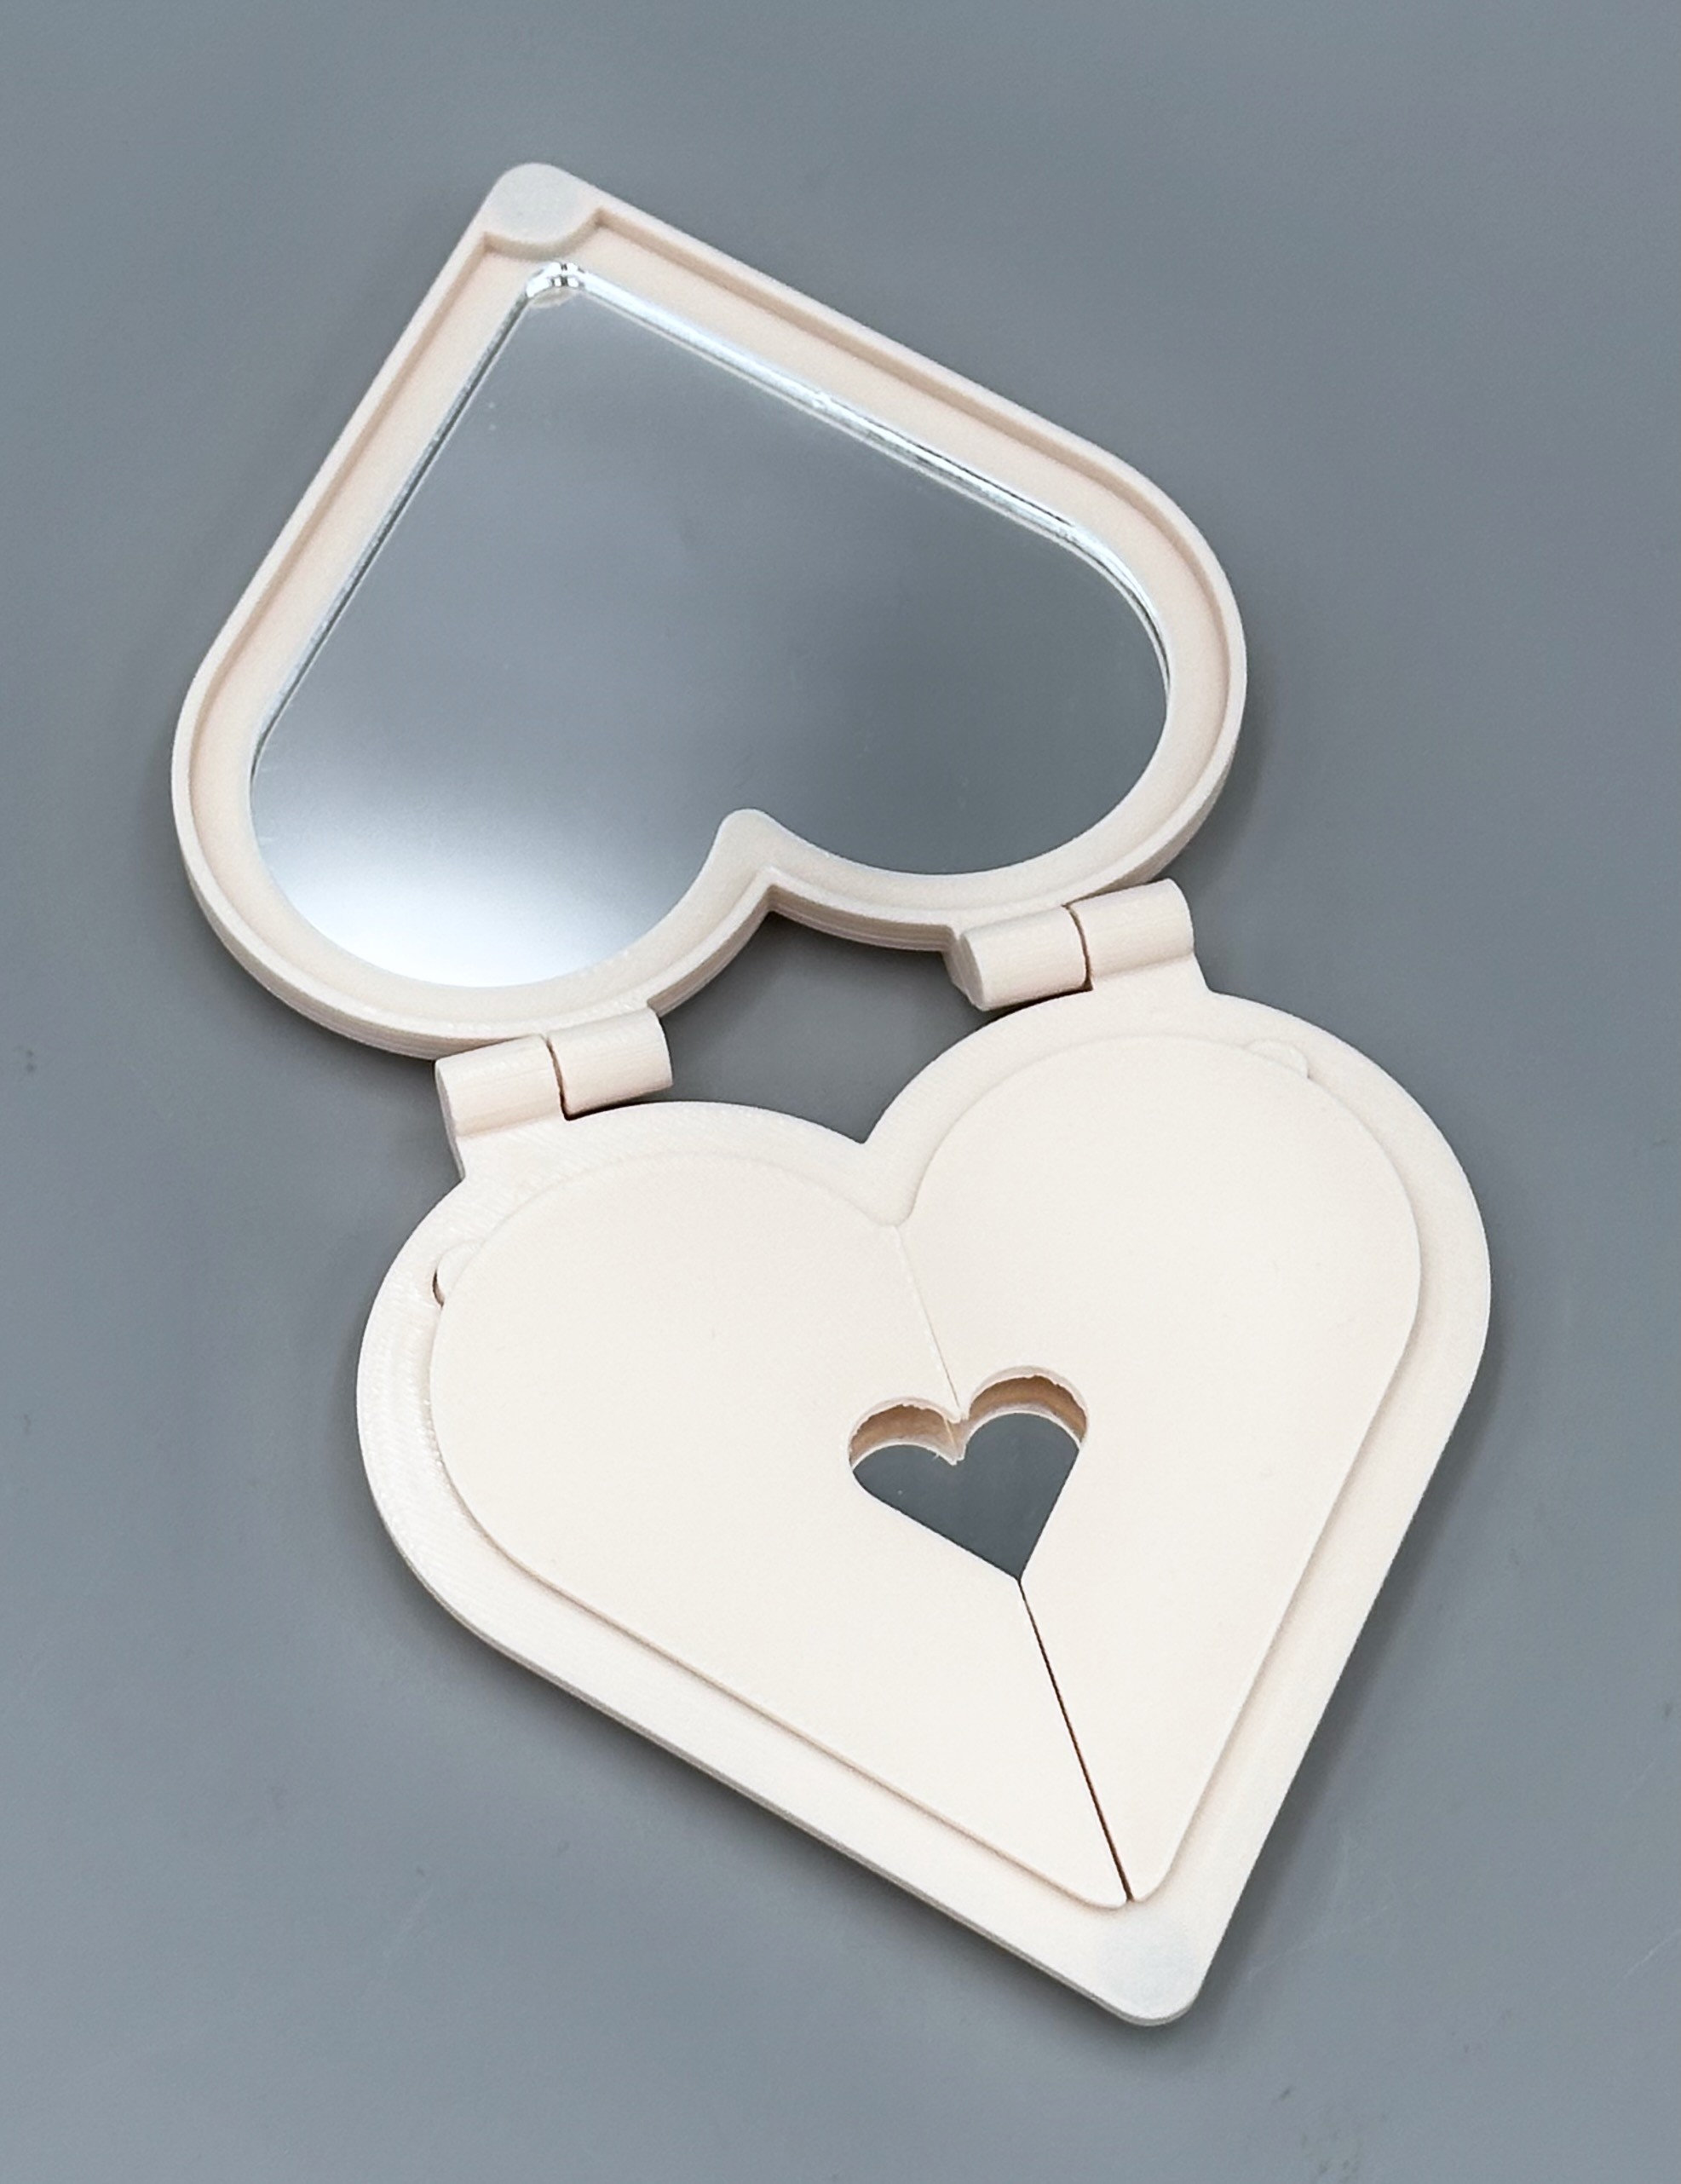
Final Photos
There are some minor tweaks I would make to the tolerances of the hinges to reduce the gap between the two halves of the compact when it’s closed, but currently the gap is small enough (~0.5 mm) to not be too bothersome. The final compact has a nice surface finish and the magnets are strong enough to keep the compact closed when not in use, which worked out well.
Contact:
Go home