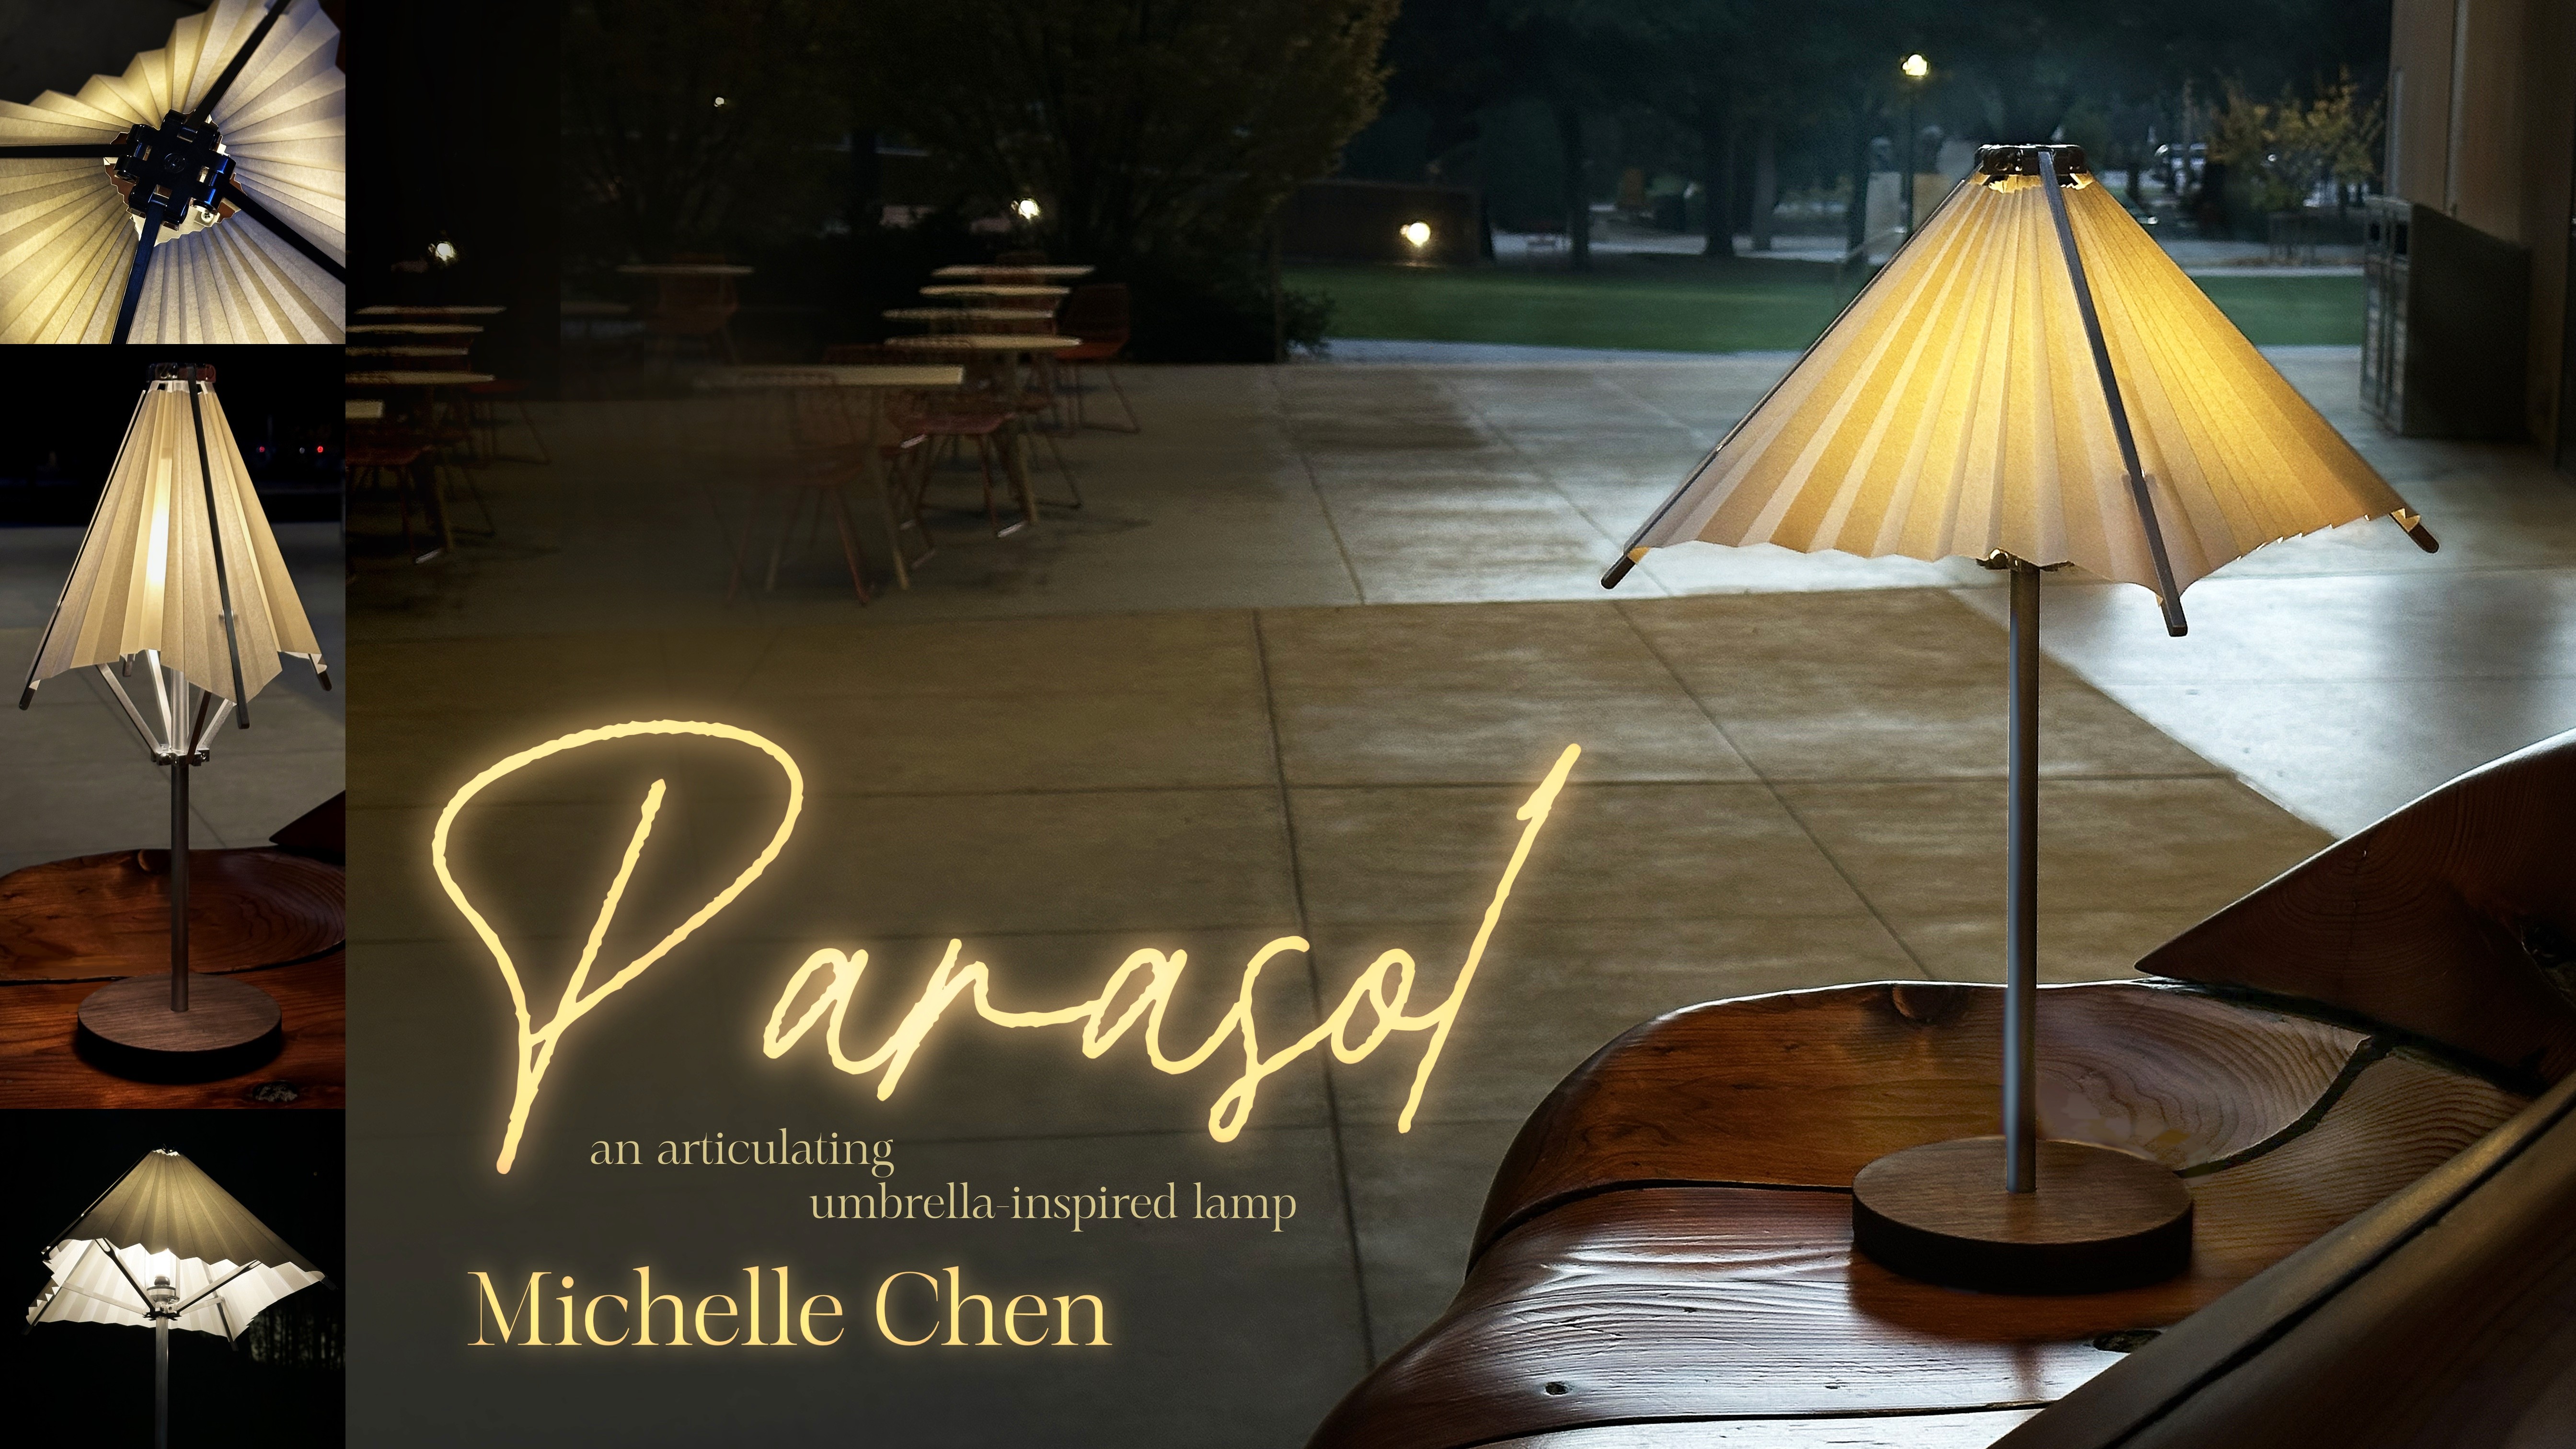
Parasol
Machining
CAD
Circuits
A one-of-a-kind mechanical lamp that brings light to gloomy days. Inspired by a summer in Korea filled with rain and shine, spent with an umbrella in hand. Parasol incorporates linkages and sliding mechanisms to adjust the diffusion of light into a room.
Ideation
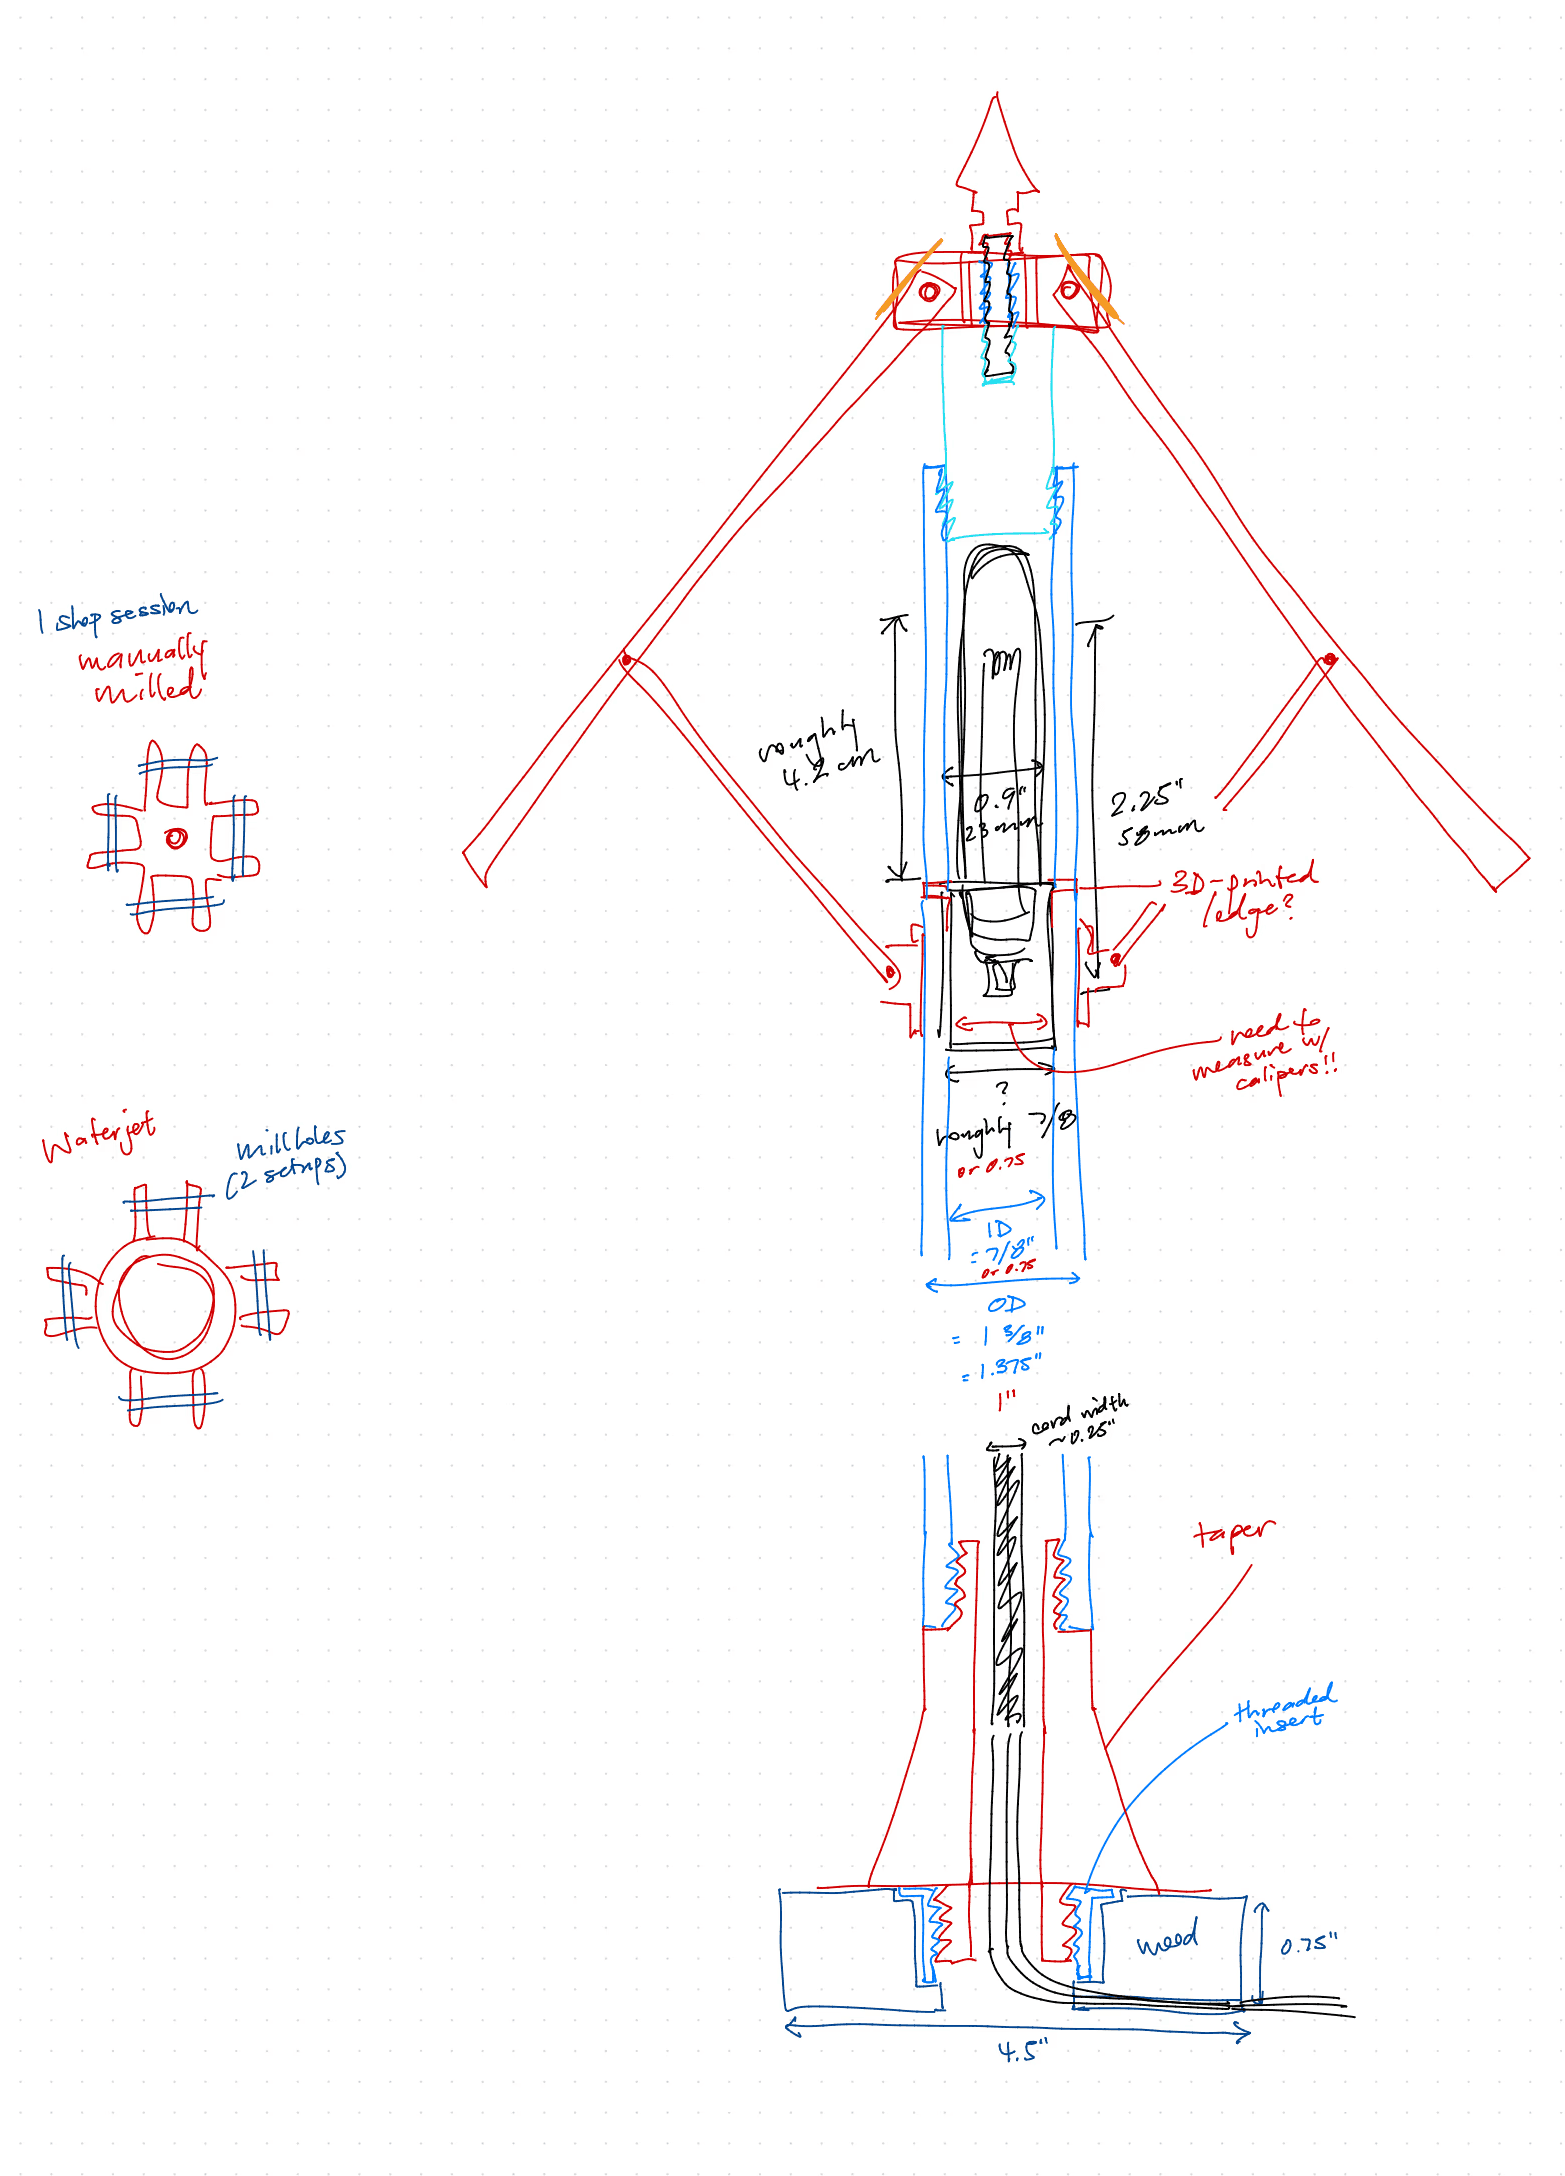
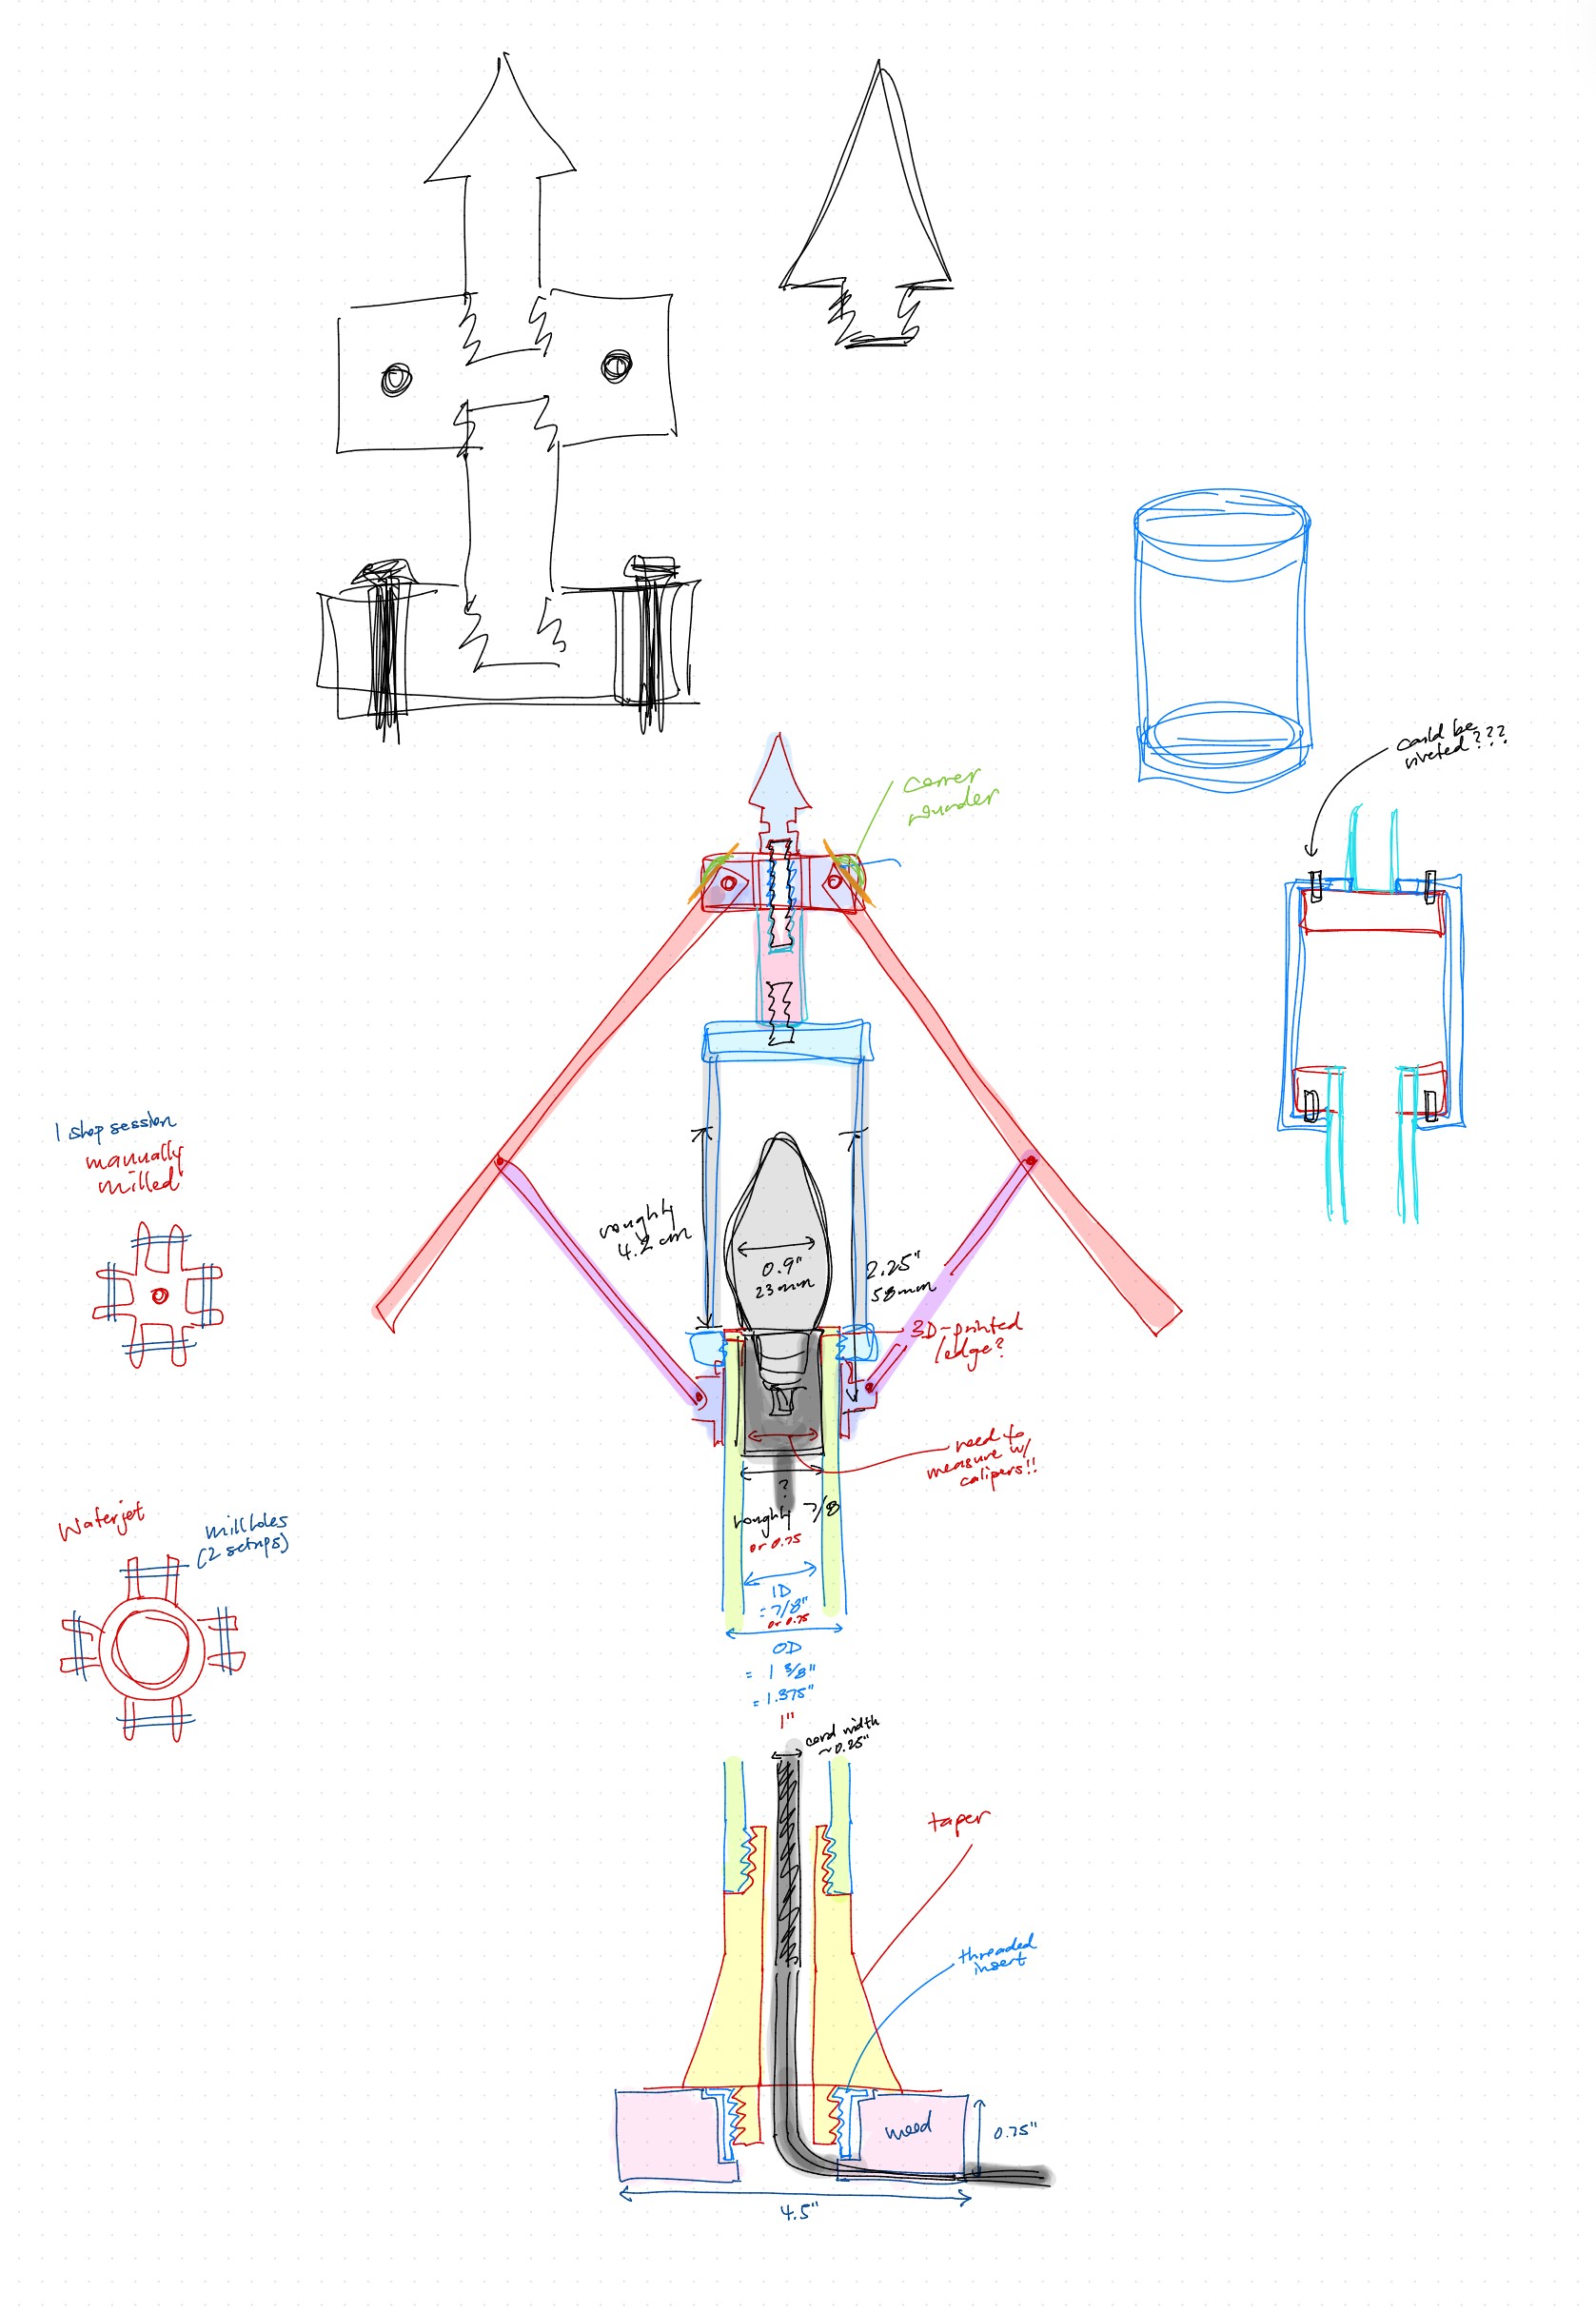
Parasol was inspired by my love for mechanical movement. In particular this idea stemmed from my curiosity towards repurposing the motion of one daily object (an umbrella) into a novel use case (an adjustable lamp). My initial sketches focused on the design of the overall armature of the lamp, laying out the anatomy of how the parts would assemble together.
Prototyping
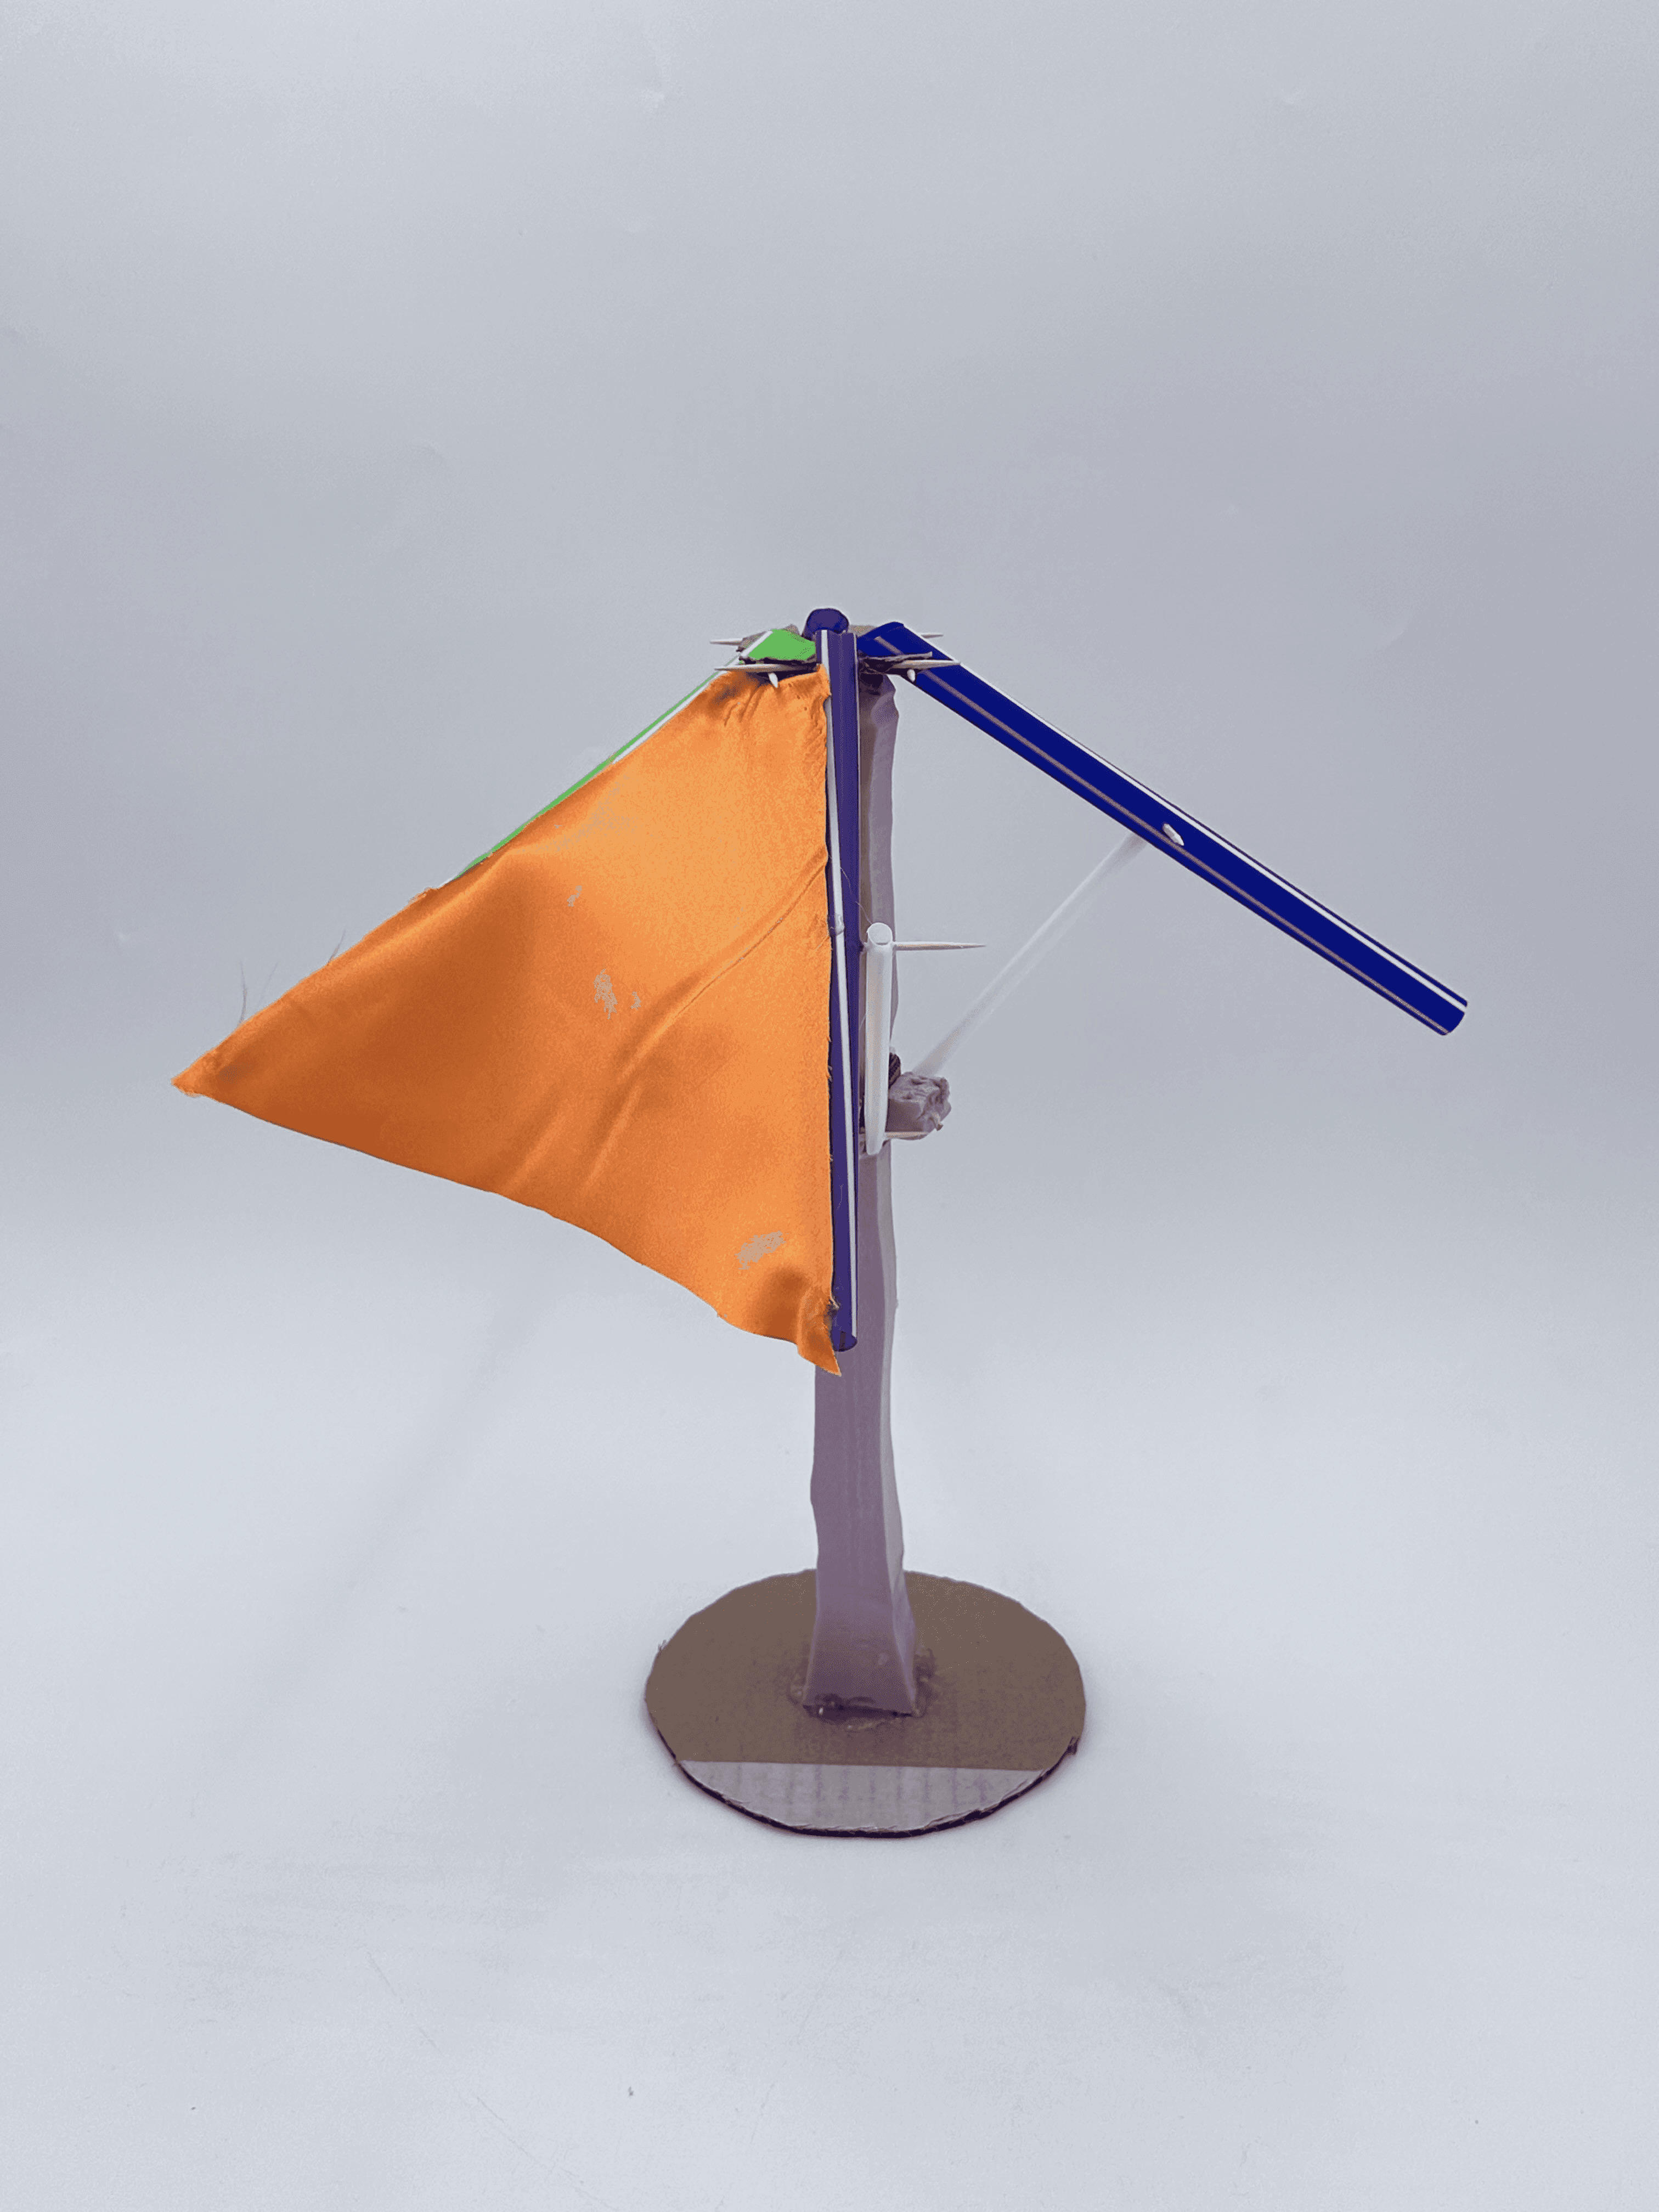
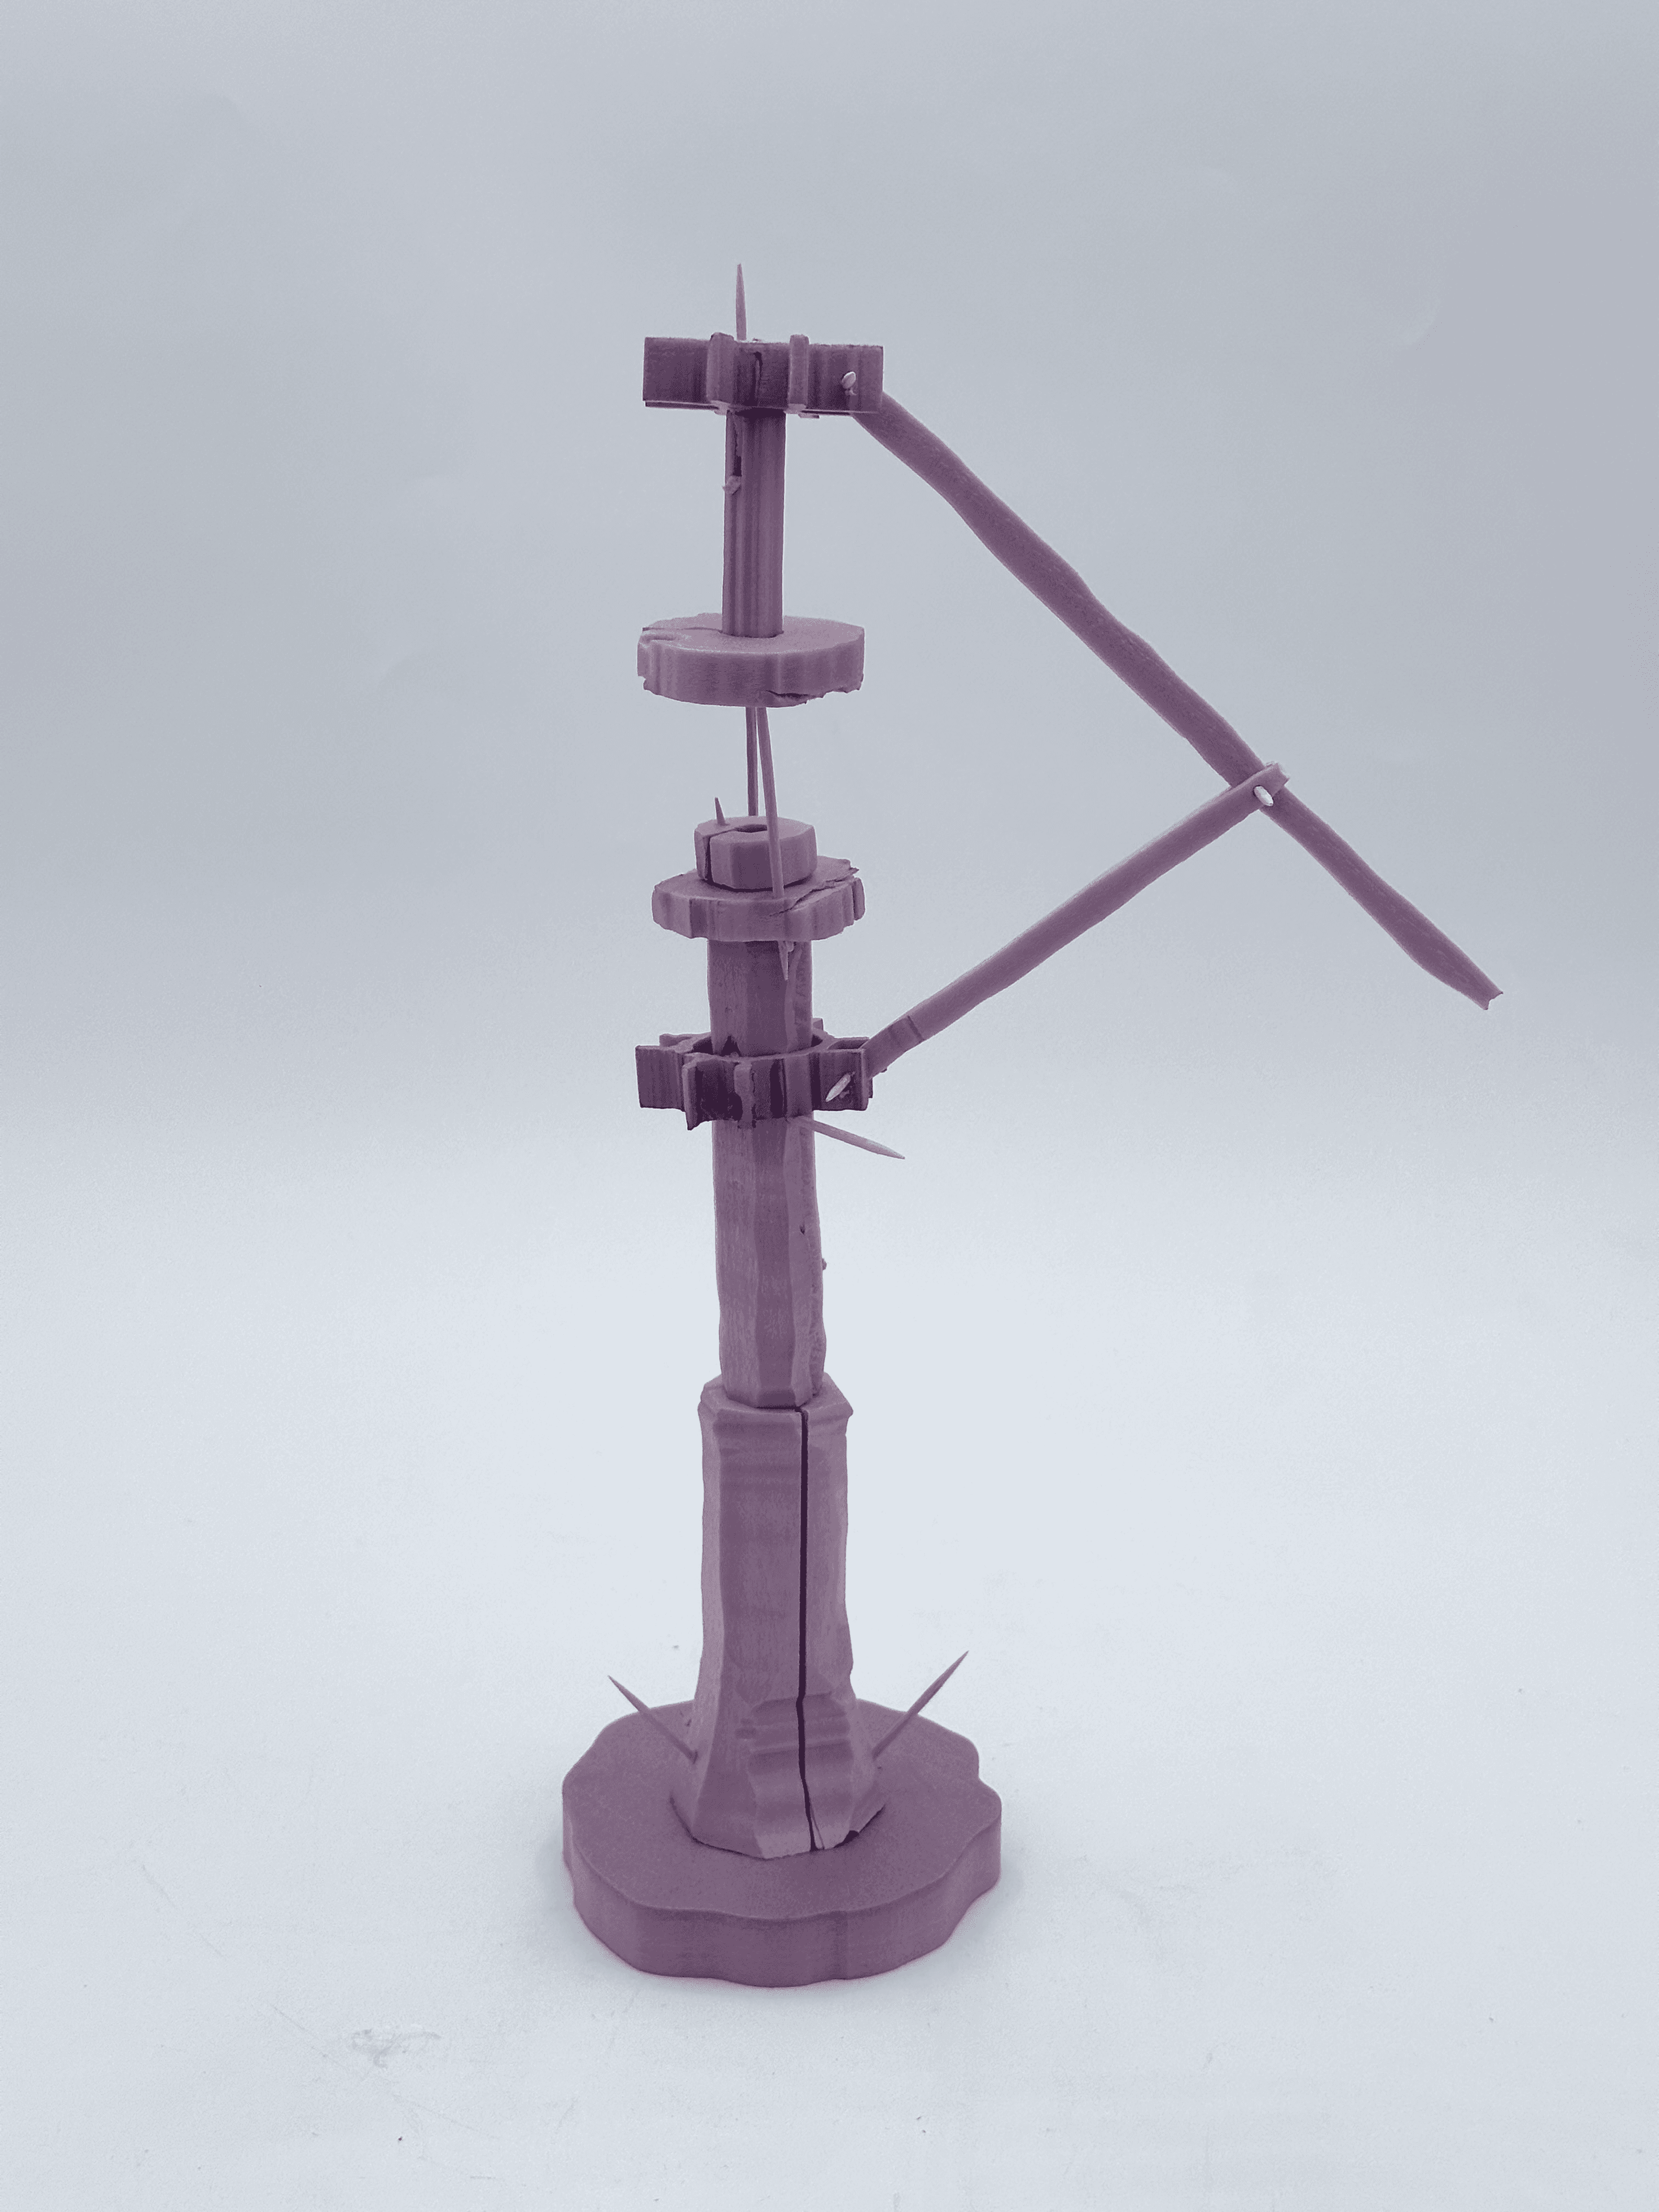
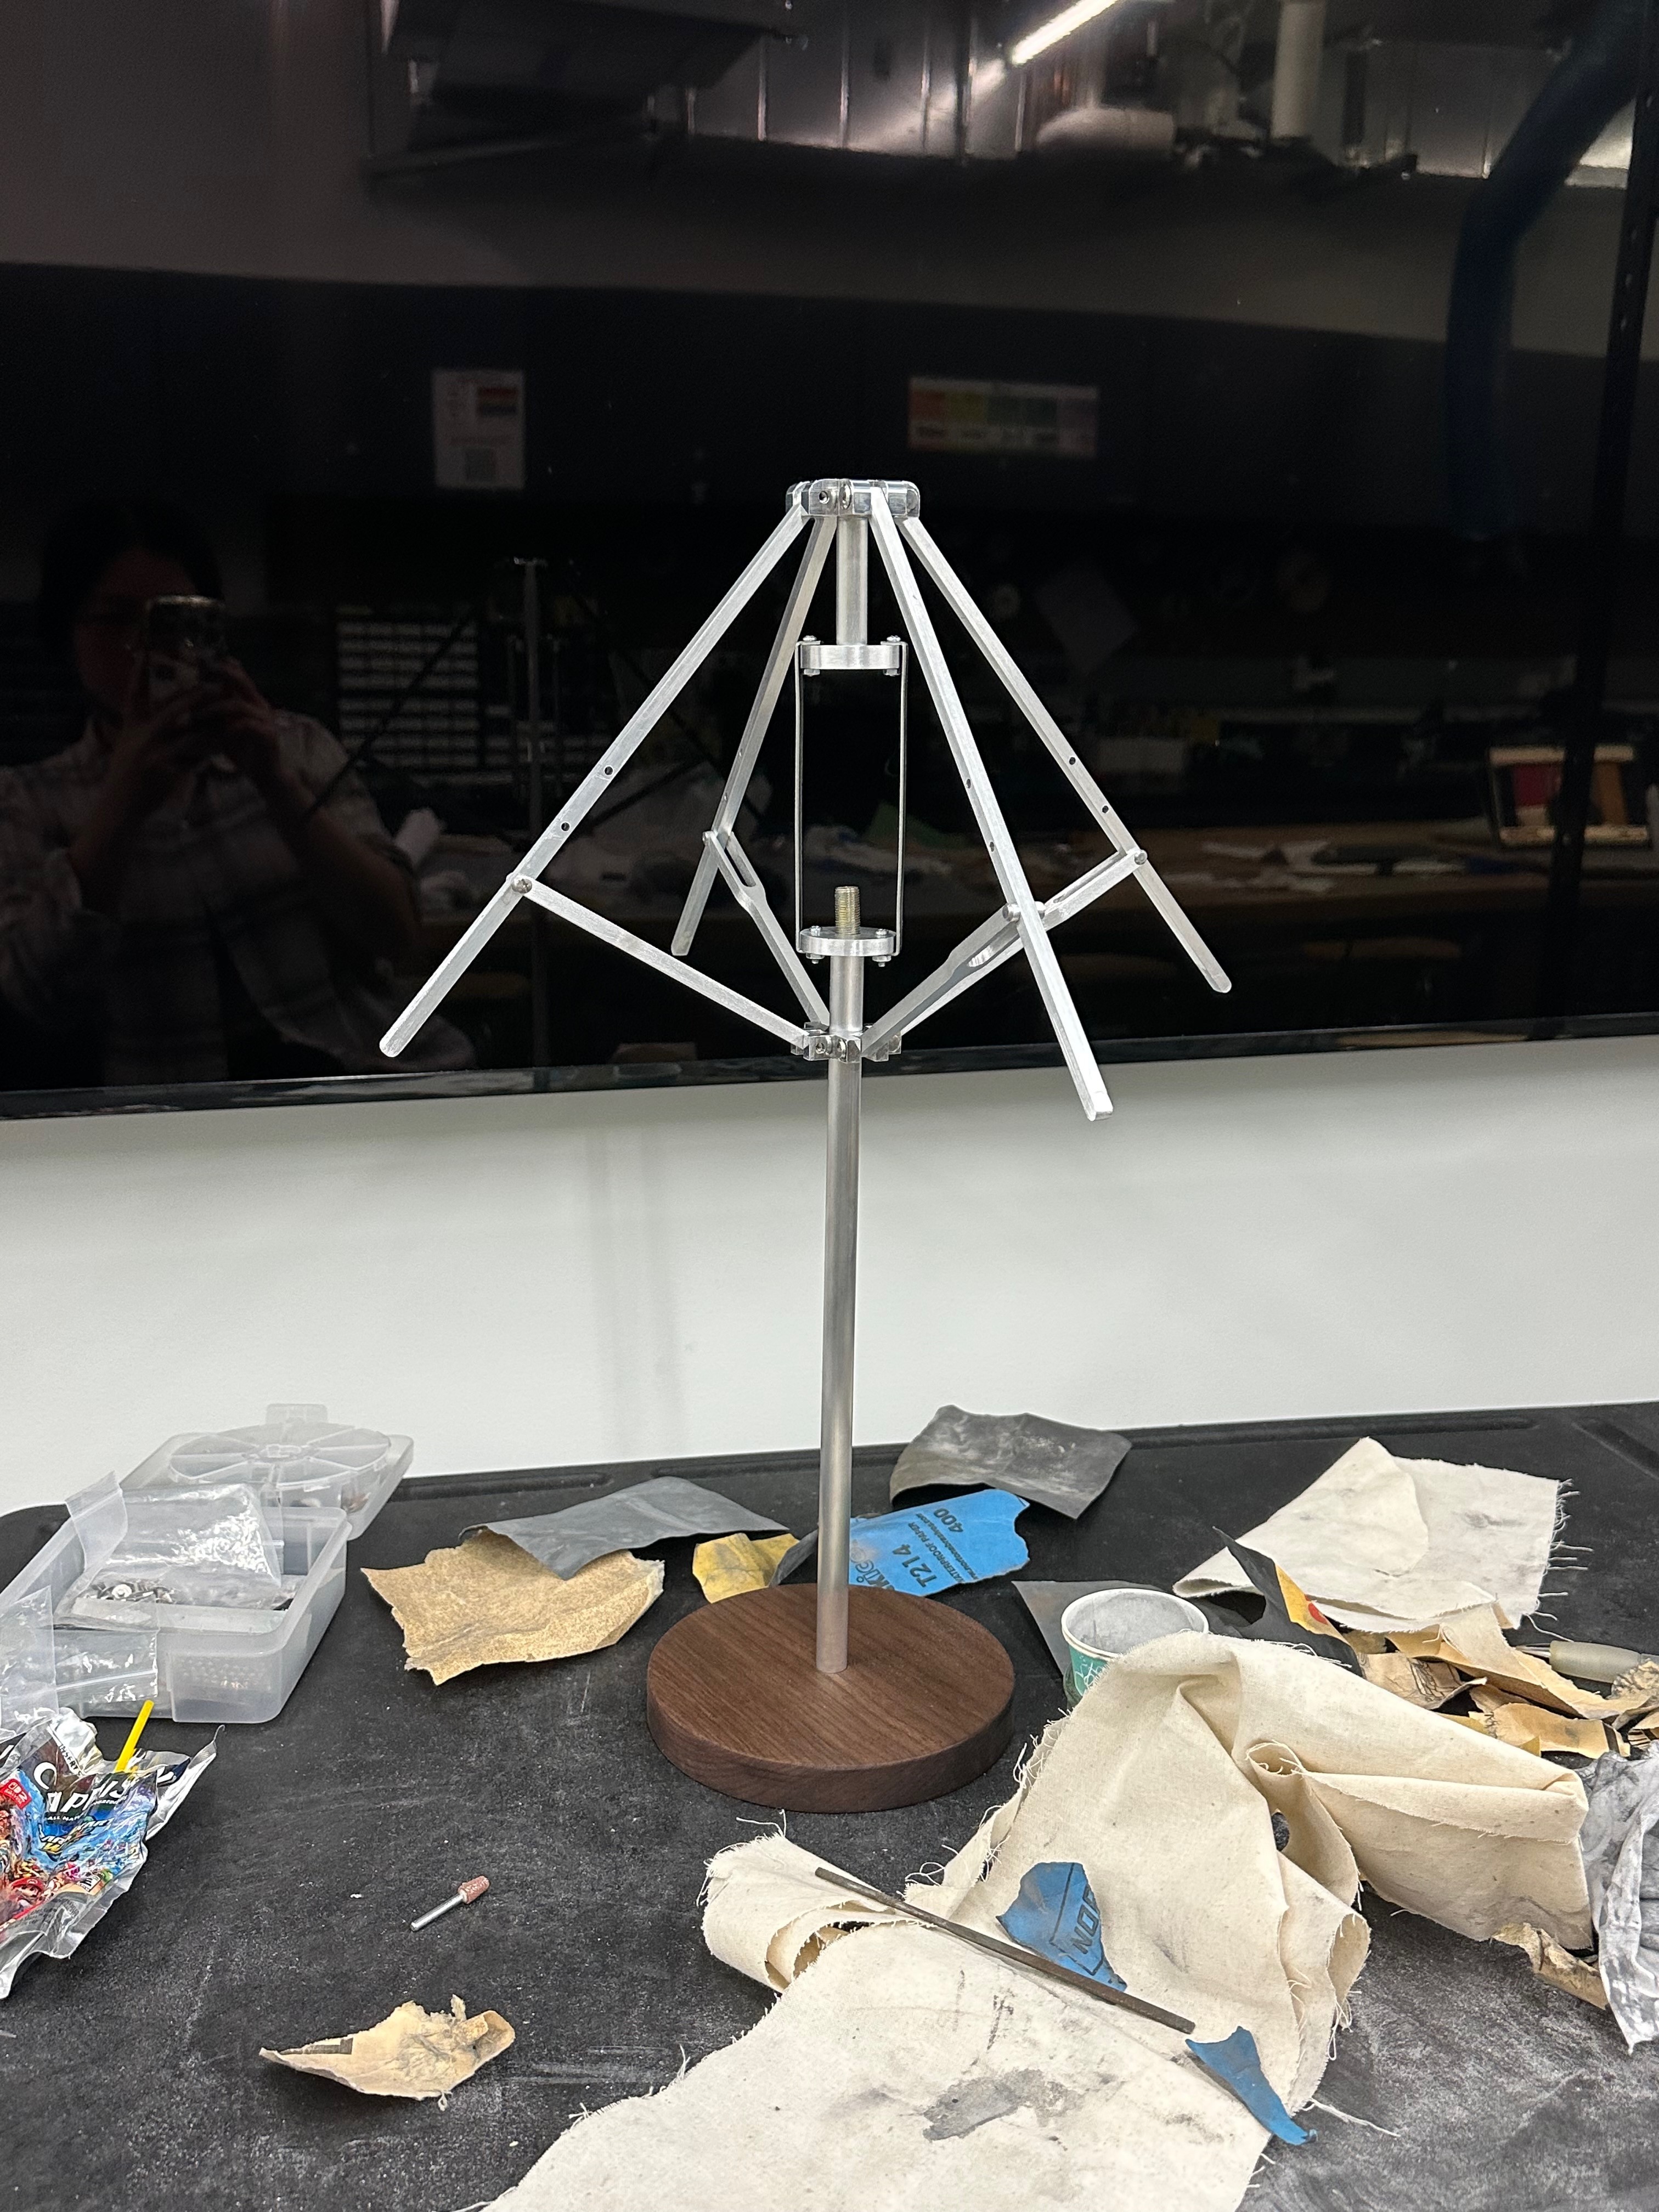
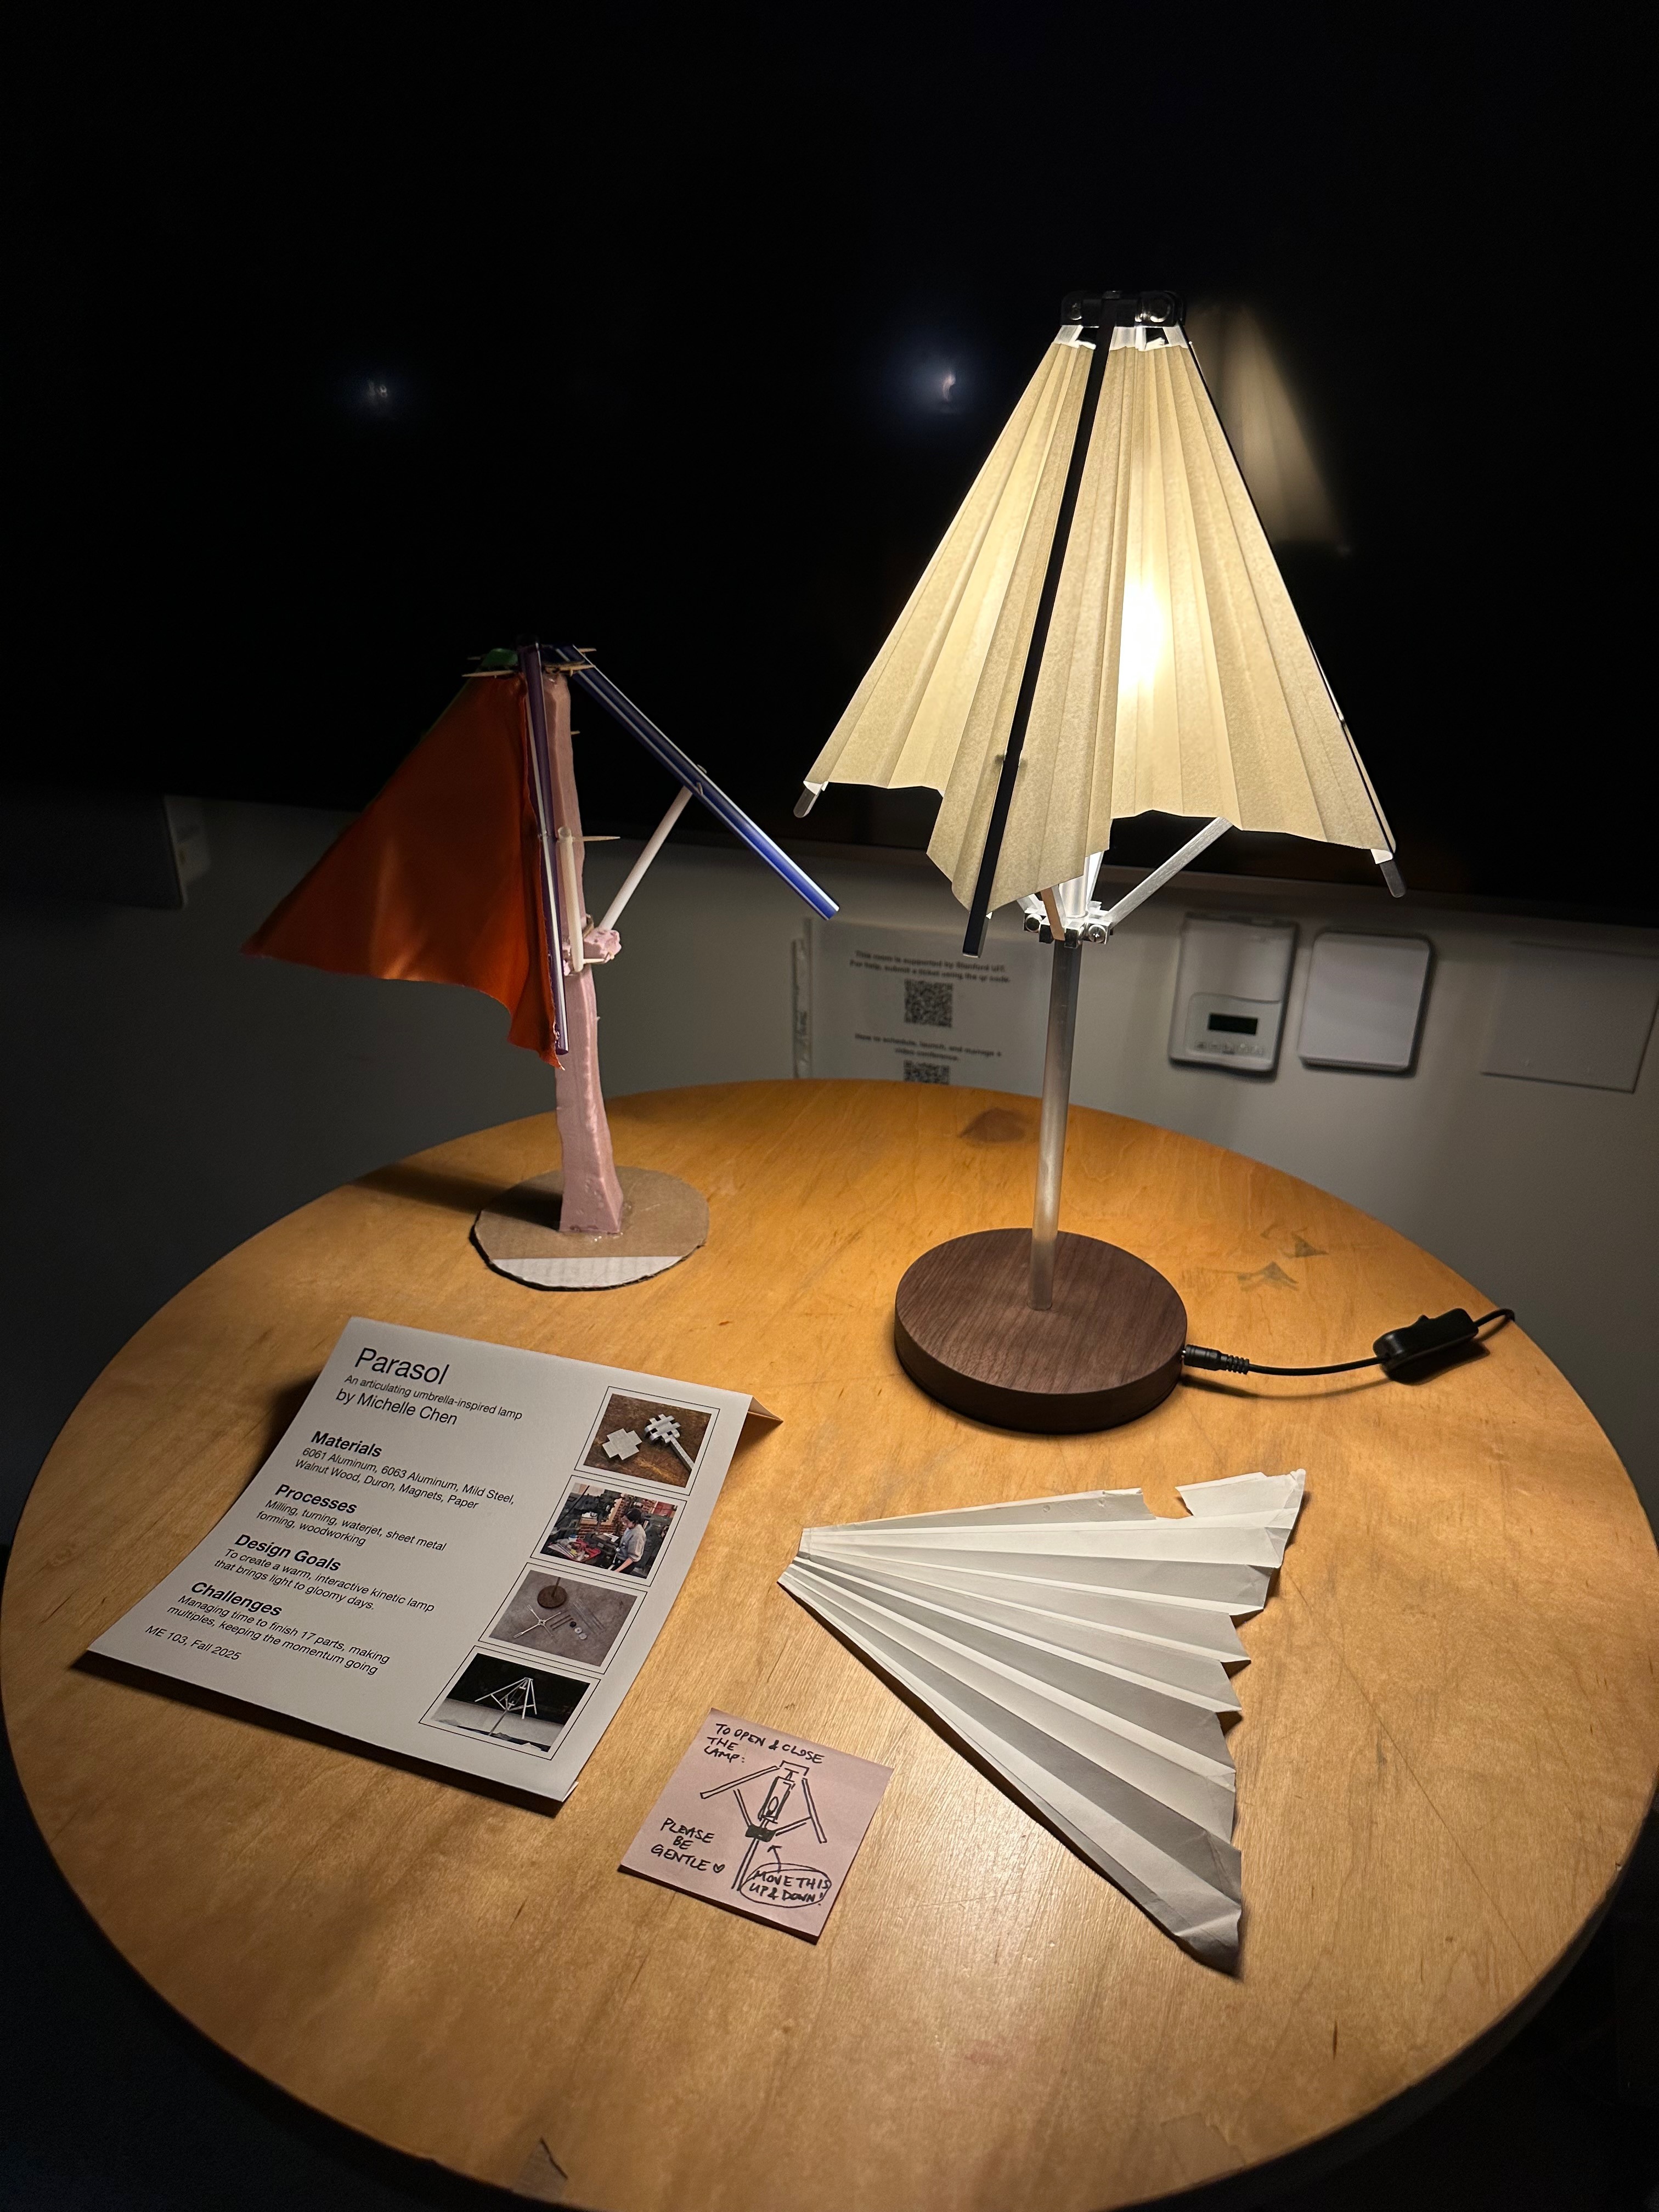
I created two initial prototypes for this project. Prototype 1 was lower fidelity and focused on the overall opening and closing of the lamp. Prototype 2 was higher fidelity and allowed me to better visualize the specific design of each part and how they could be fabricated using manual machinery.
CAD Modeling
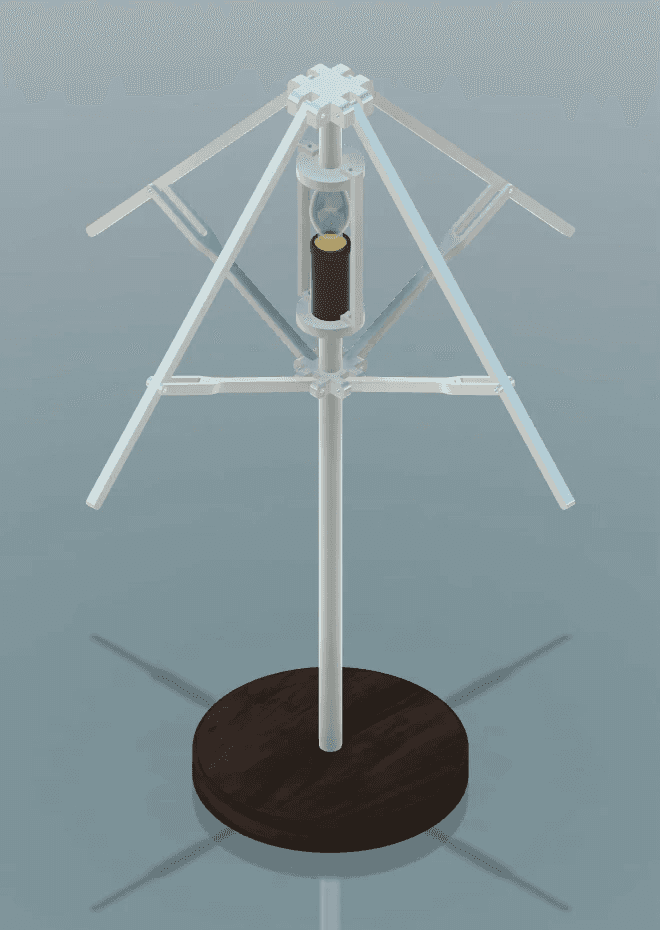
Next, I created a CAD model in Fusion 360 containing all of the parts for the lamp, including threads, hardware, and the actual dimensions for my machined parts. This served as my blueprint for later fabrication.
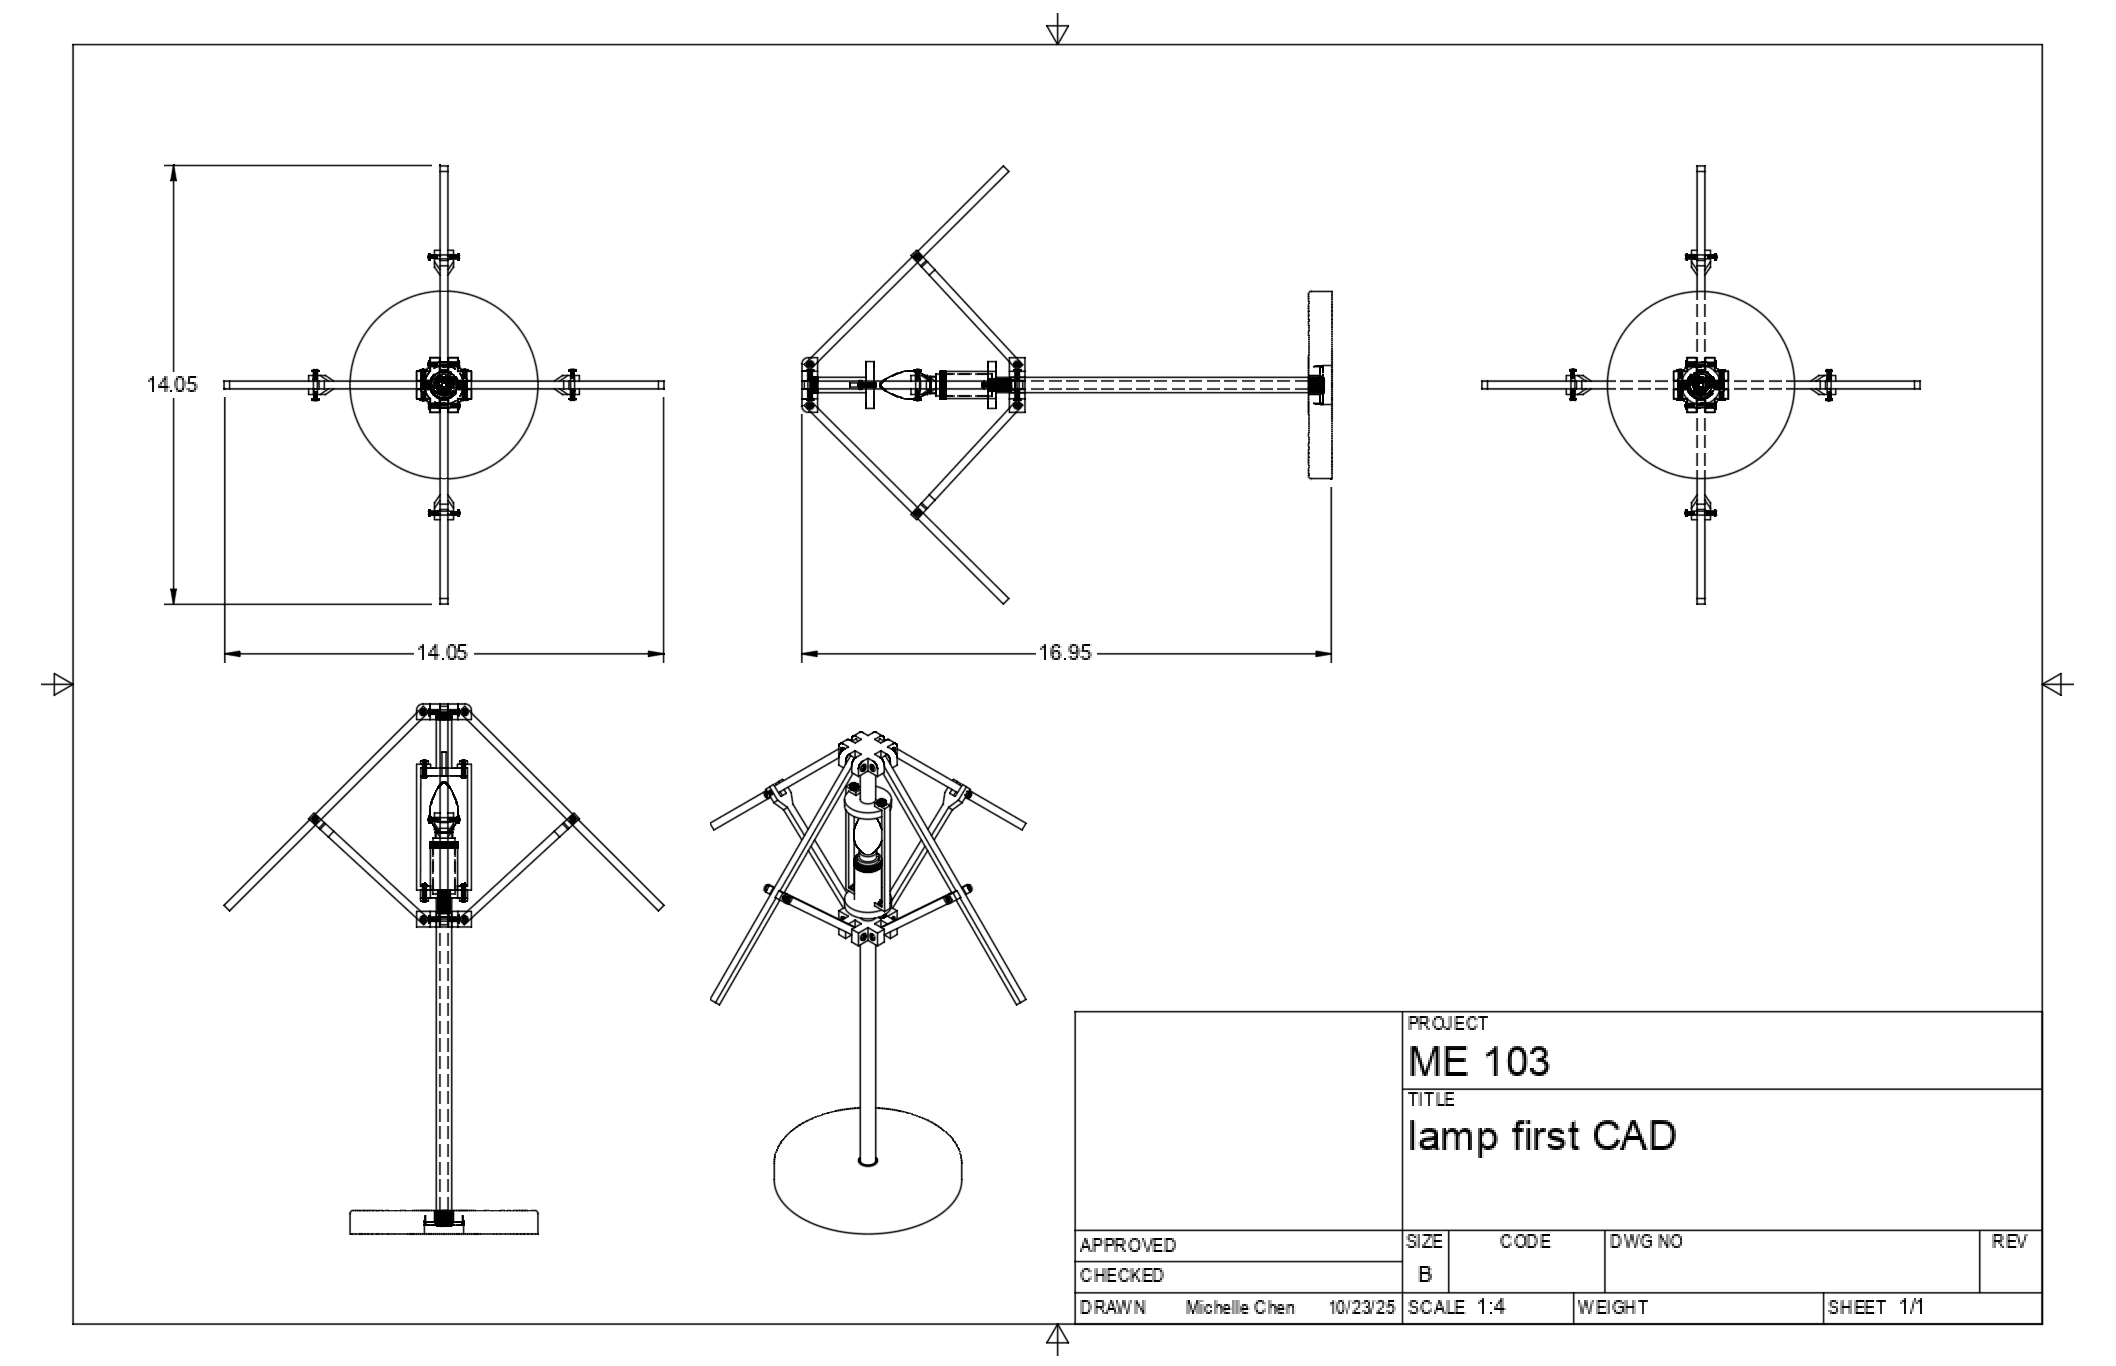
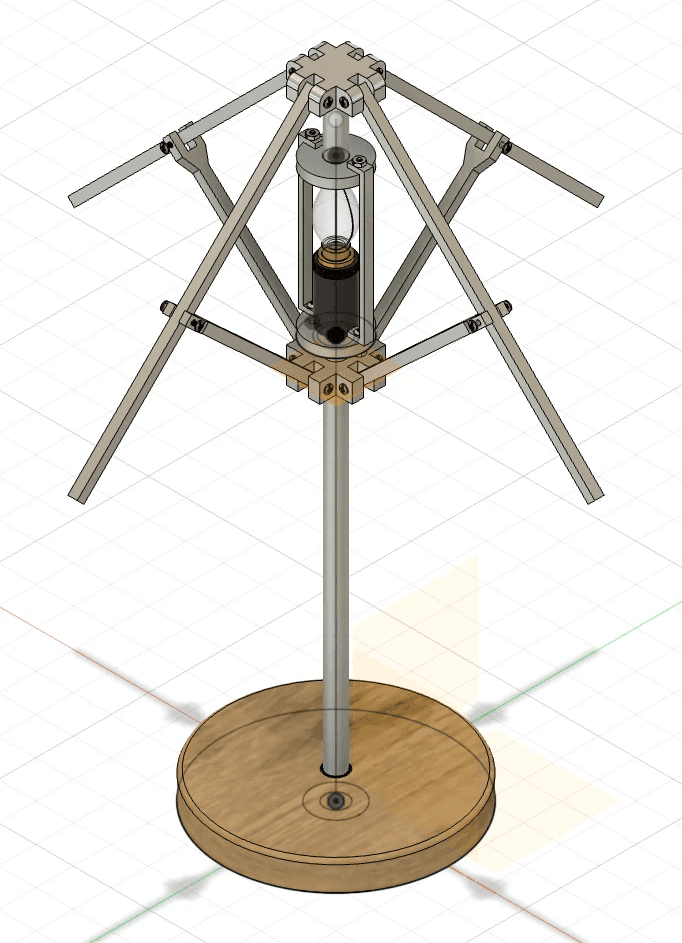
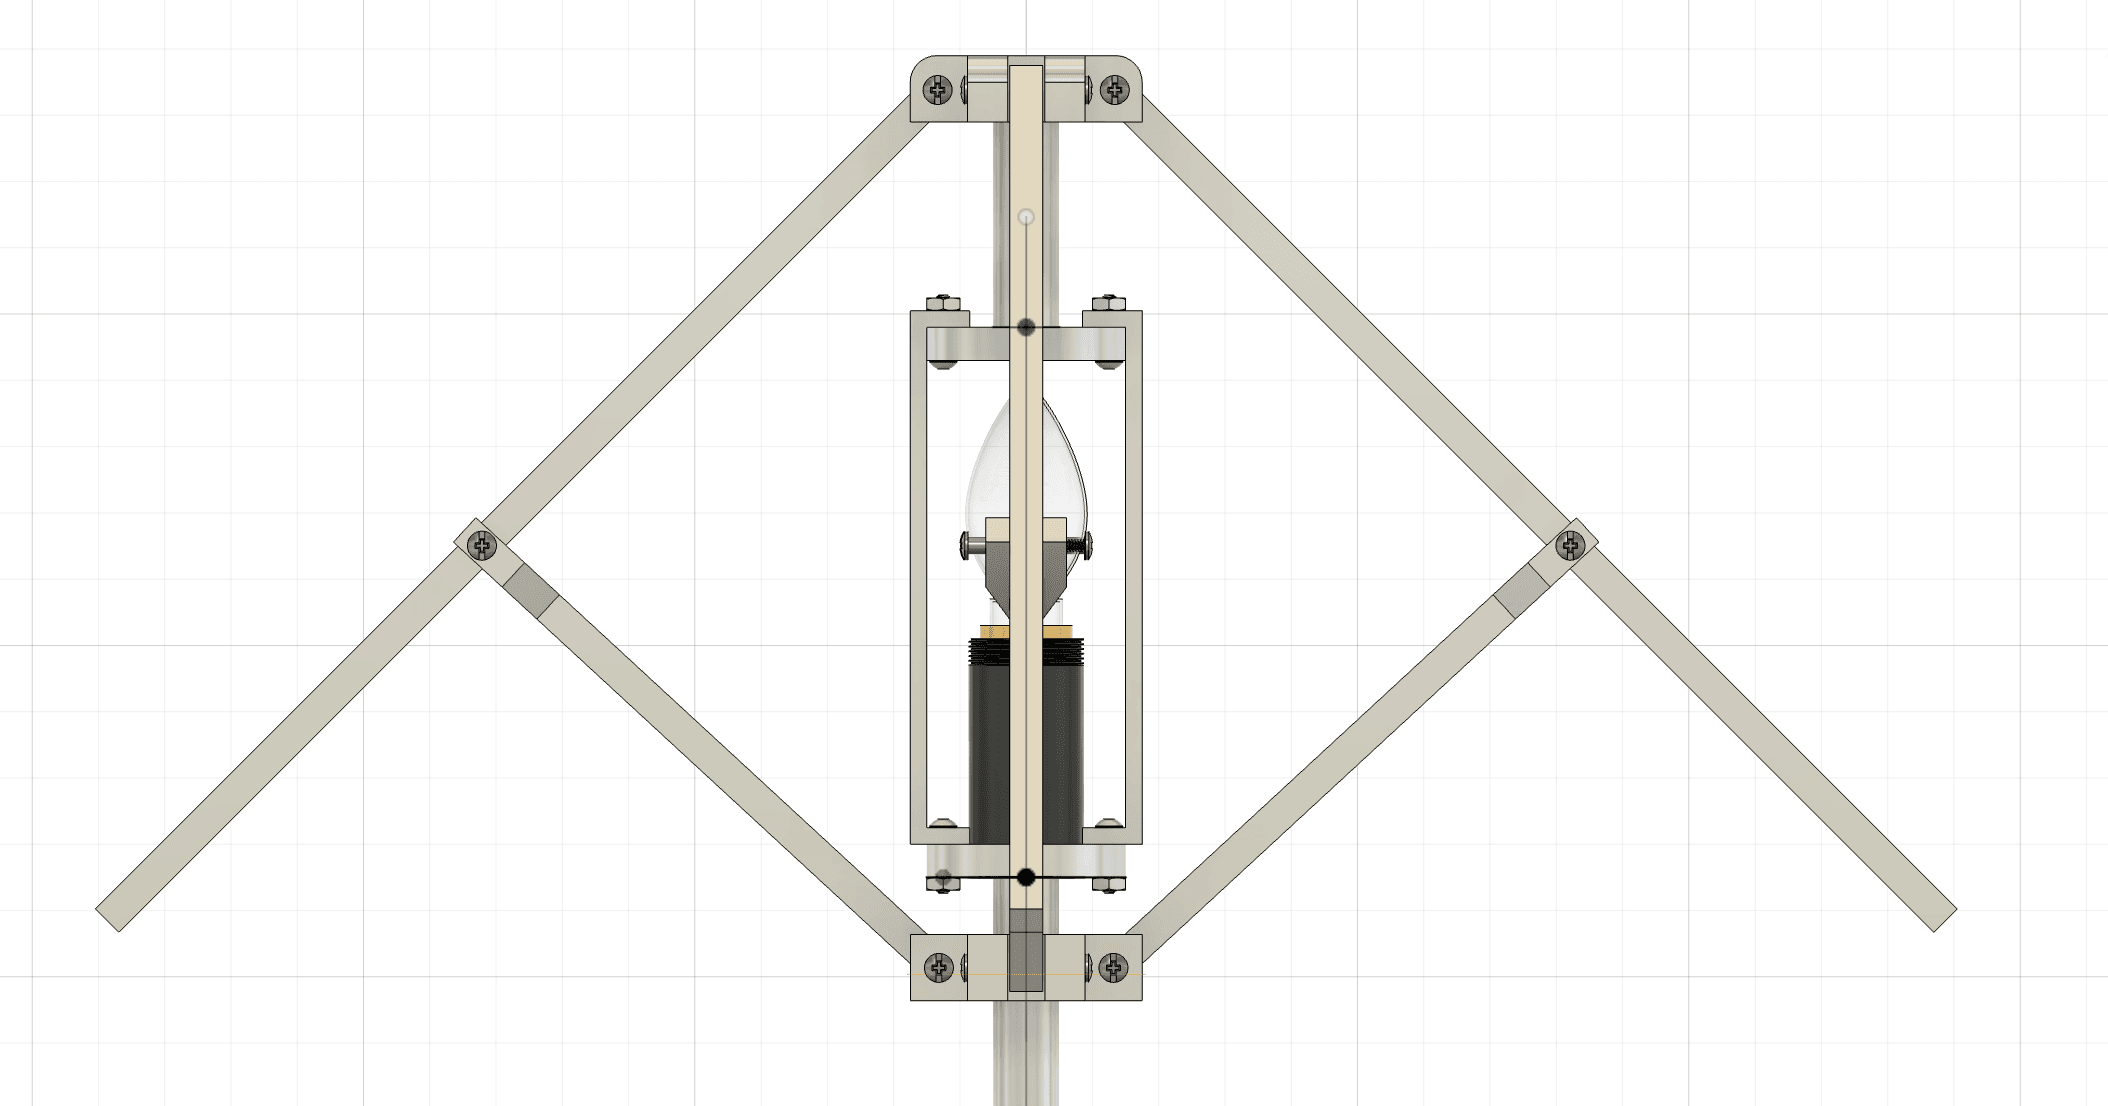
After 3 iterations of my main CAD, I added joints to each component to better visualize the movement of the linkages, as well as animate the opening and closing of the shade.

Material Selection + BOM
I fabricated Parasol primarily from 6061 and 6063 Aluminum due to ease of machining, breadth of tubing sizes, cost efficiency, and aesthetics (options for finishing and polishing). I fabricated the brackets around the light bulb from mild steel, as these parts required a material stronger in compression. I created the wooden base from walnut, a heavier hardwood.
For each of the linkages, I chose to use various sizes of binding barrels (aka Chicago Screws) to create removable, smooth pinned connections. To attach the central tube to the wooden base, I selected a 1/2"-13 tee nut insert to hammer into the base. bellow is the Bill of Materials (BOM) for this project.

Operations Sequence
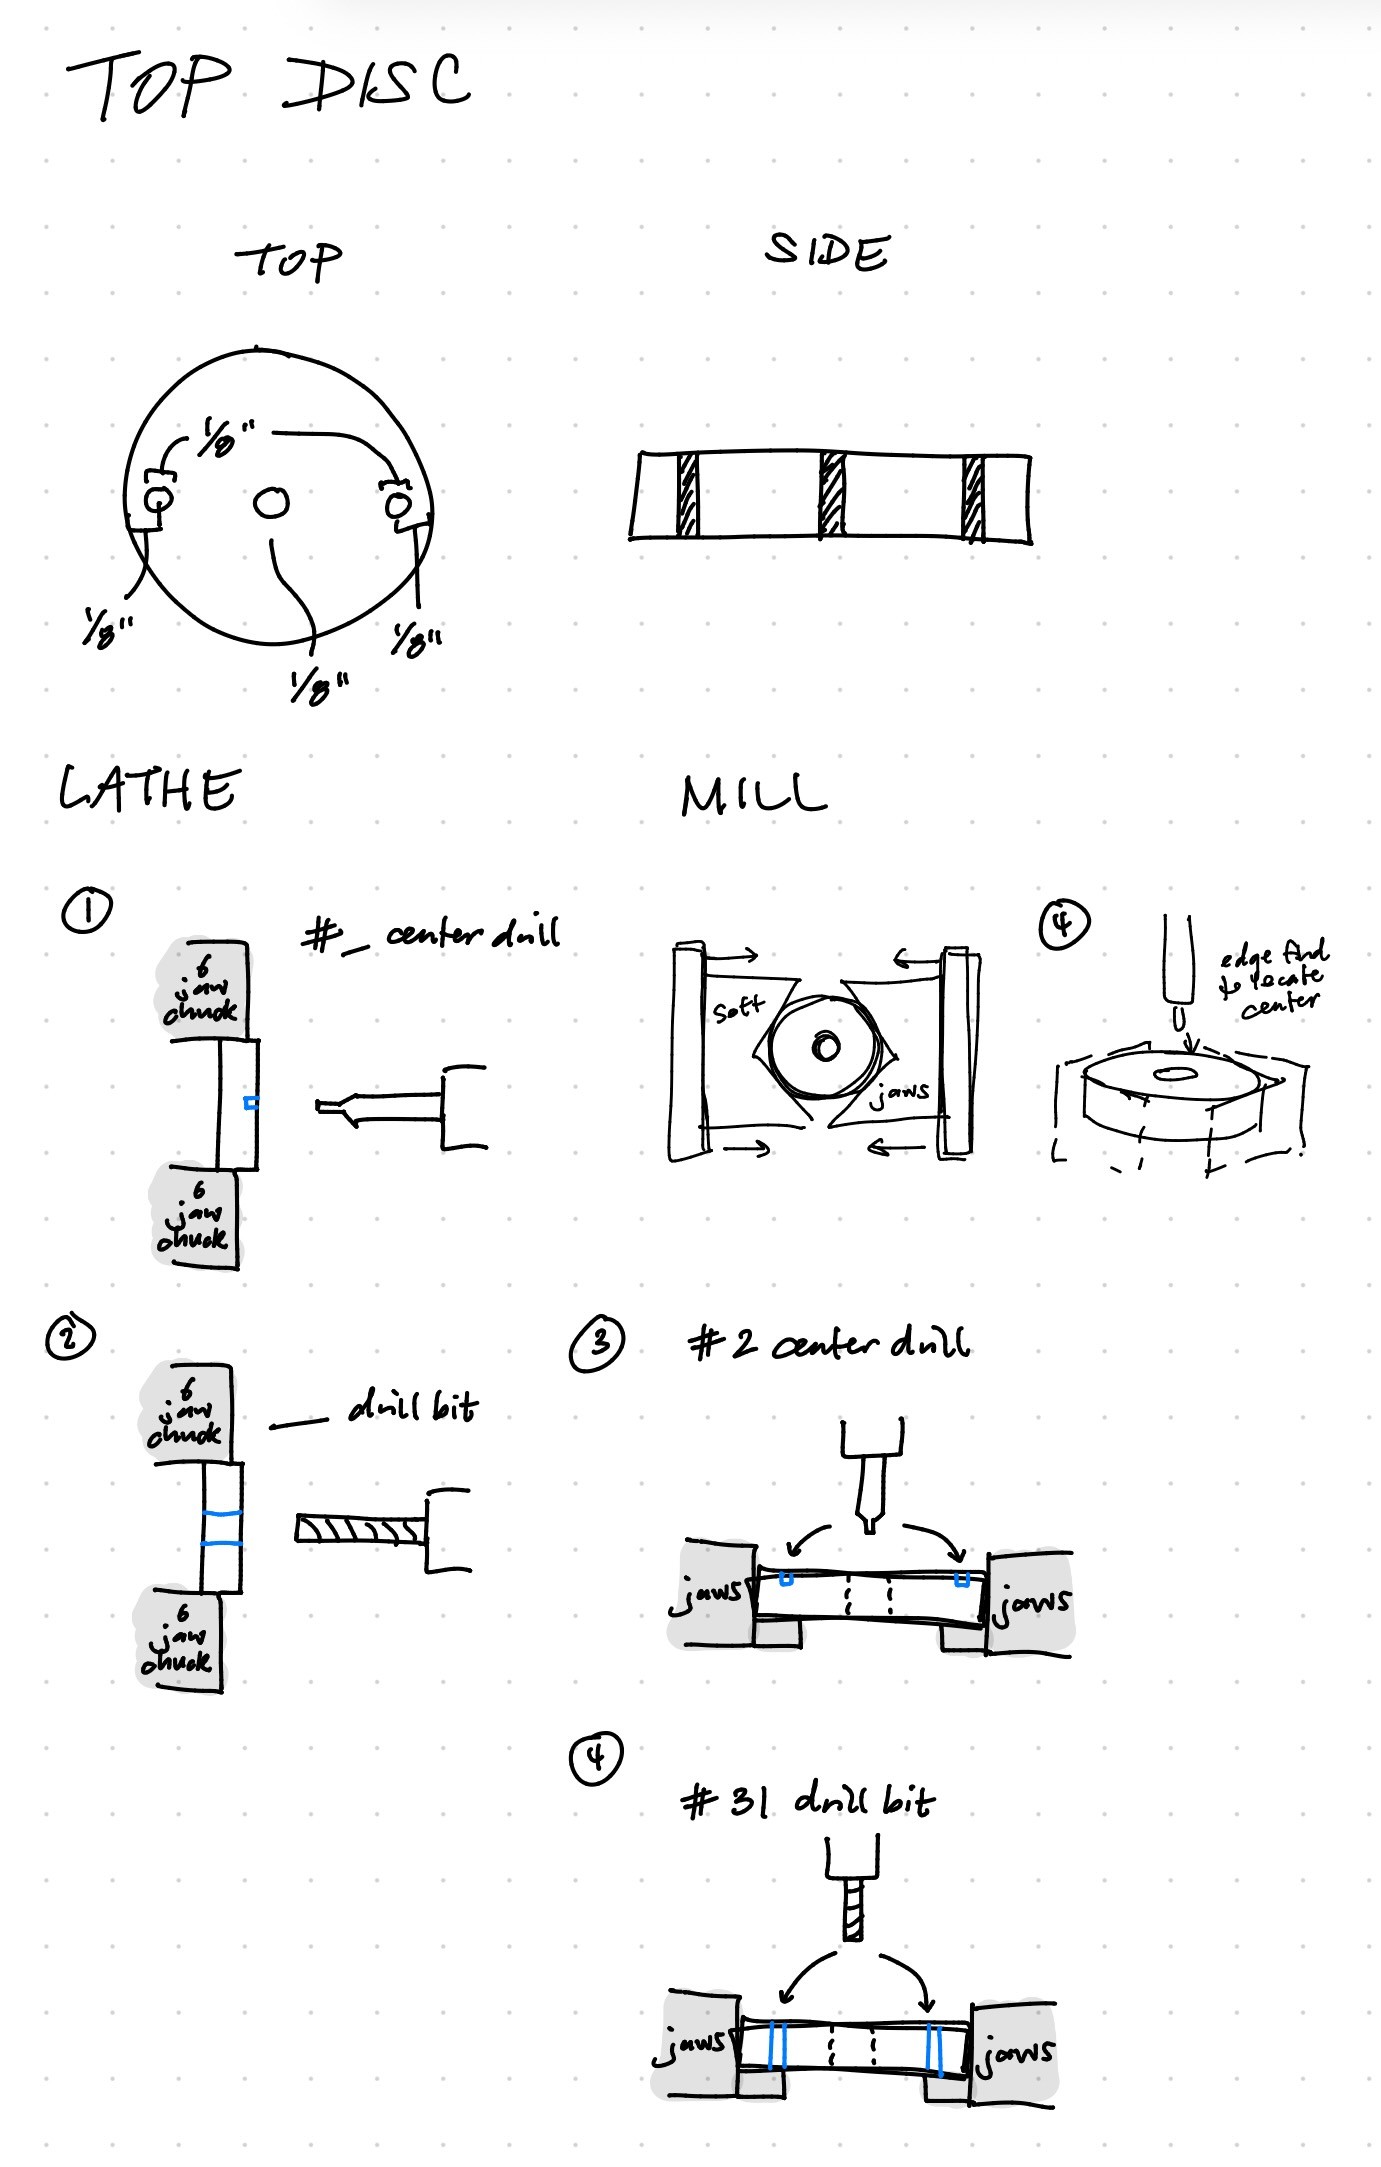
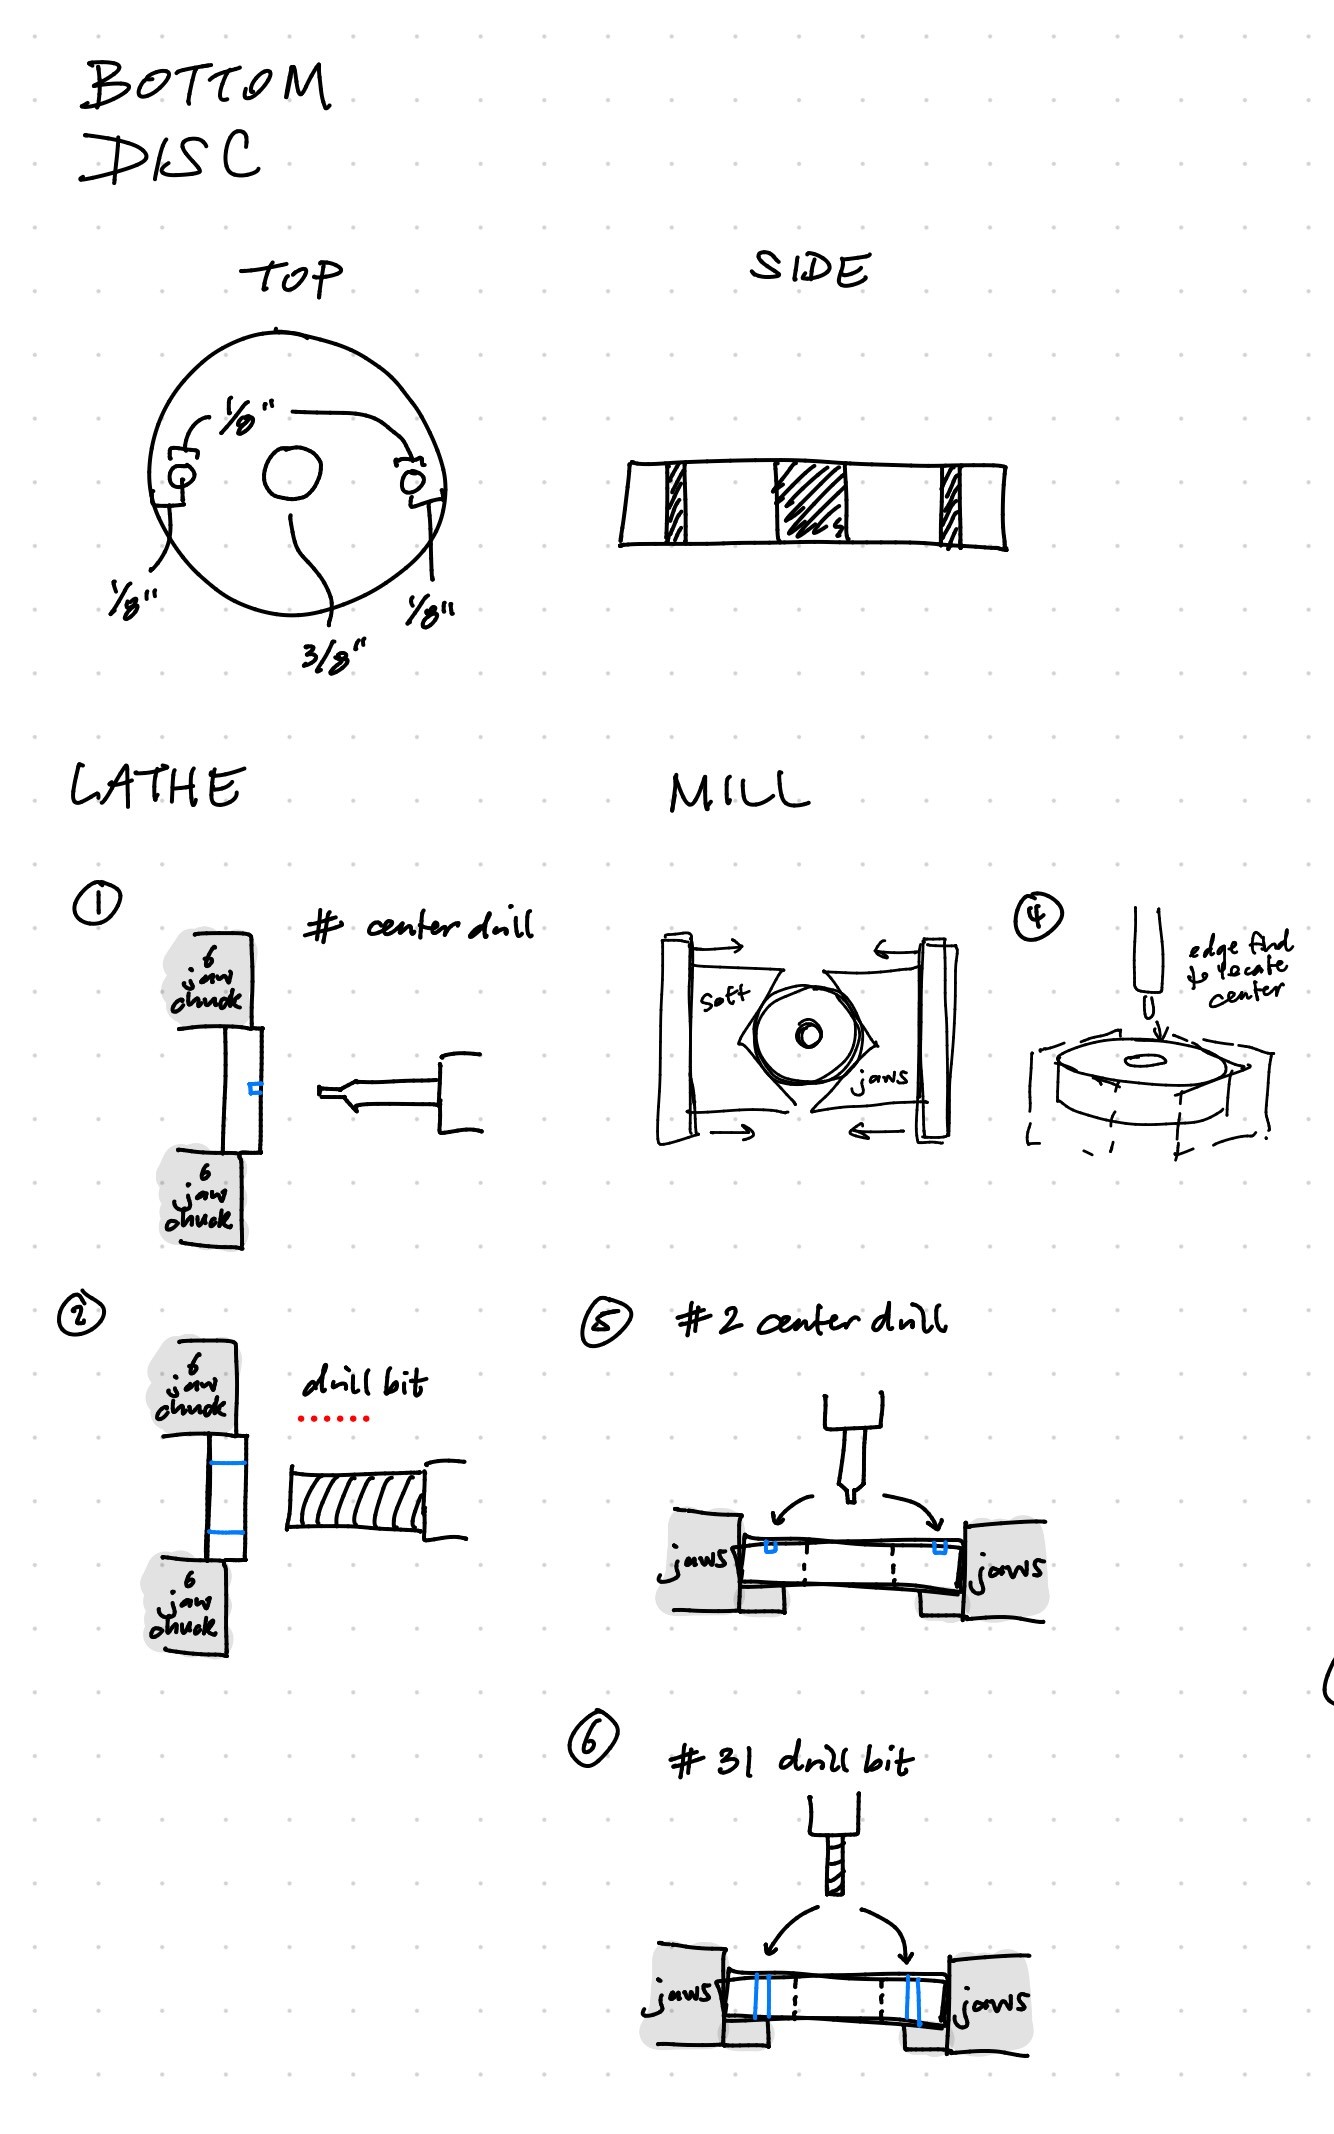
Below is the operations sequence for each part of Parasol.
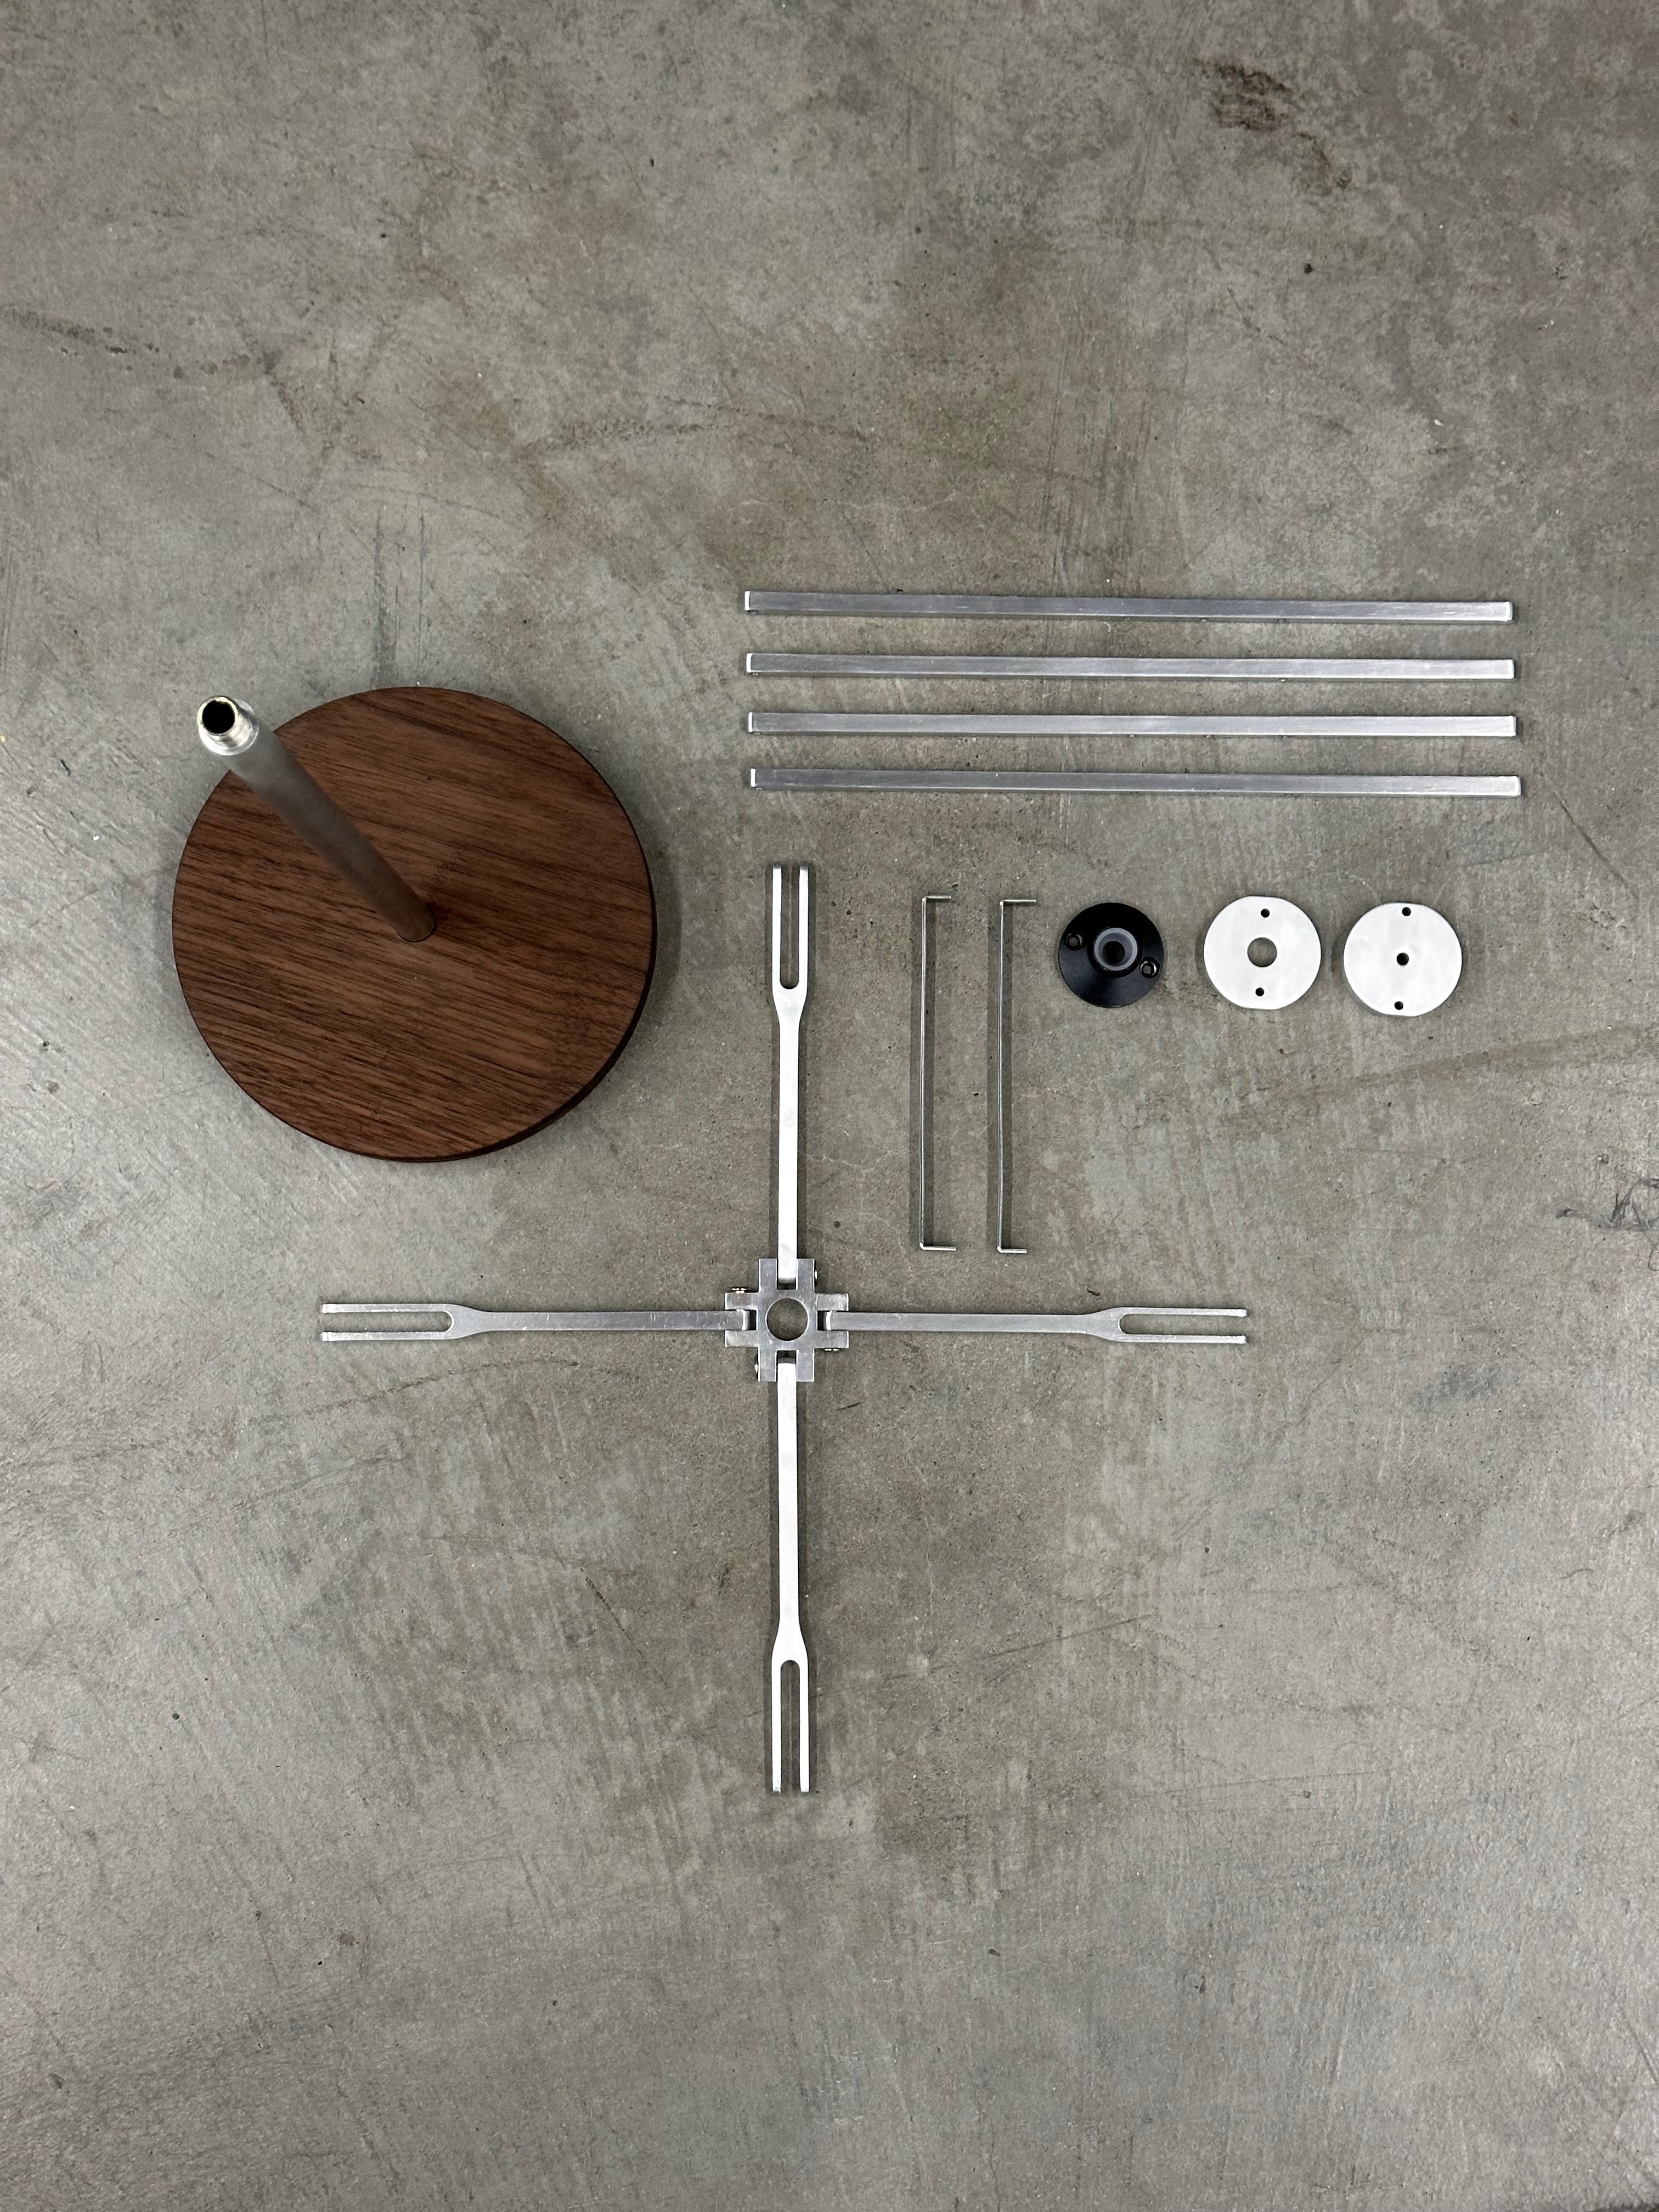
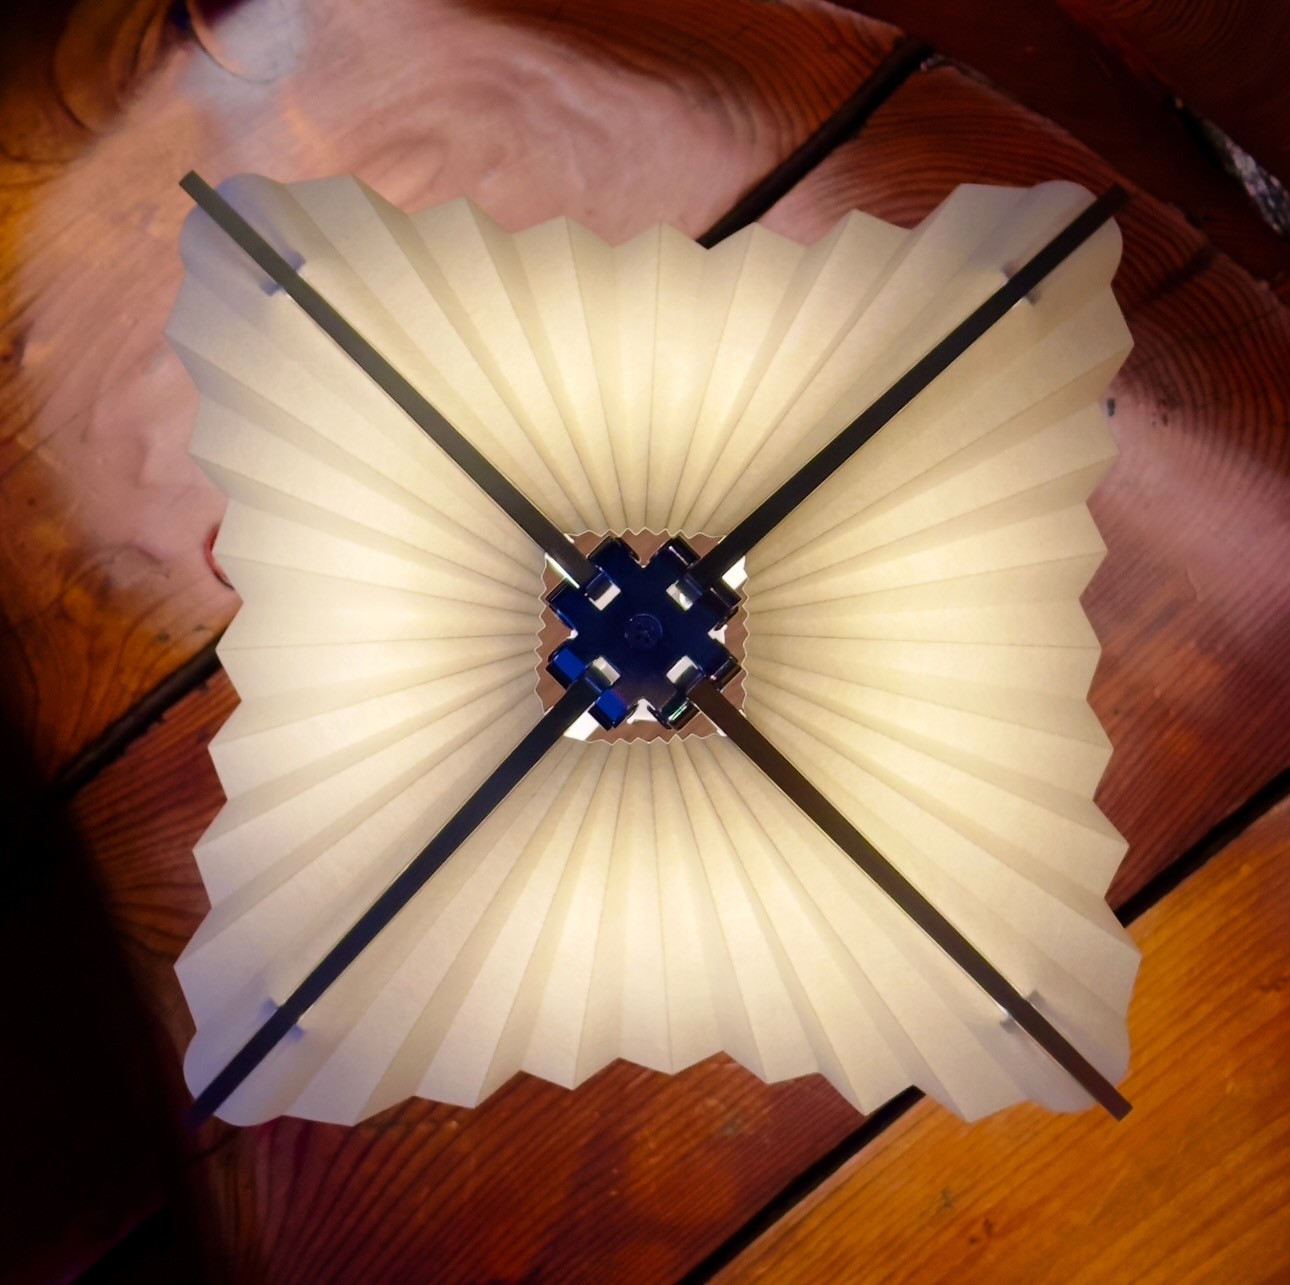
The complete parts list from top to bottom is:
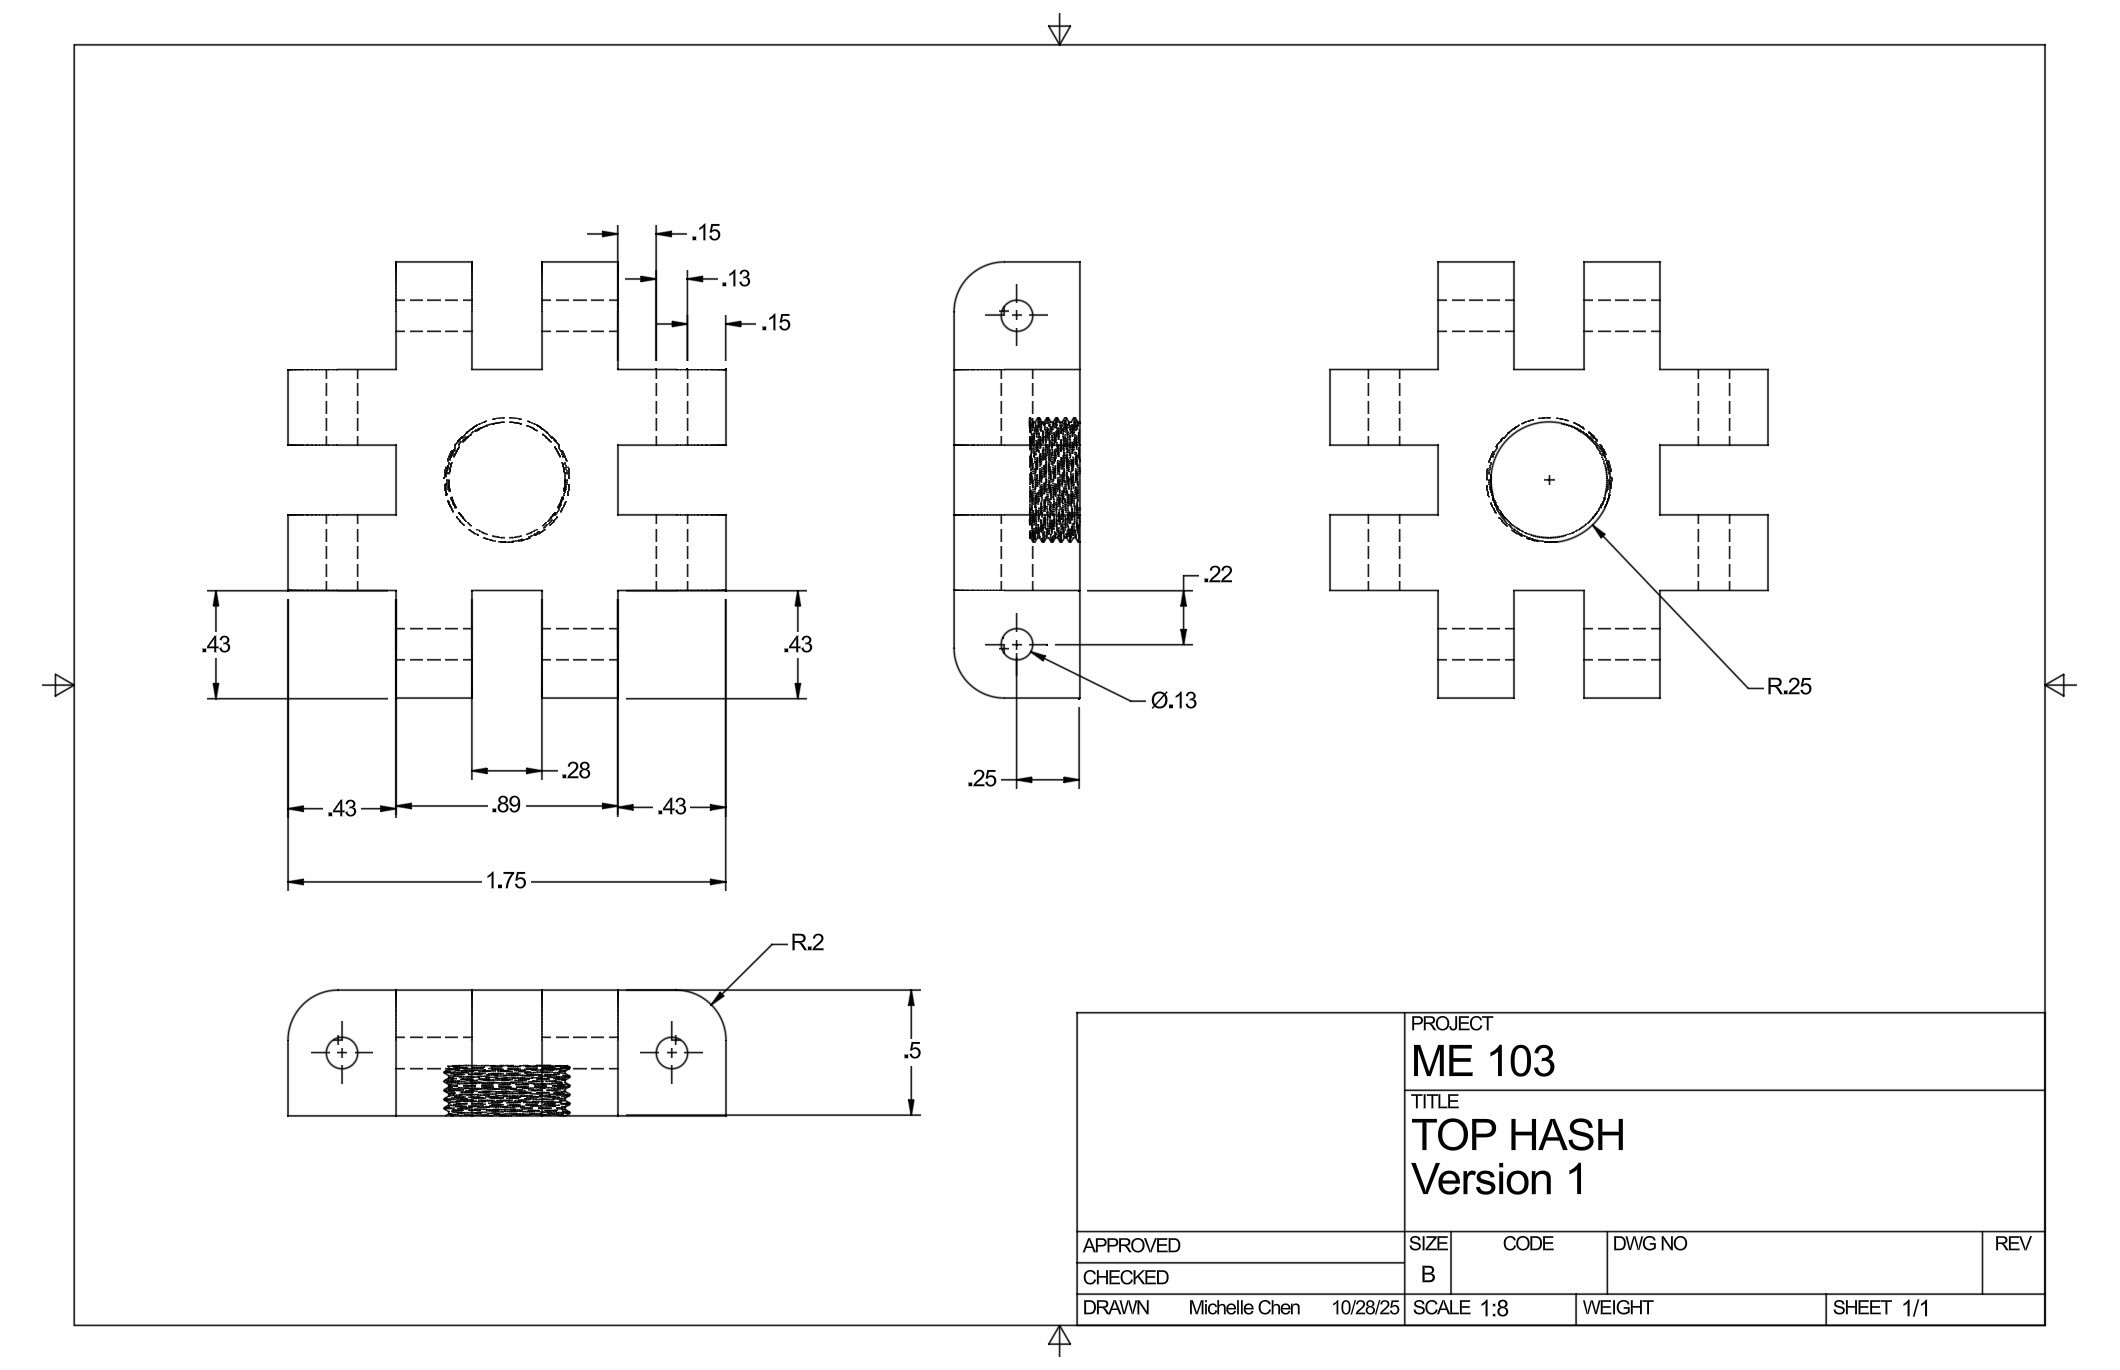
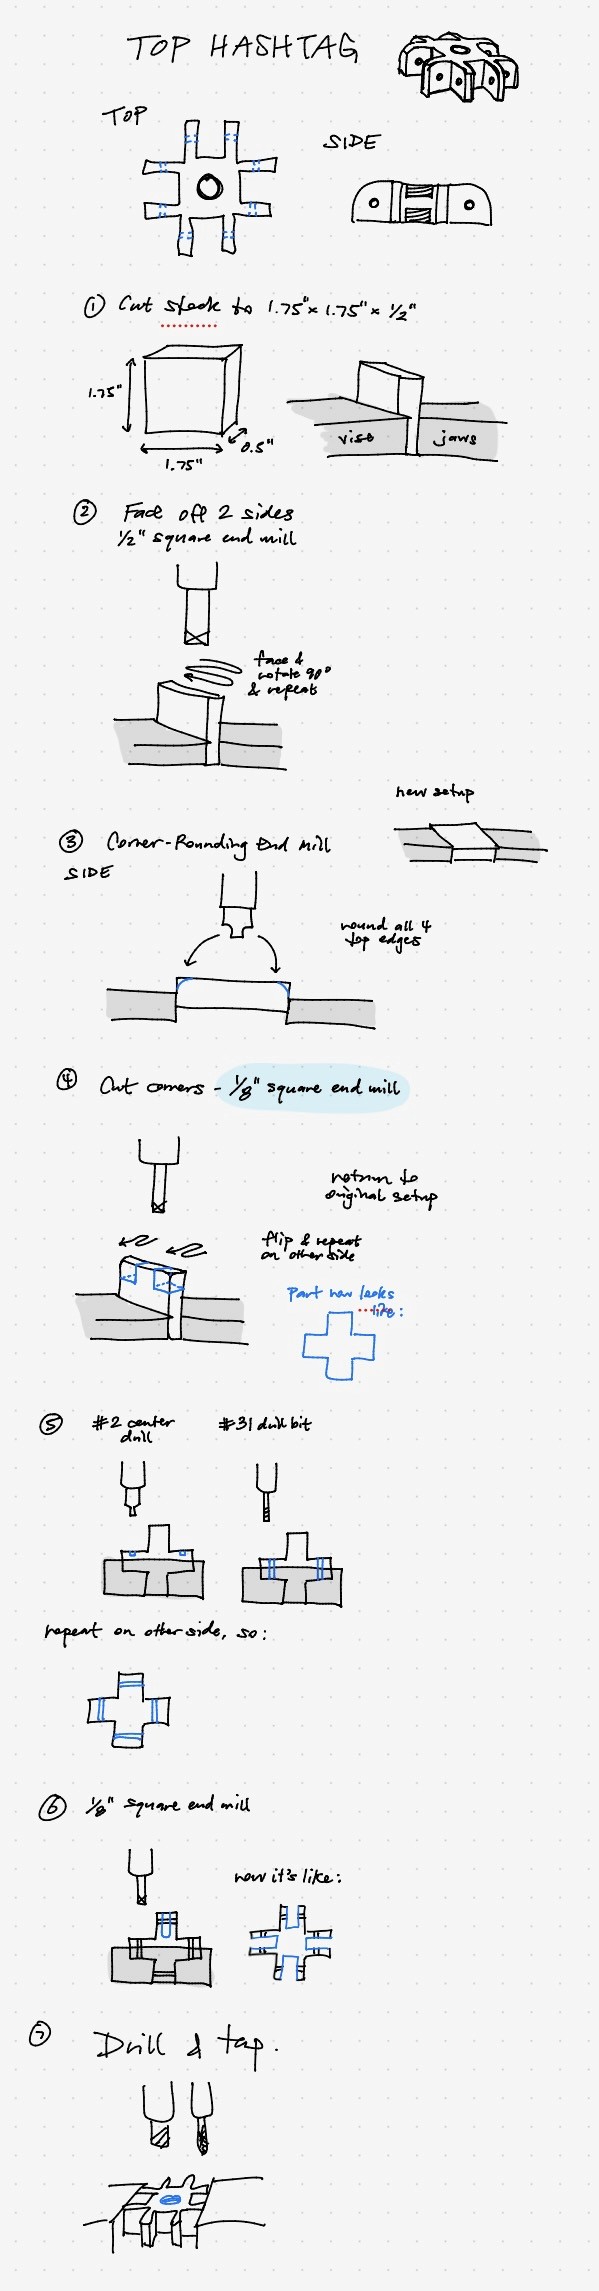
Top Hashtag
Cylinder Spacer
Top Disc
Bottom Disc
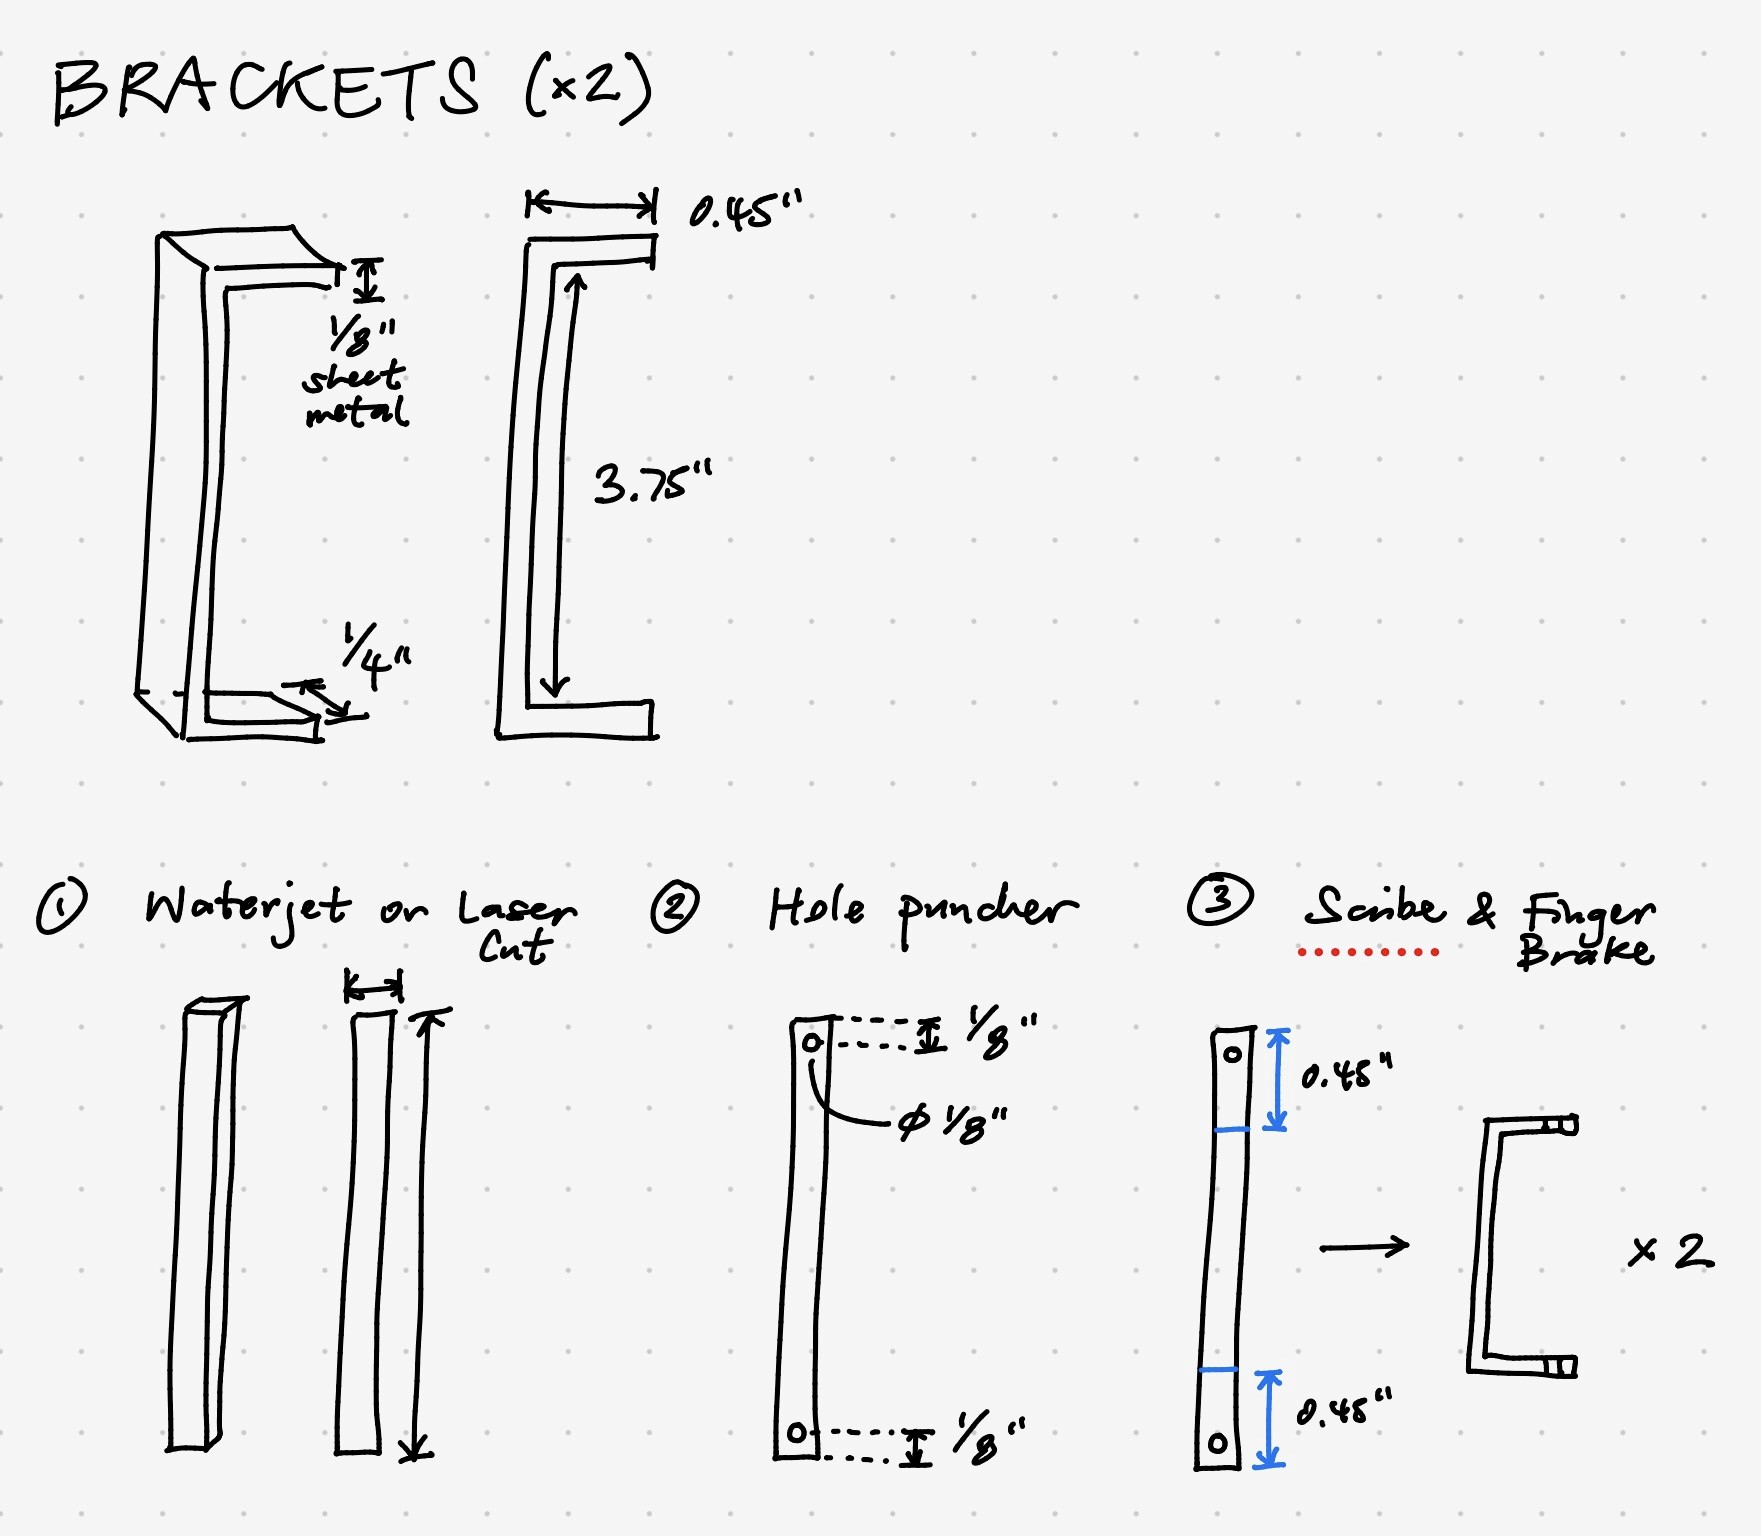
Cage Brackets (x2)
Long Arms (x4)
Short Arms (x4)
Bottom Hashtag
Tube Stem
Wooden Base

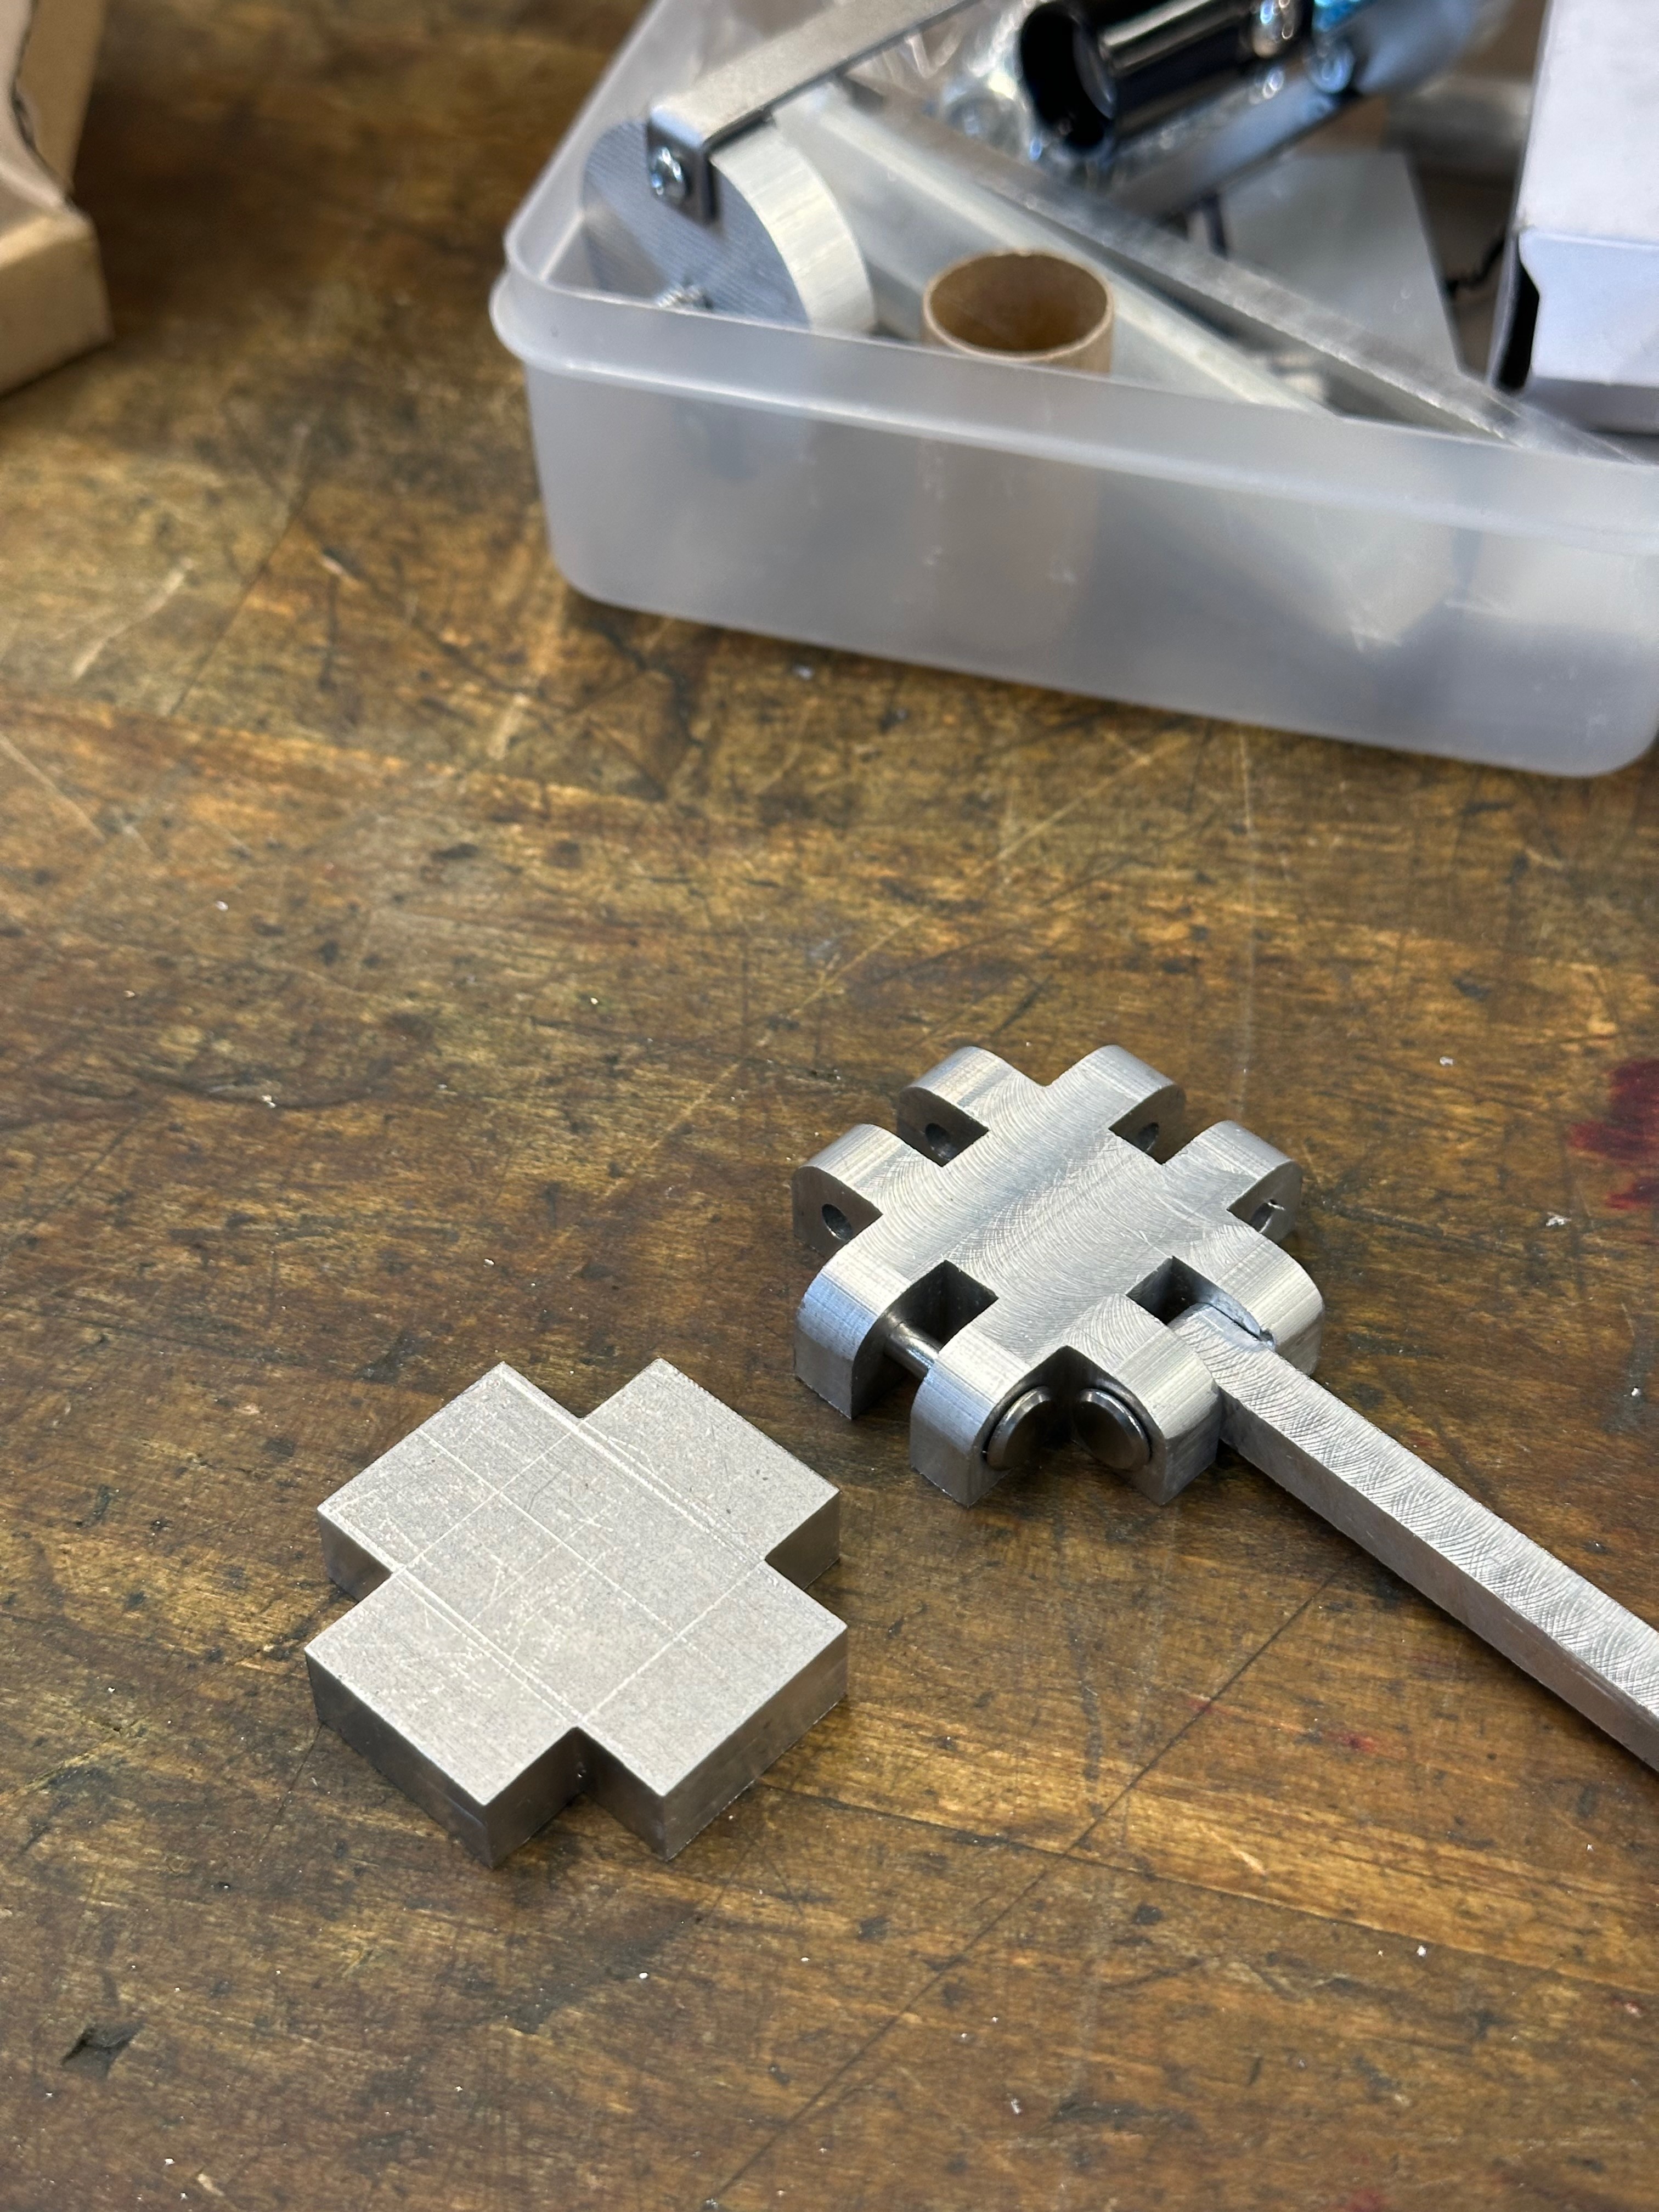
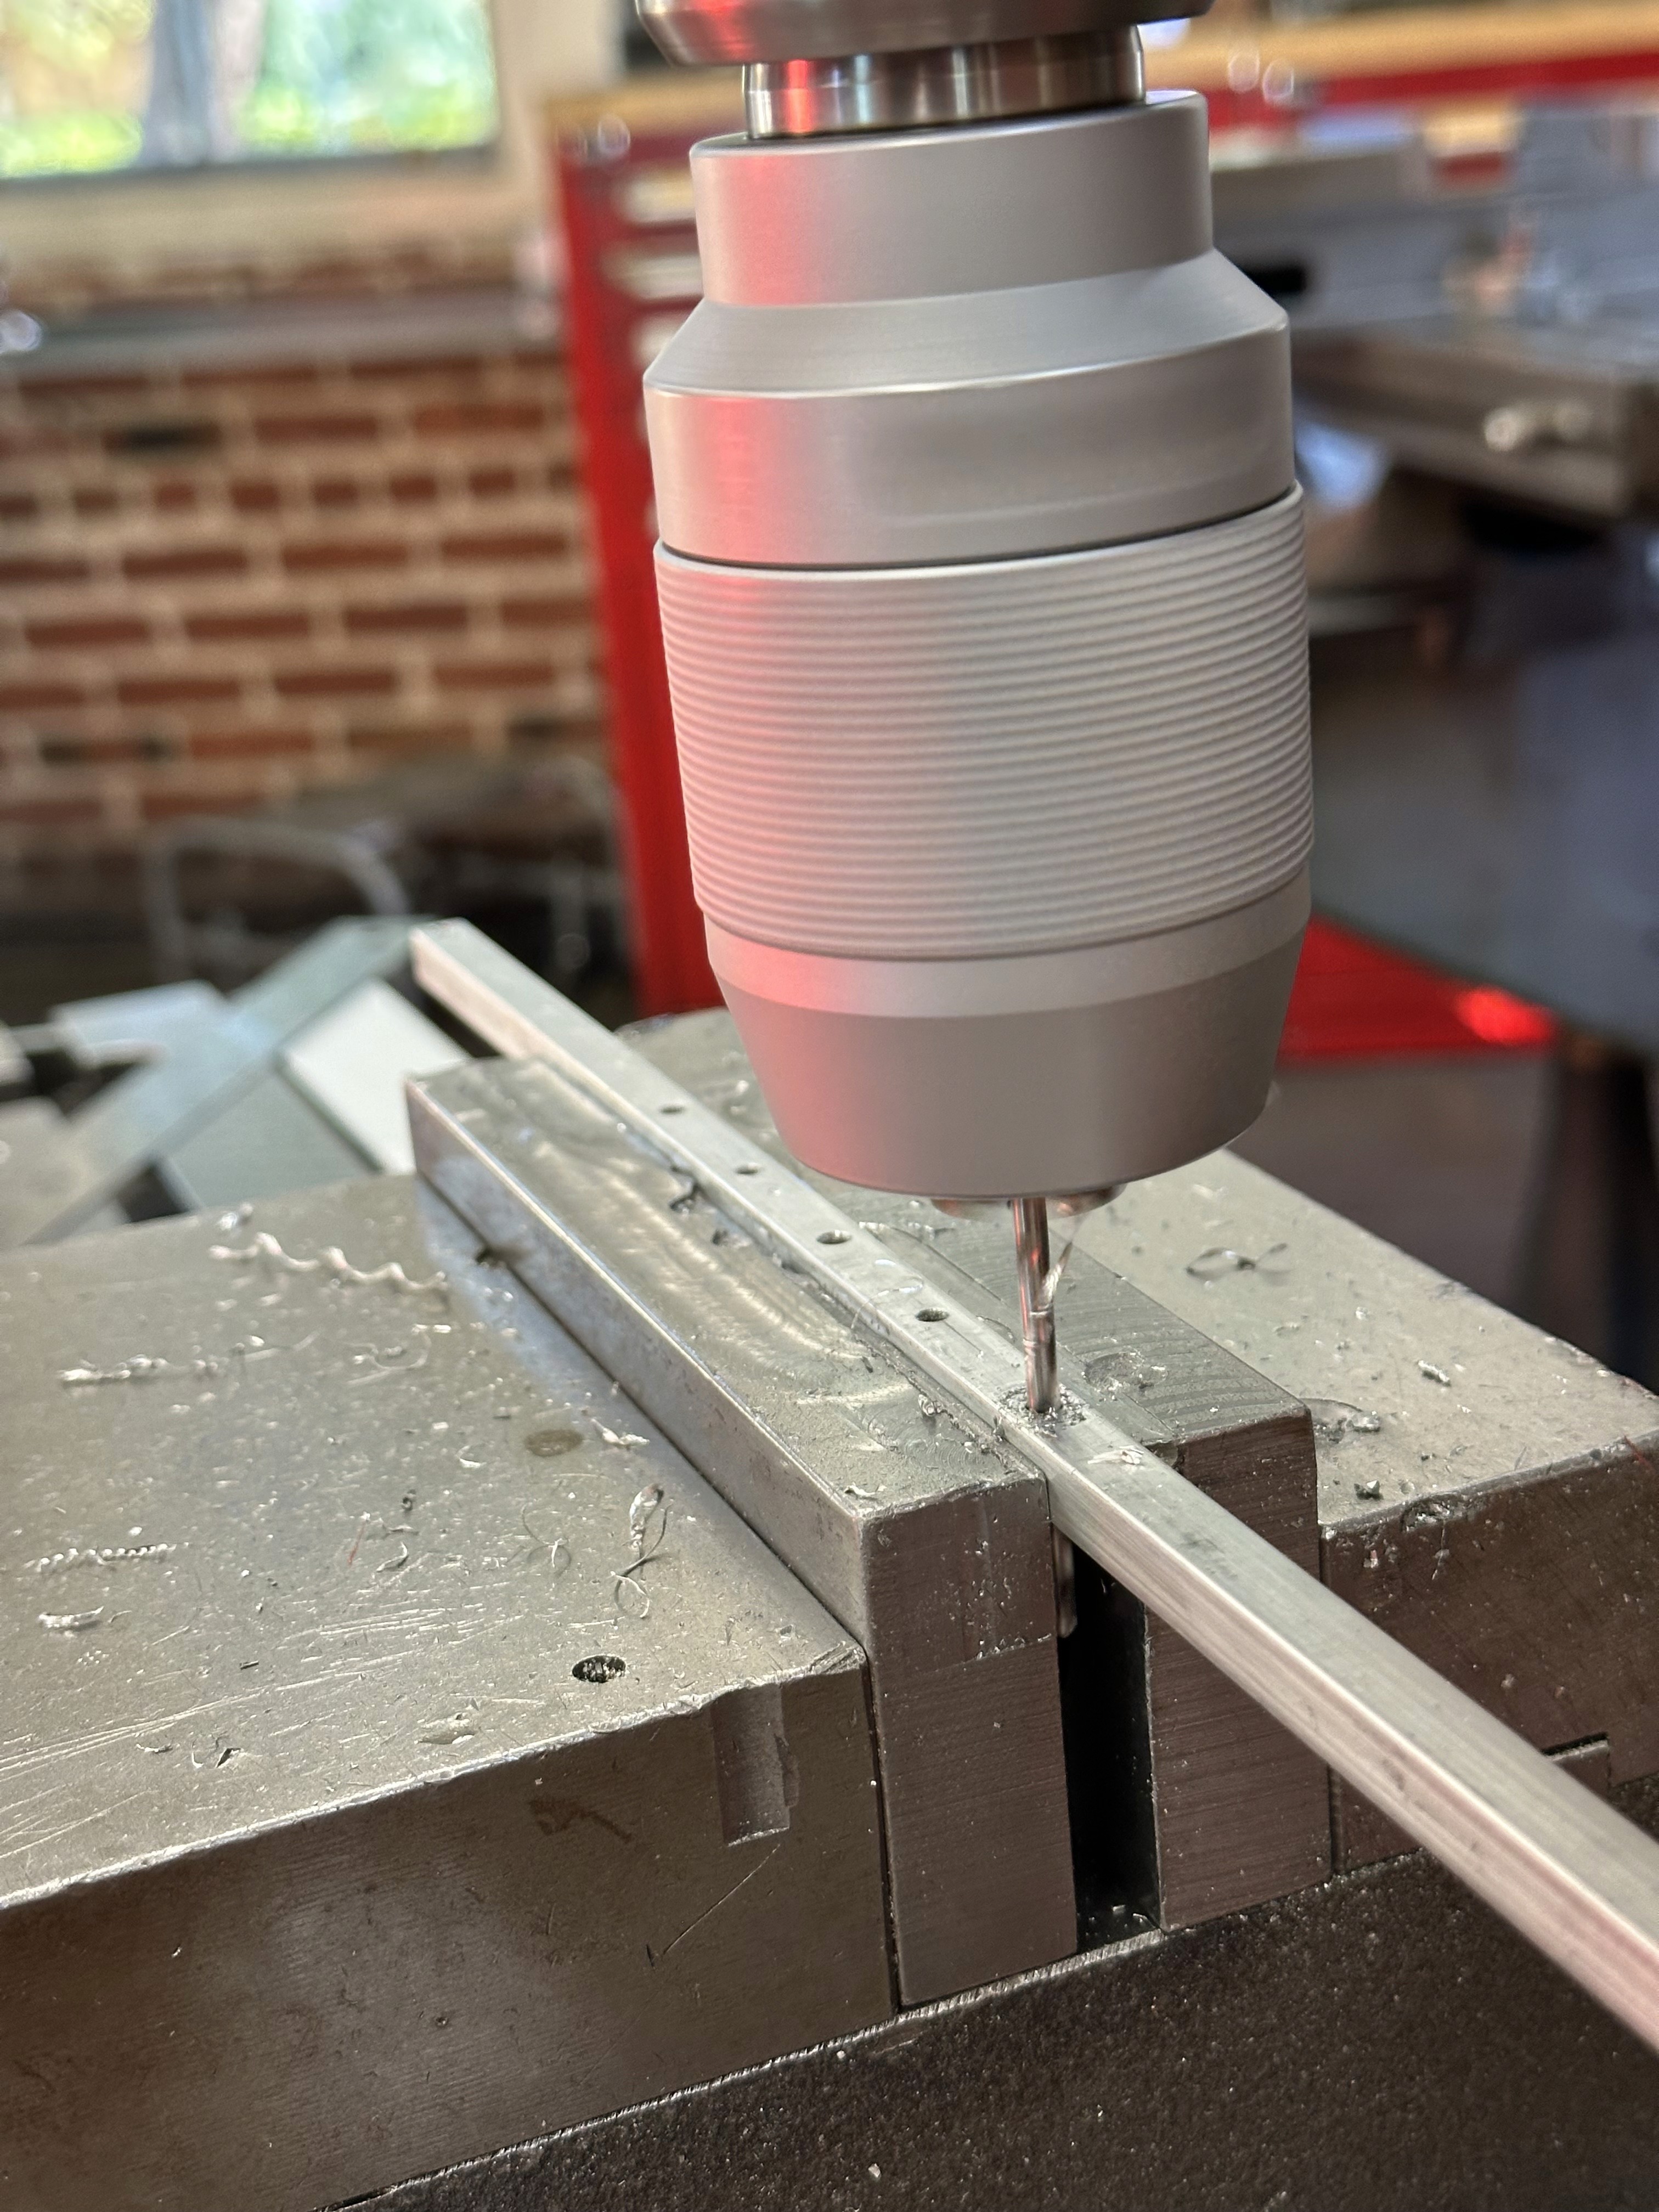
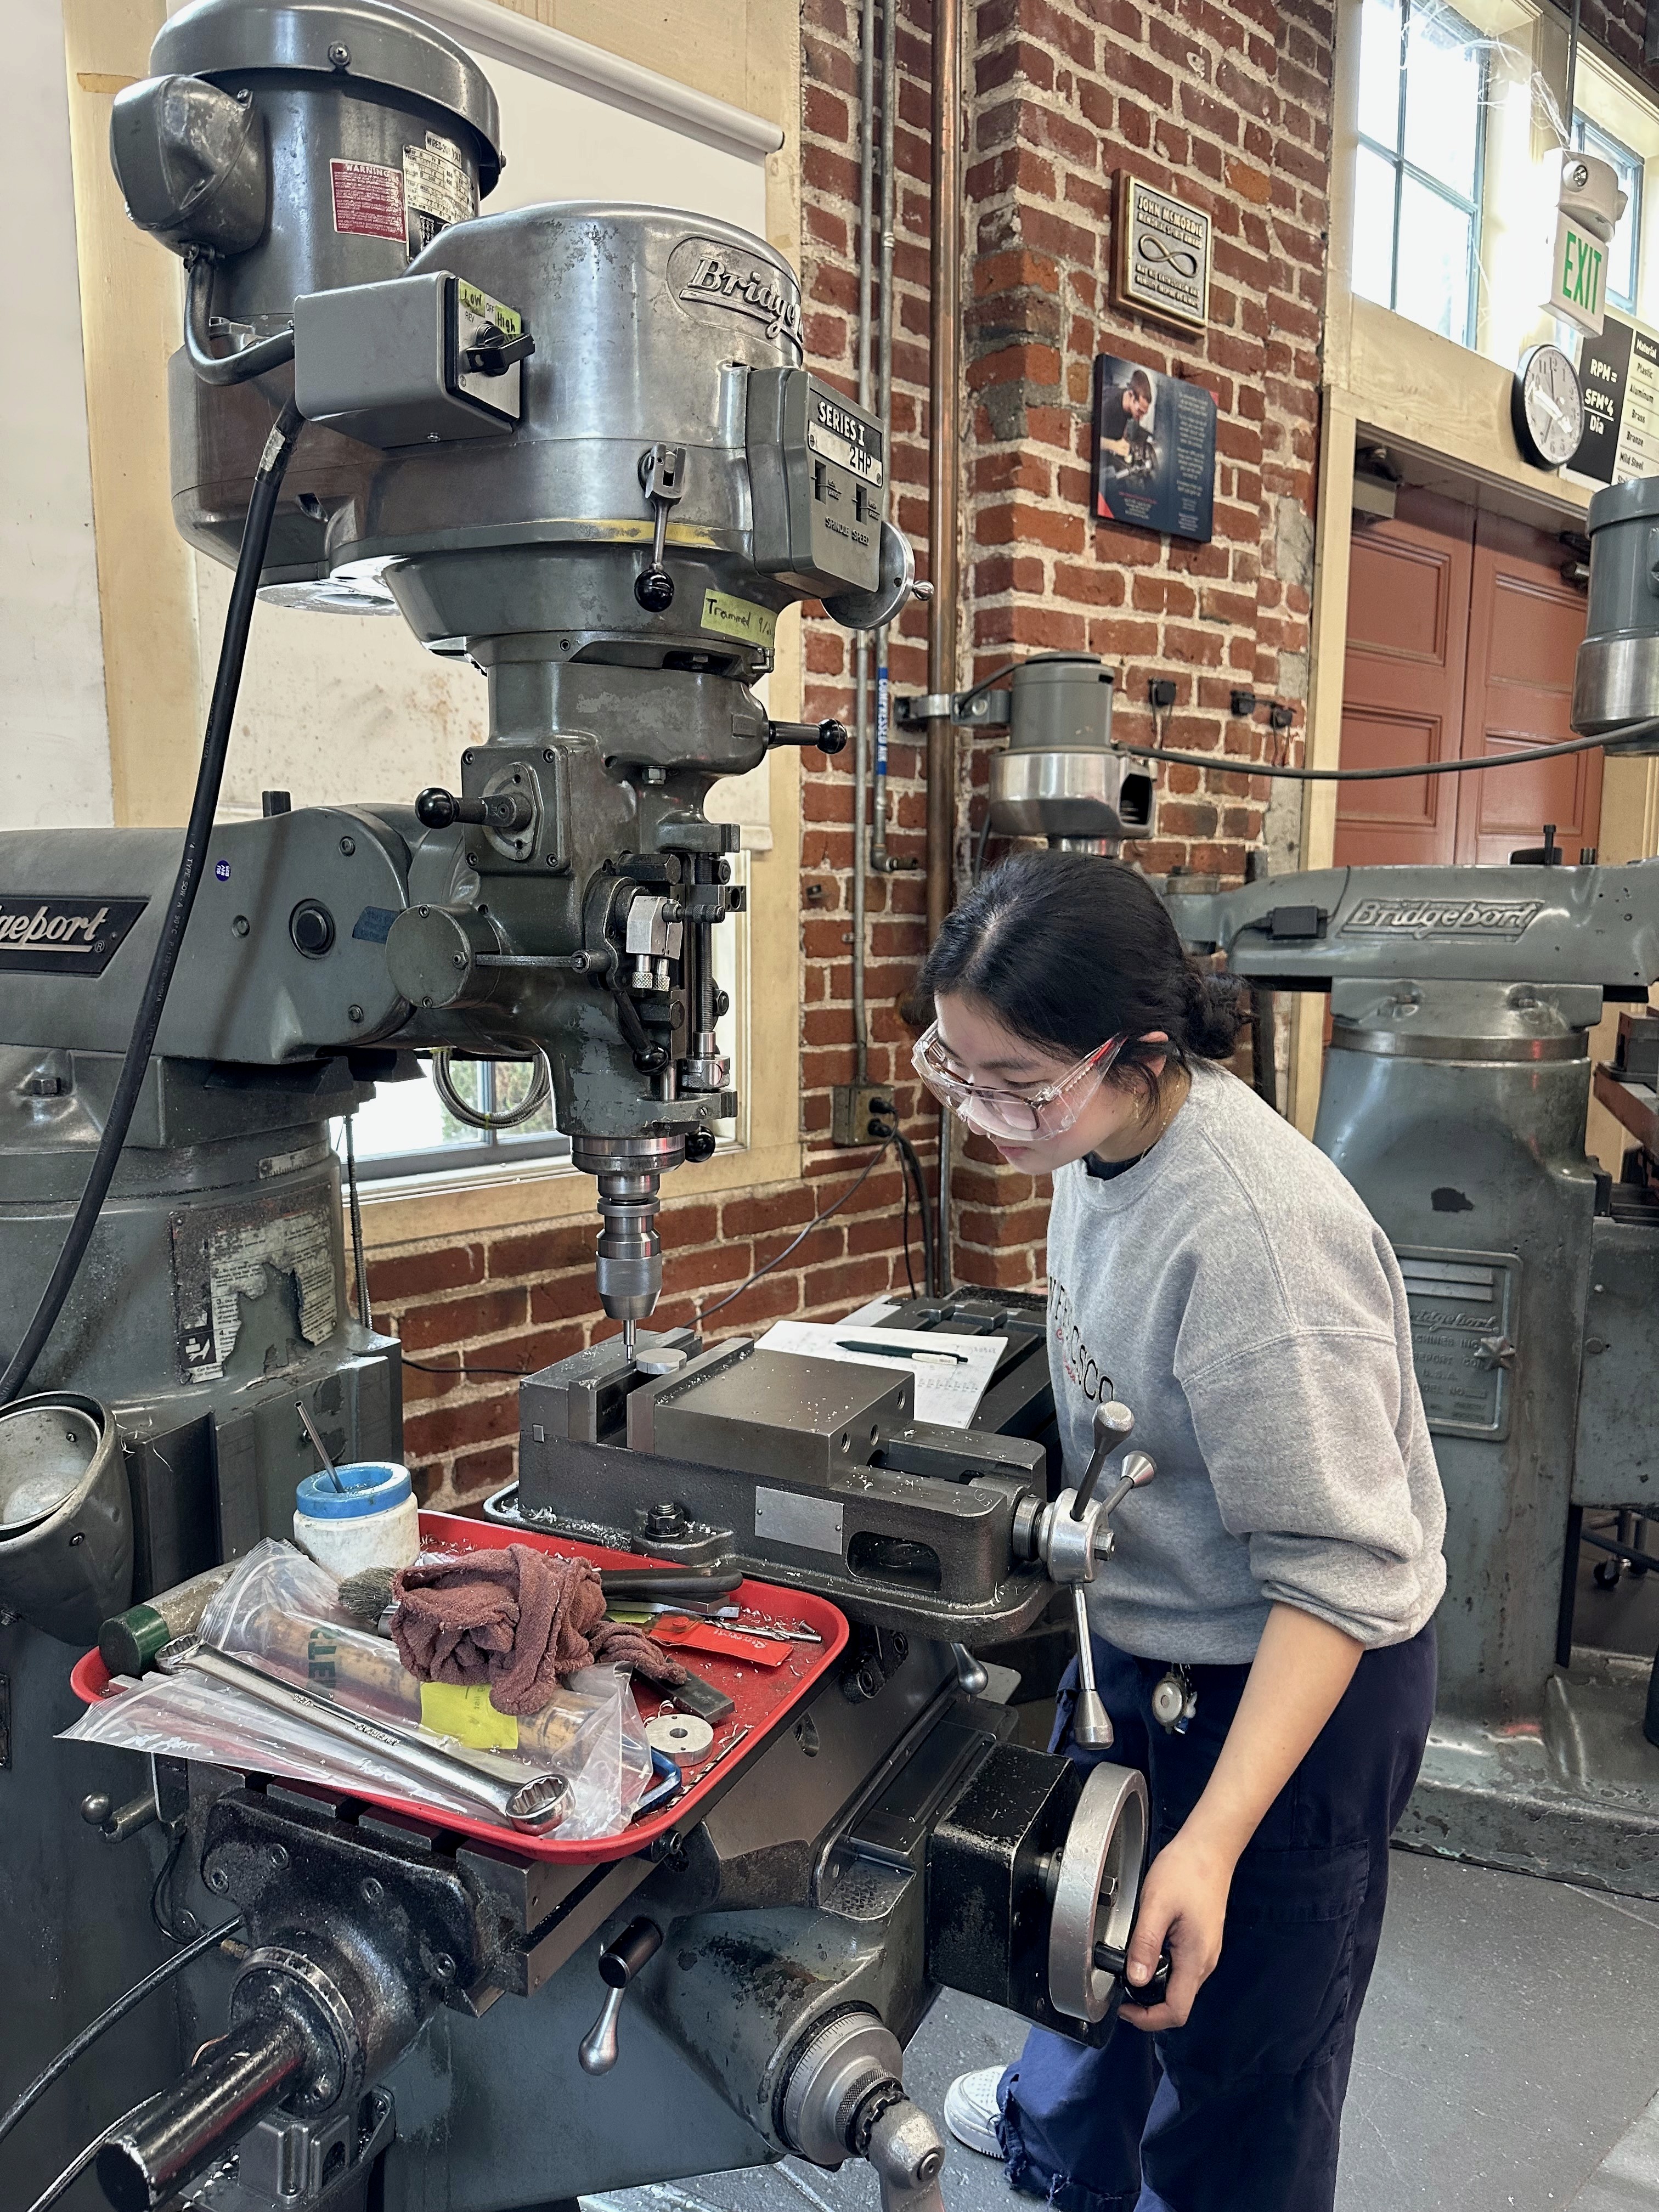
Machining
All parts were fabricated using a manual mill and lathe (aside from the short linkages, which were first cut on the waterjet). I used the following techniques across my parts:
Mill — Squaring up, facing, drilling, edge finding, corner rounding
Lathe — Turning, facing, drilling, tapping, external threading, auto-feeding
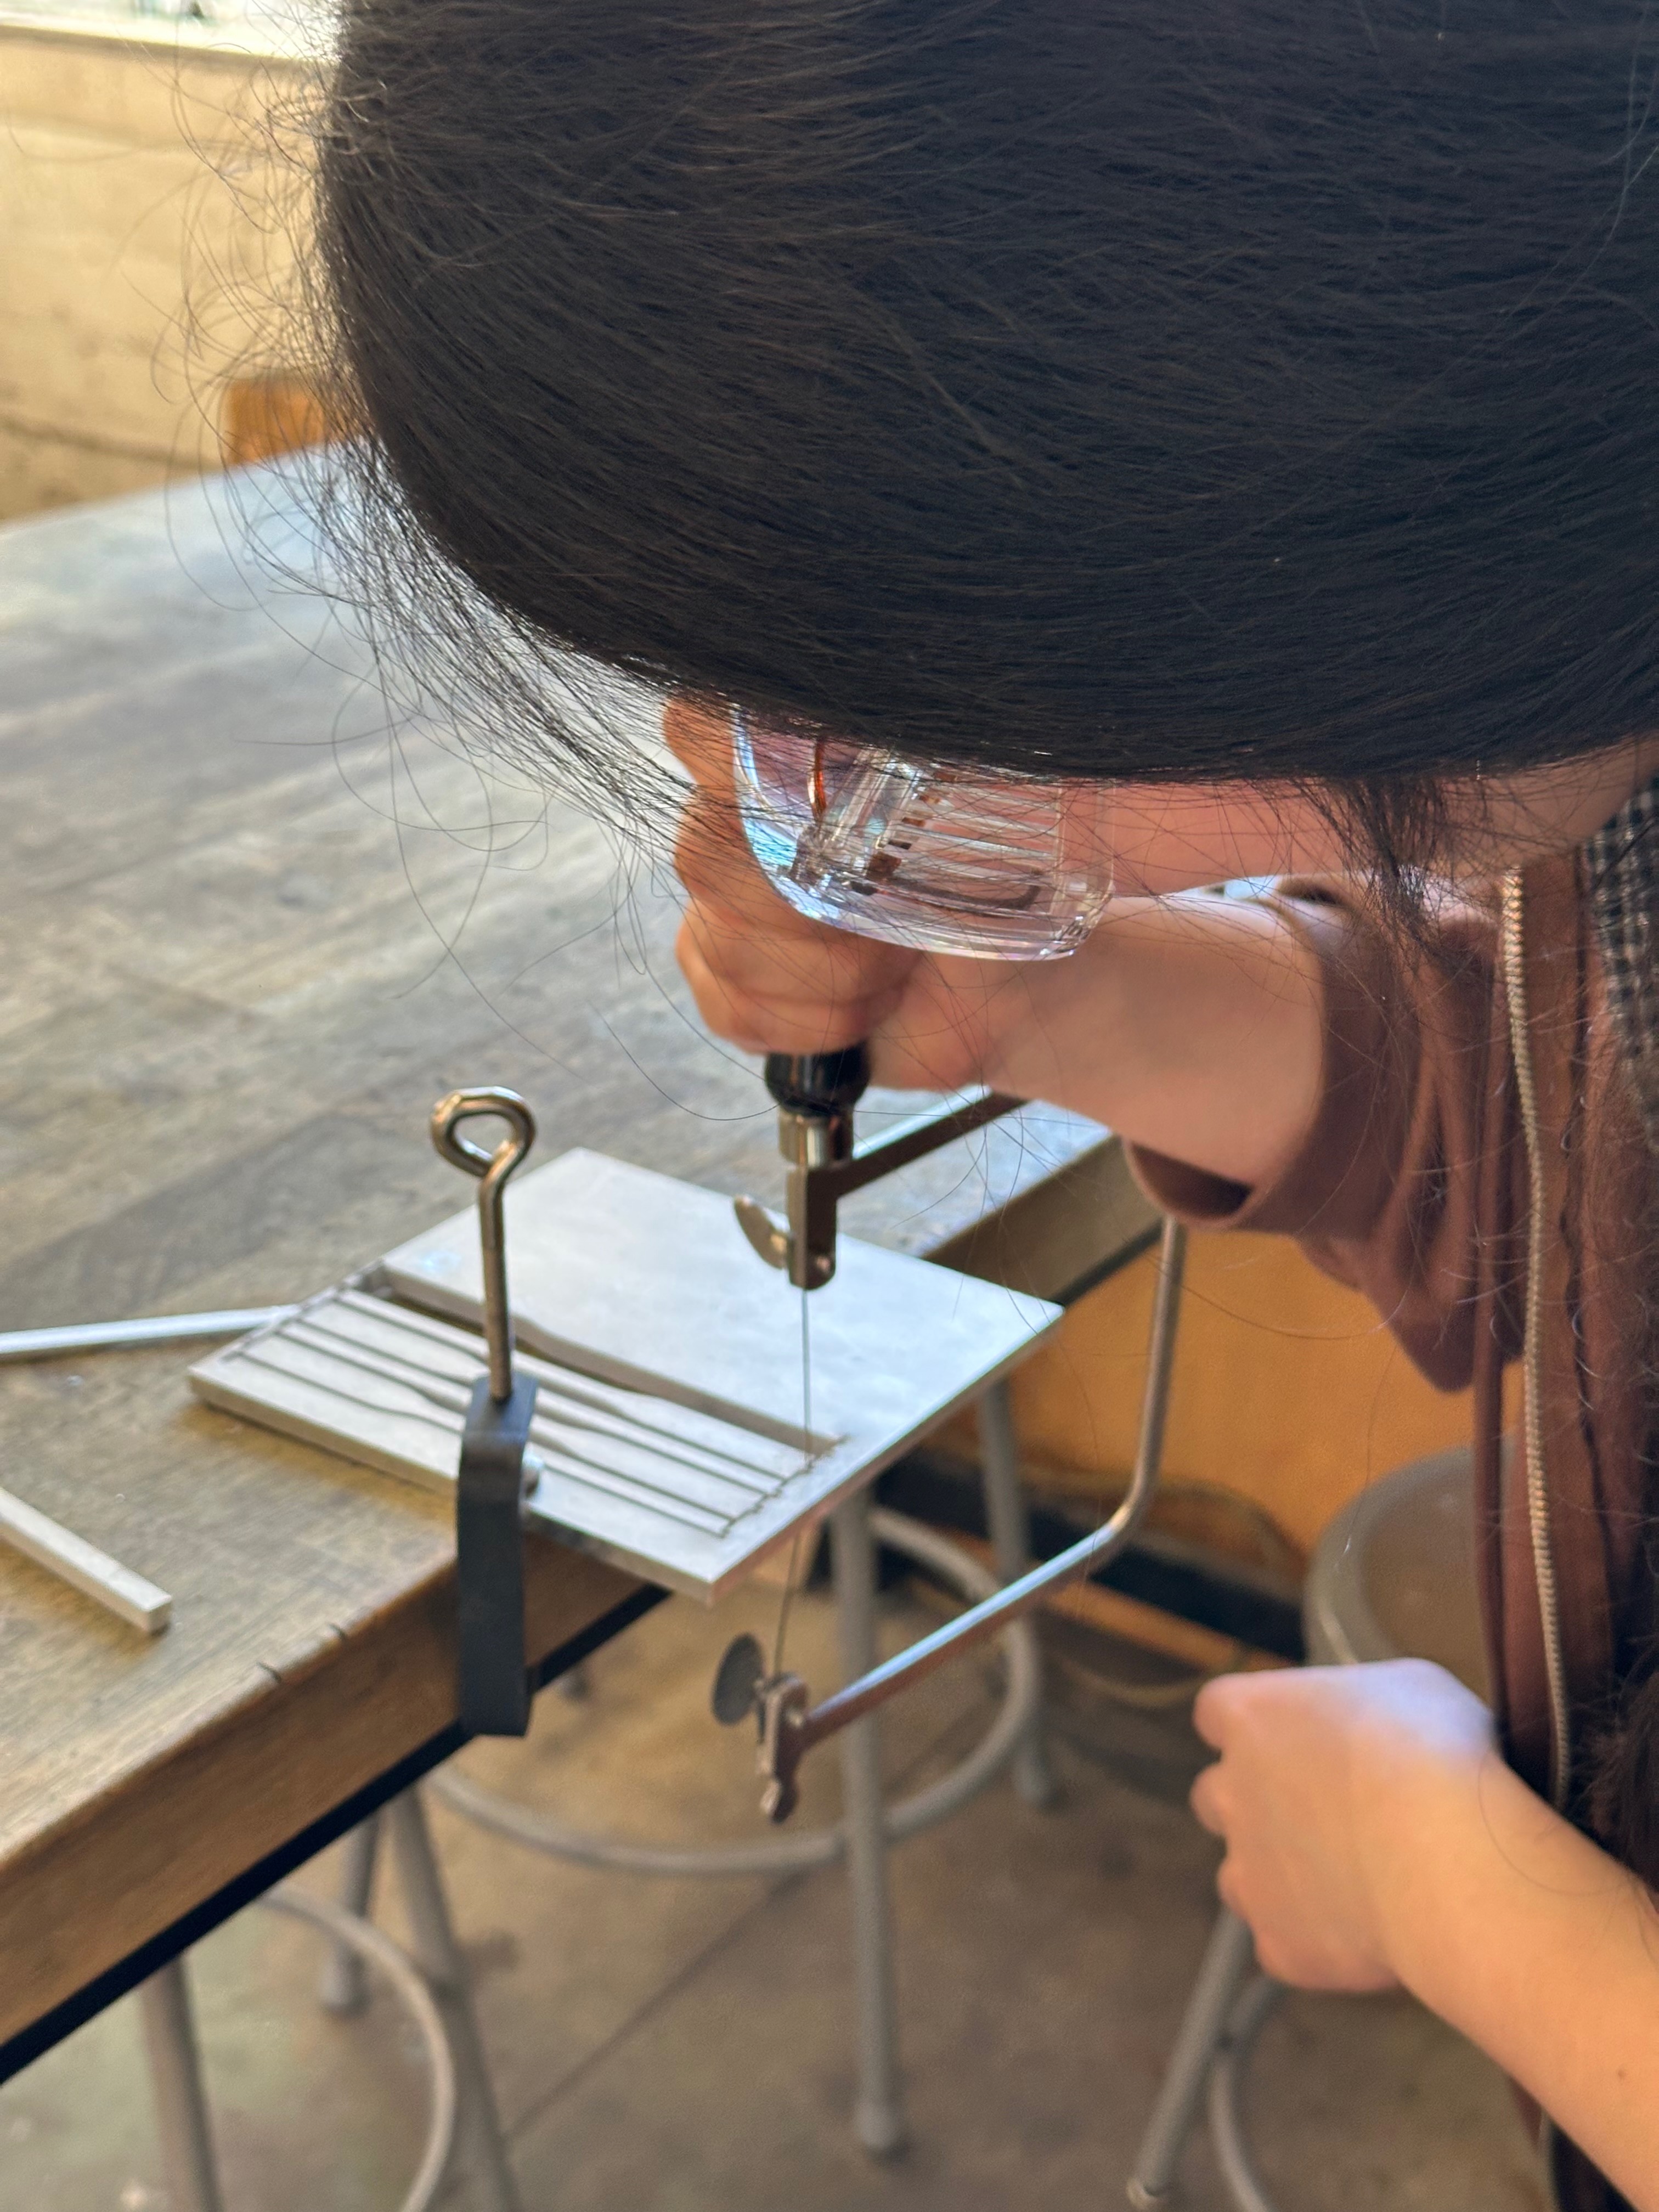
Additional Processes
Other processes I used for fabrication included waterjet cutting, sheet metal forming (hole puncher, corner notcher, finger brake), and woodworking (drill press). Photos of the fabrication process can be seen below.
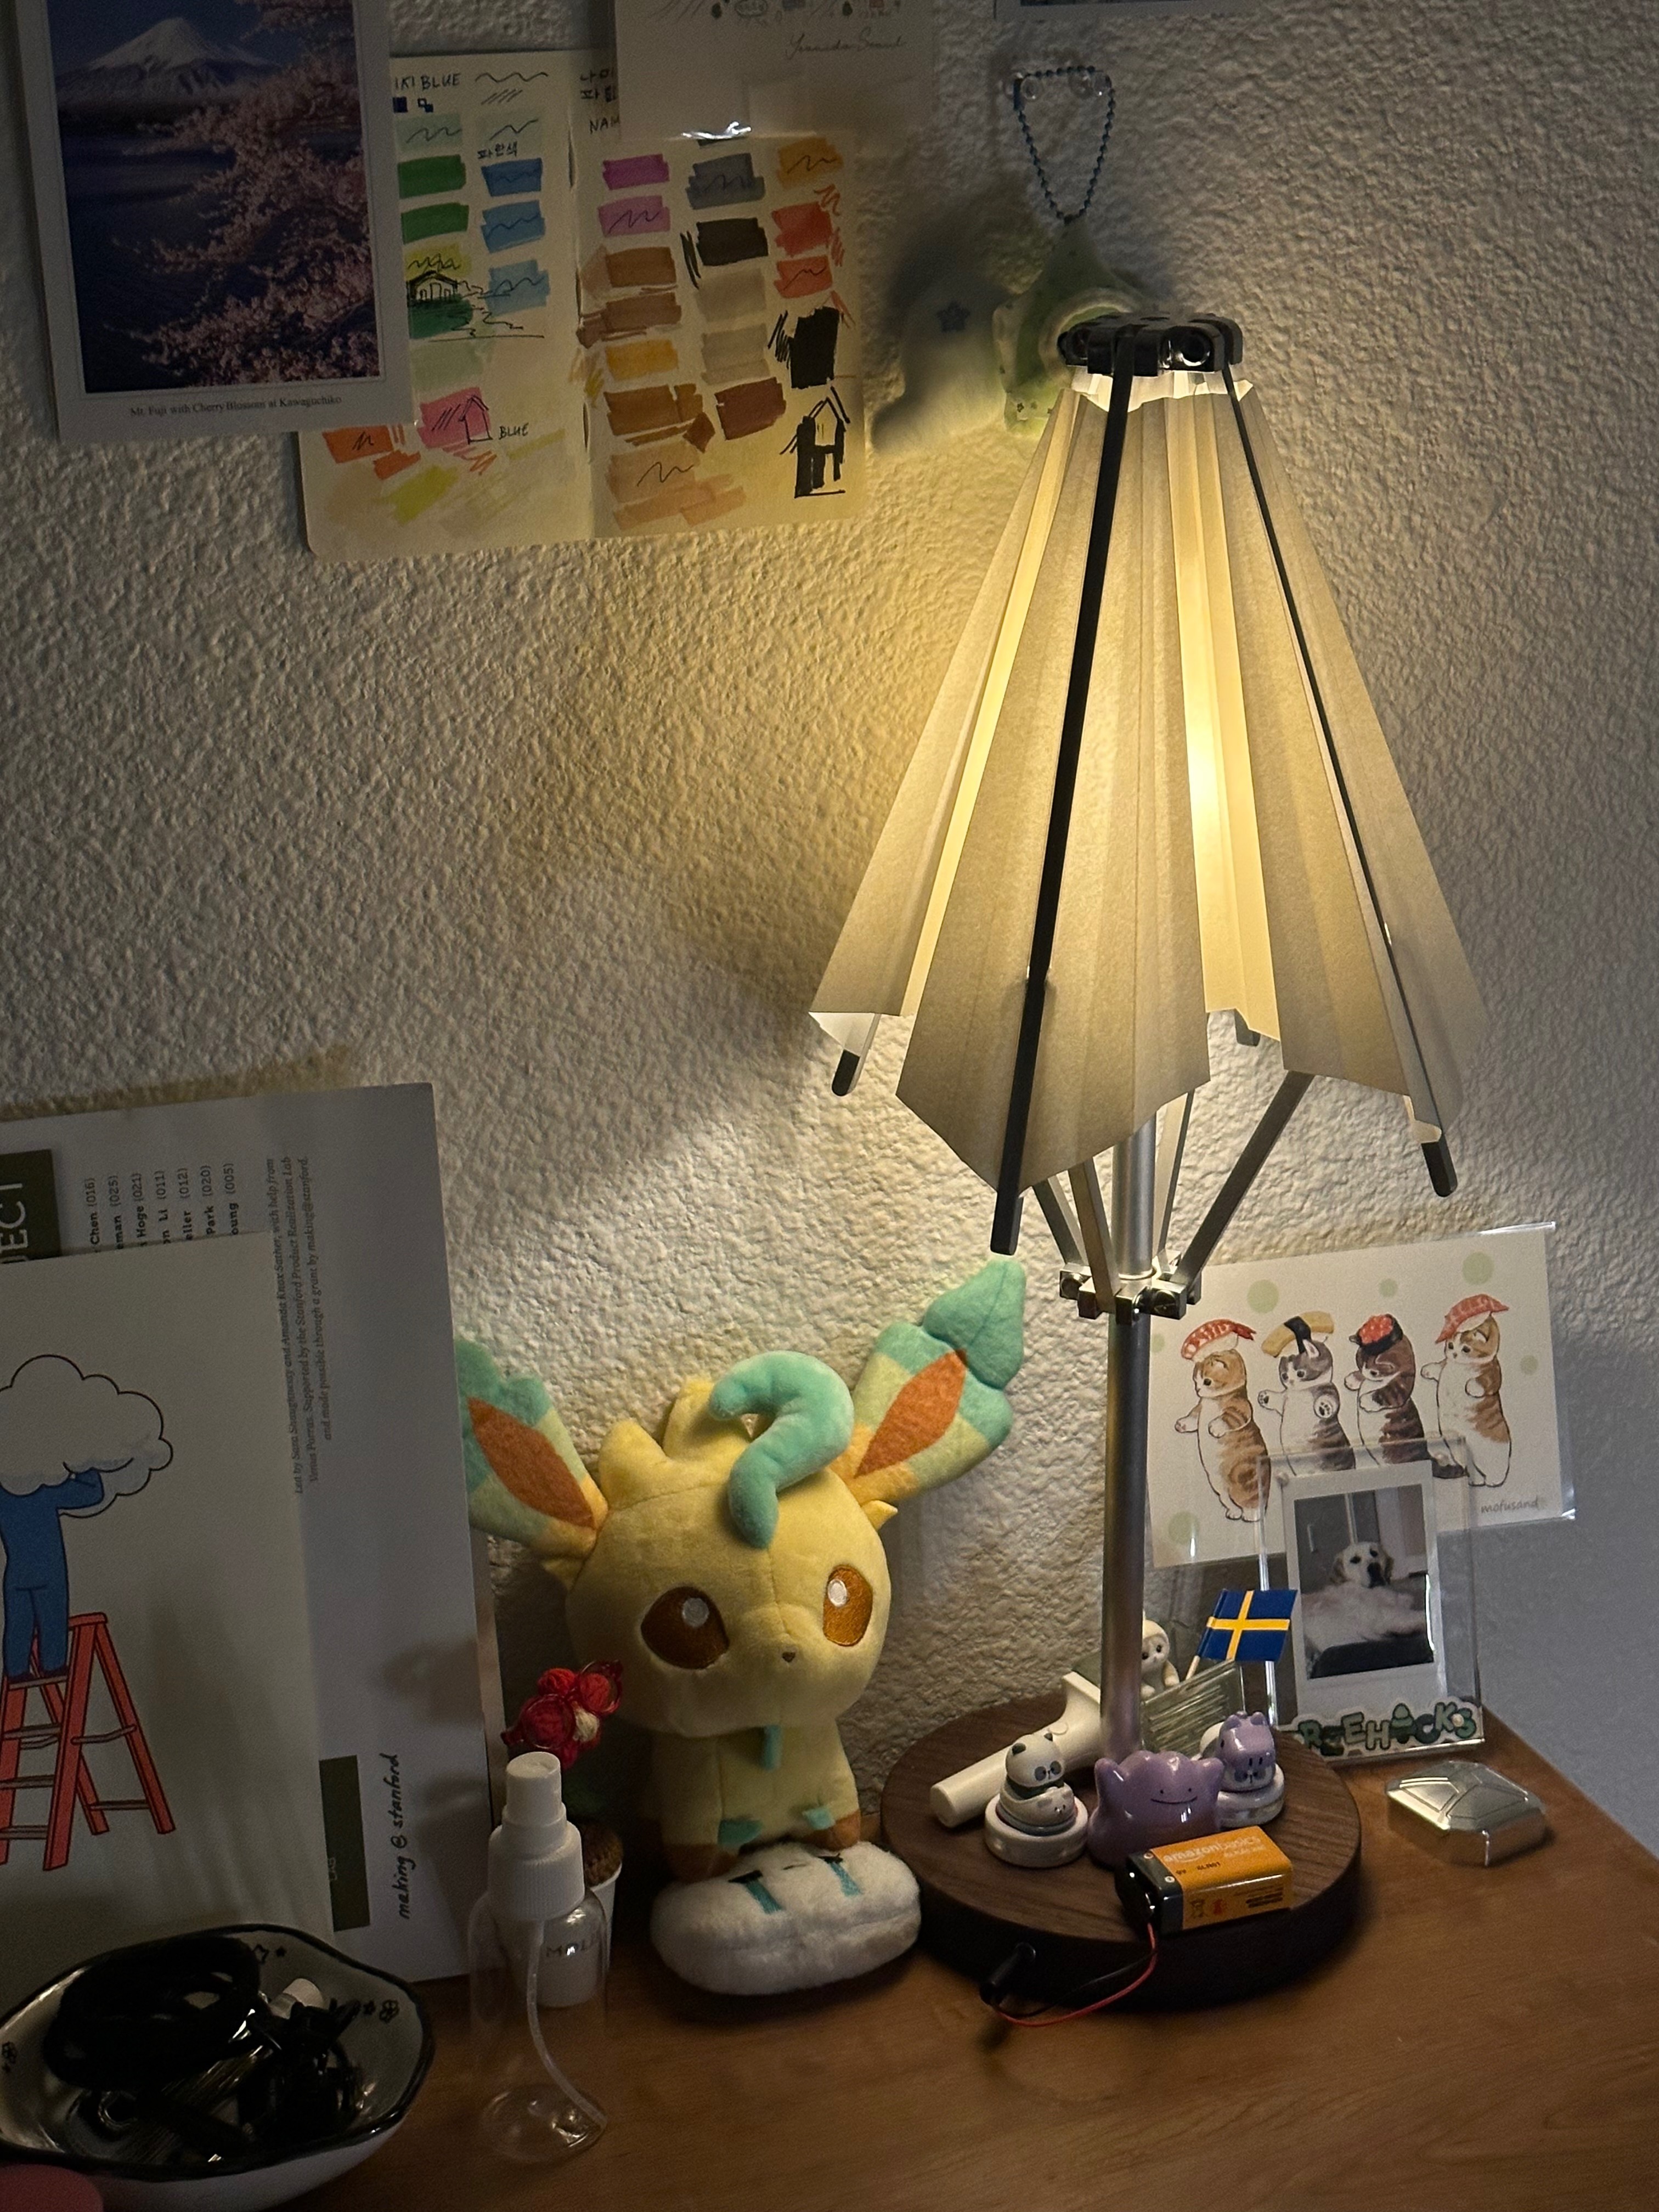
Electrical
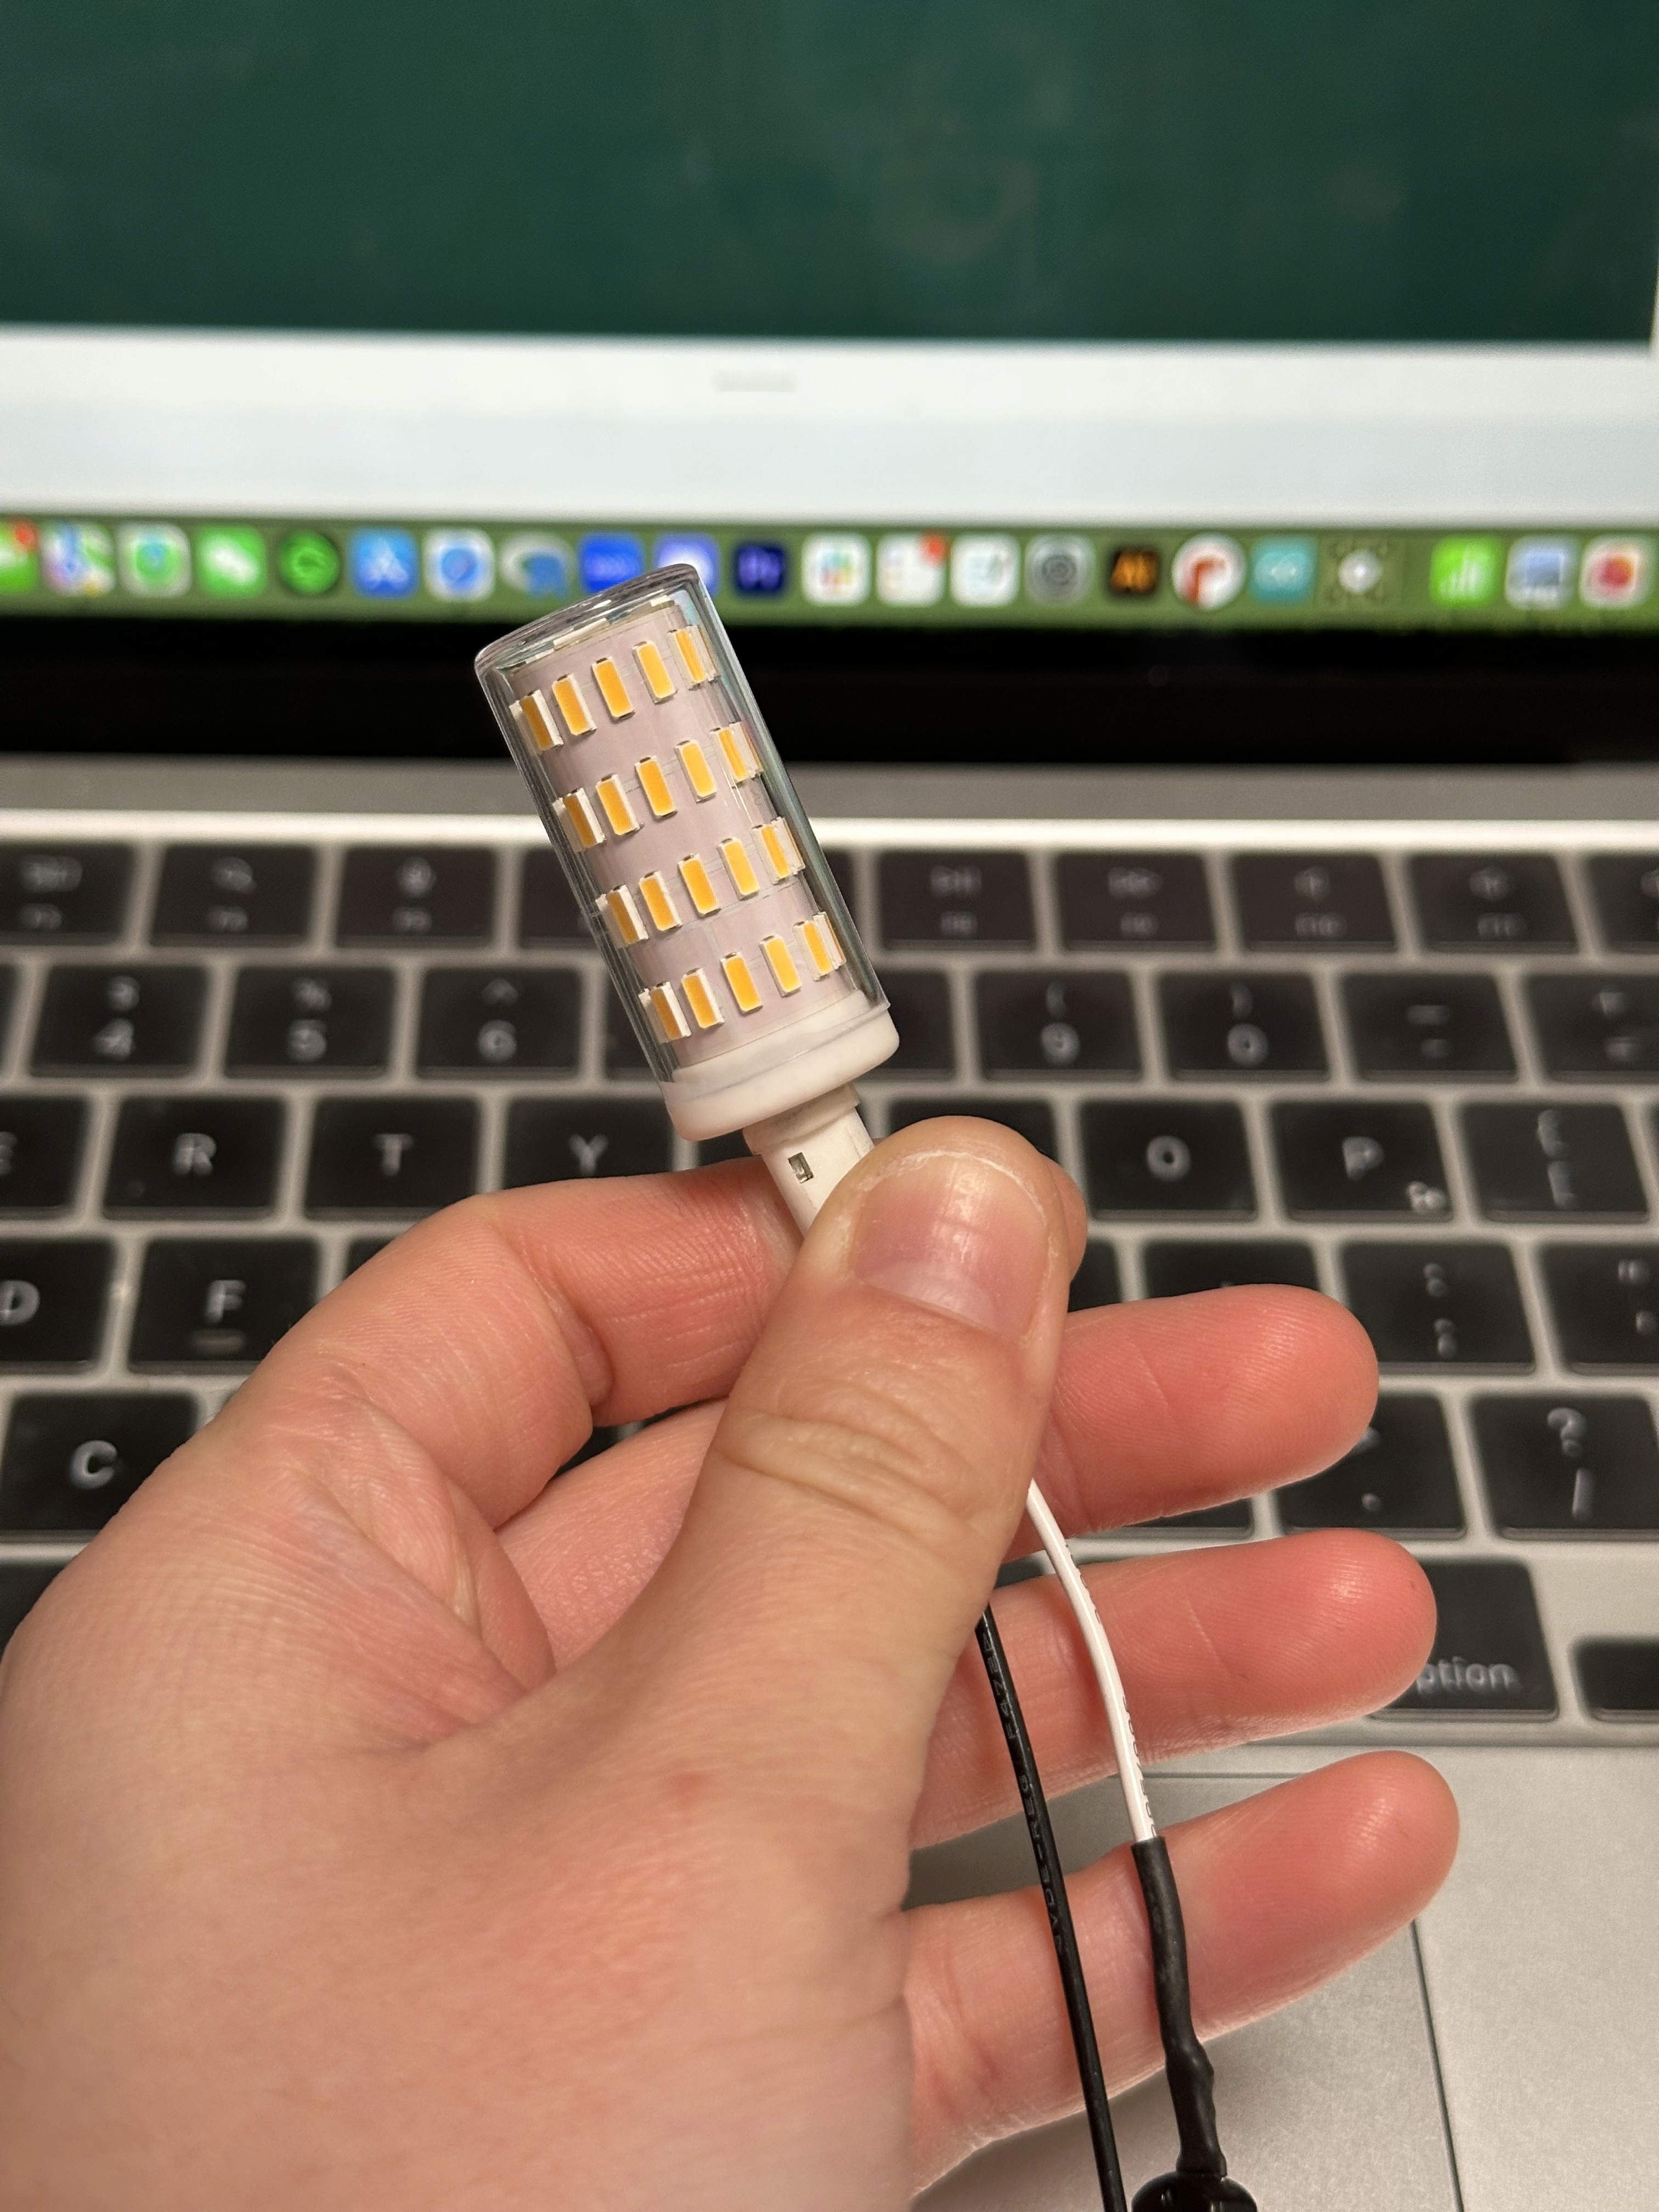
Within the wooden base, I created a simple circuit to allow the lamp to be illuminated. The circuit from top to bottom is as follows:
G4 LED, 5V -> G4 Ceramic Socket -> Female DC Barrel Jack -> External Switch (Male DC Barrel Jack) -> AC/DC Wall Adapter (DC 12V Output)
I ran the wires from the G4 ceramic socket through the tube and down into the wooden base, where I hand-chiseled a compartment for the DC barrel jack, which allows Parasol to be unplugged and conveniently transported.
Challenges
Making a large volume of parts — Consistency when making multiples, proper scoping, keeping track of many loose pieces
Constant redesign & re-dimensioning — Careful planning was required, as I could not fully assemble and test the lamp until I completed the fabrication of all of my parts
Obtaining the correct stock & hardware — Working within size constraints (tube must accommodate wires), hardware must fit careful tolerances (hole sizes, length of binding barrels)
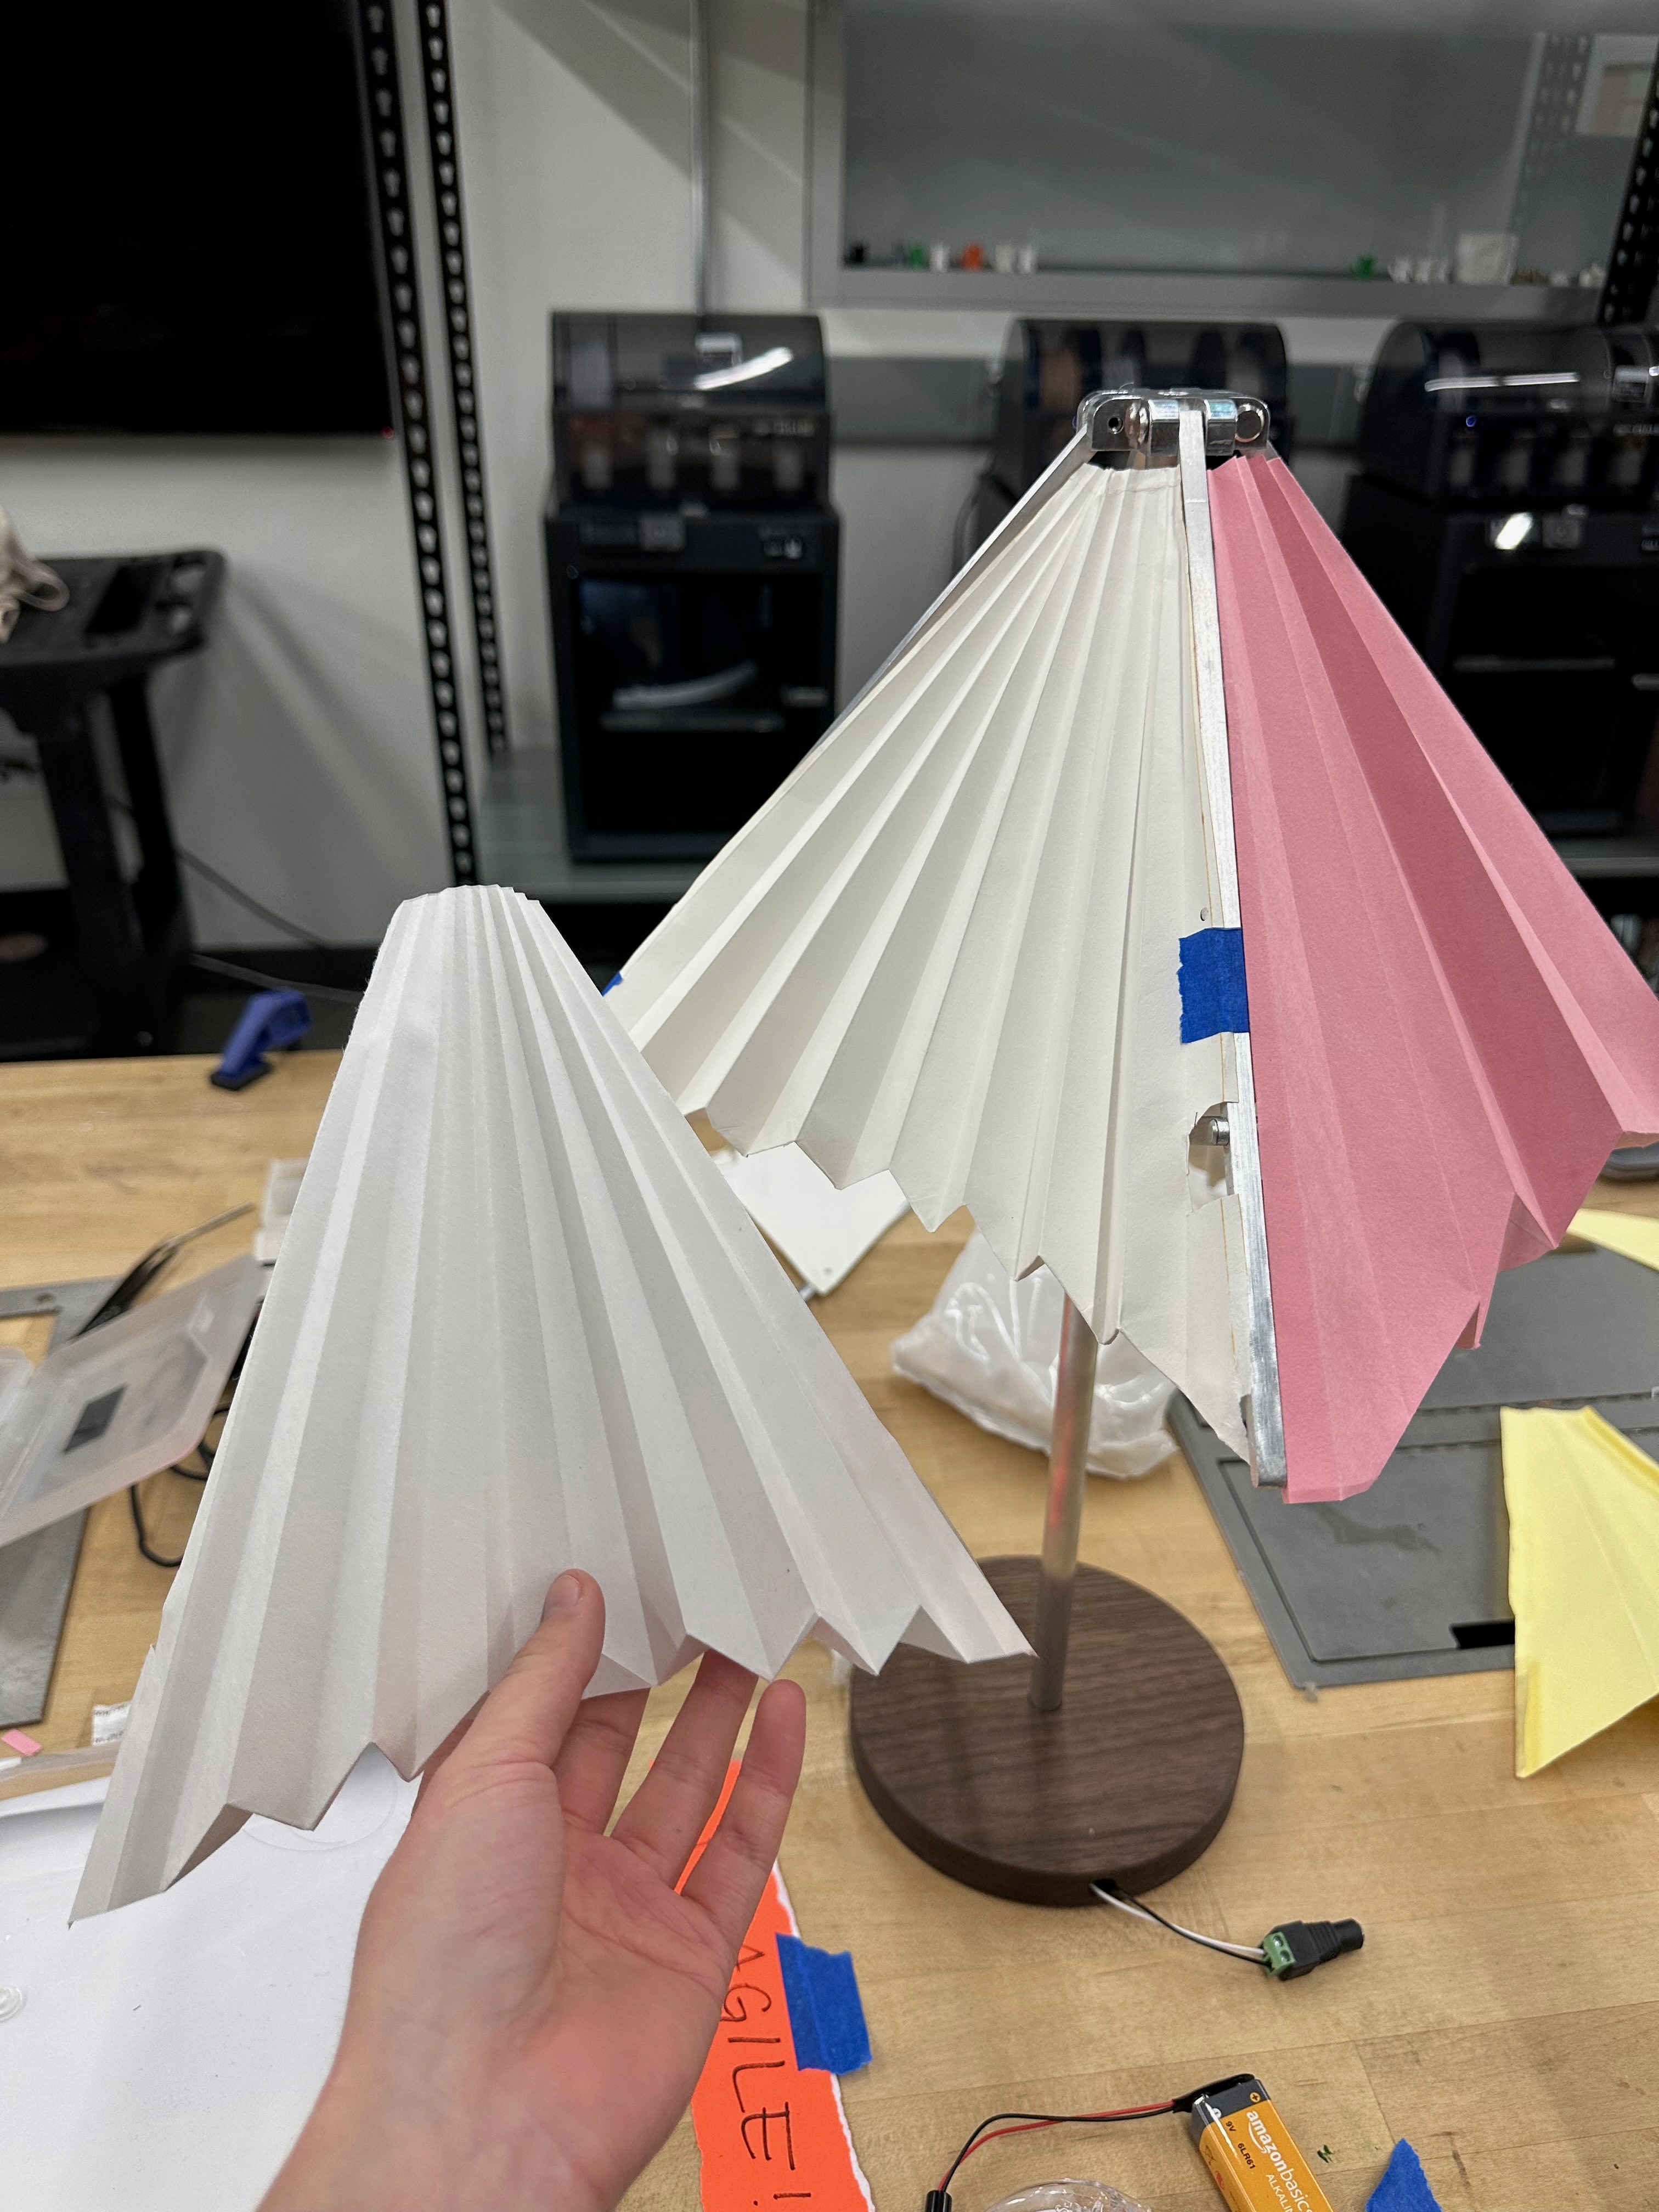
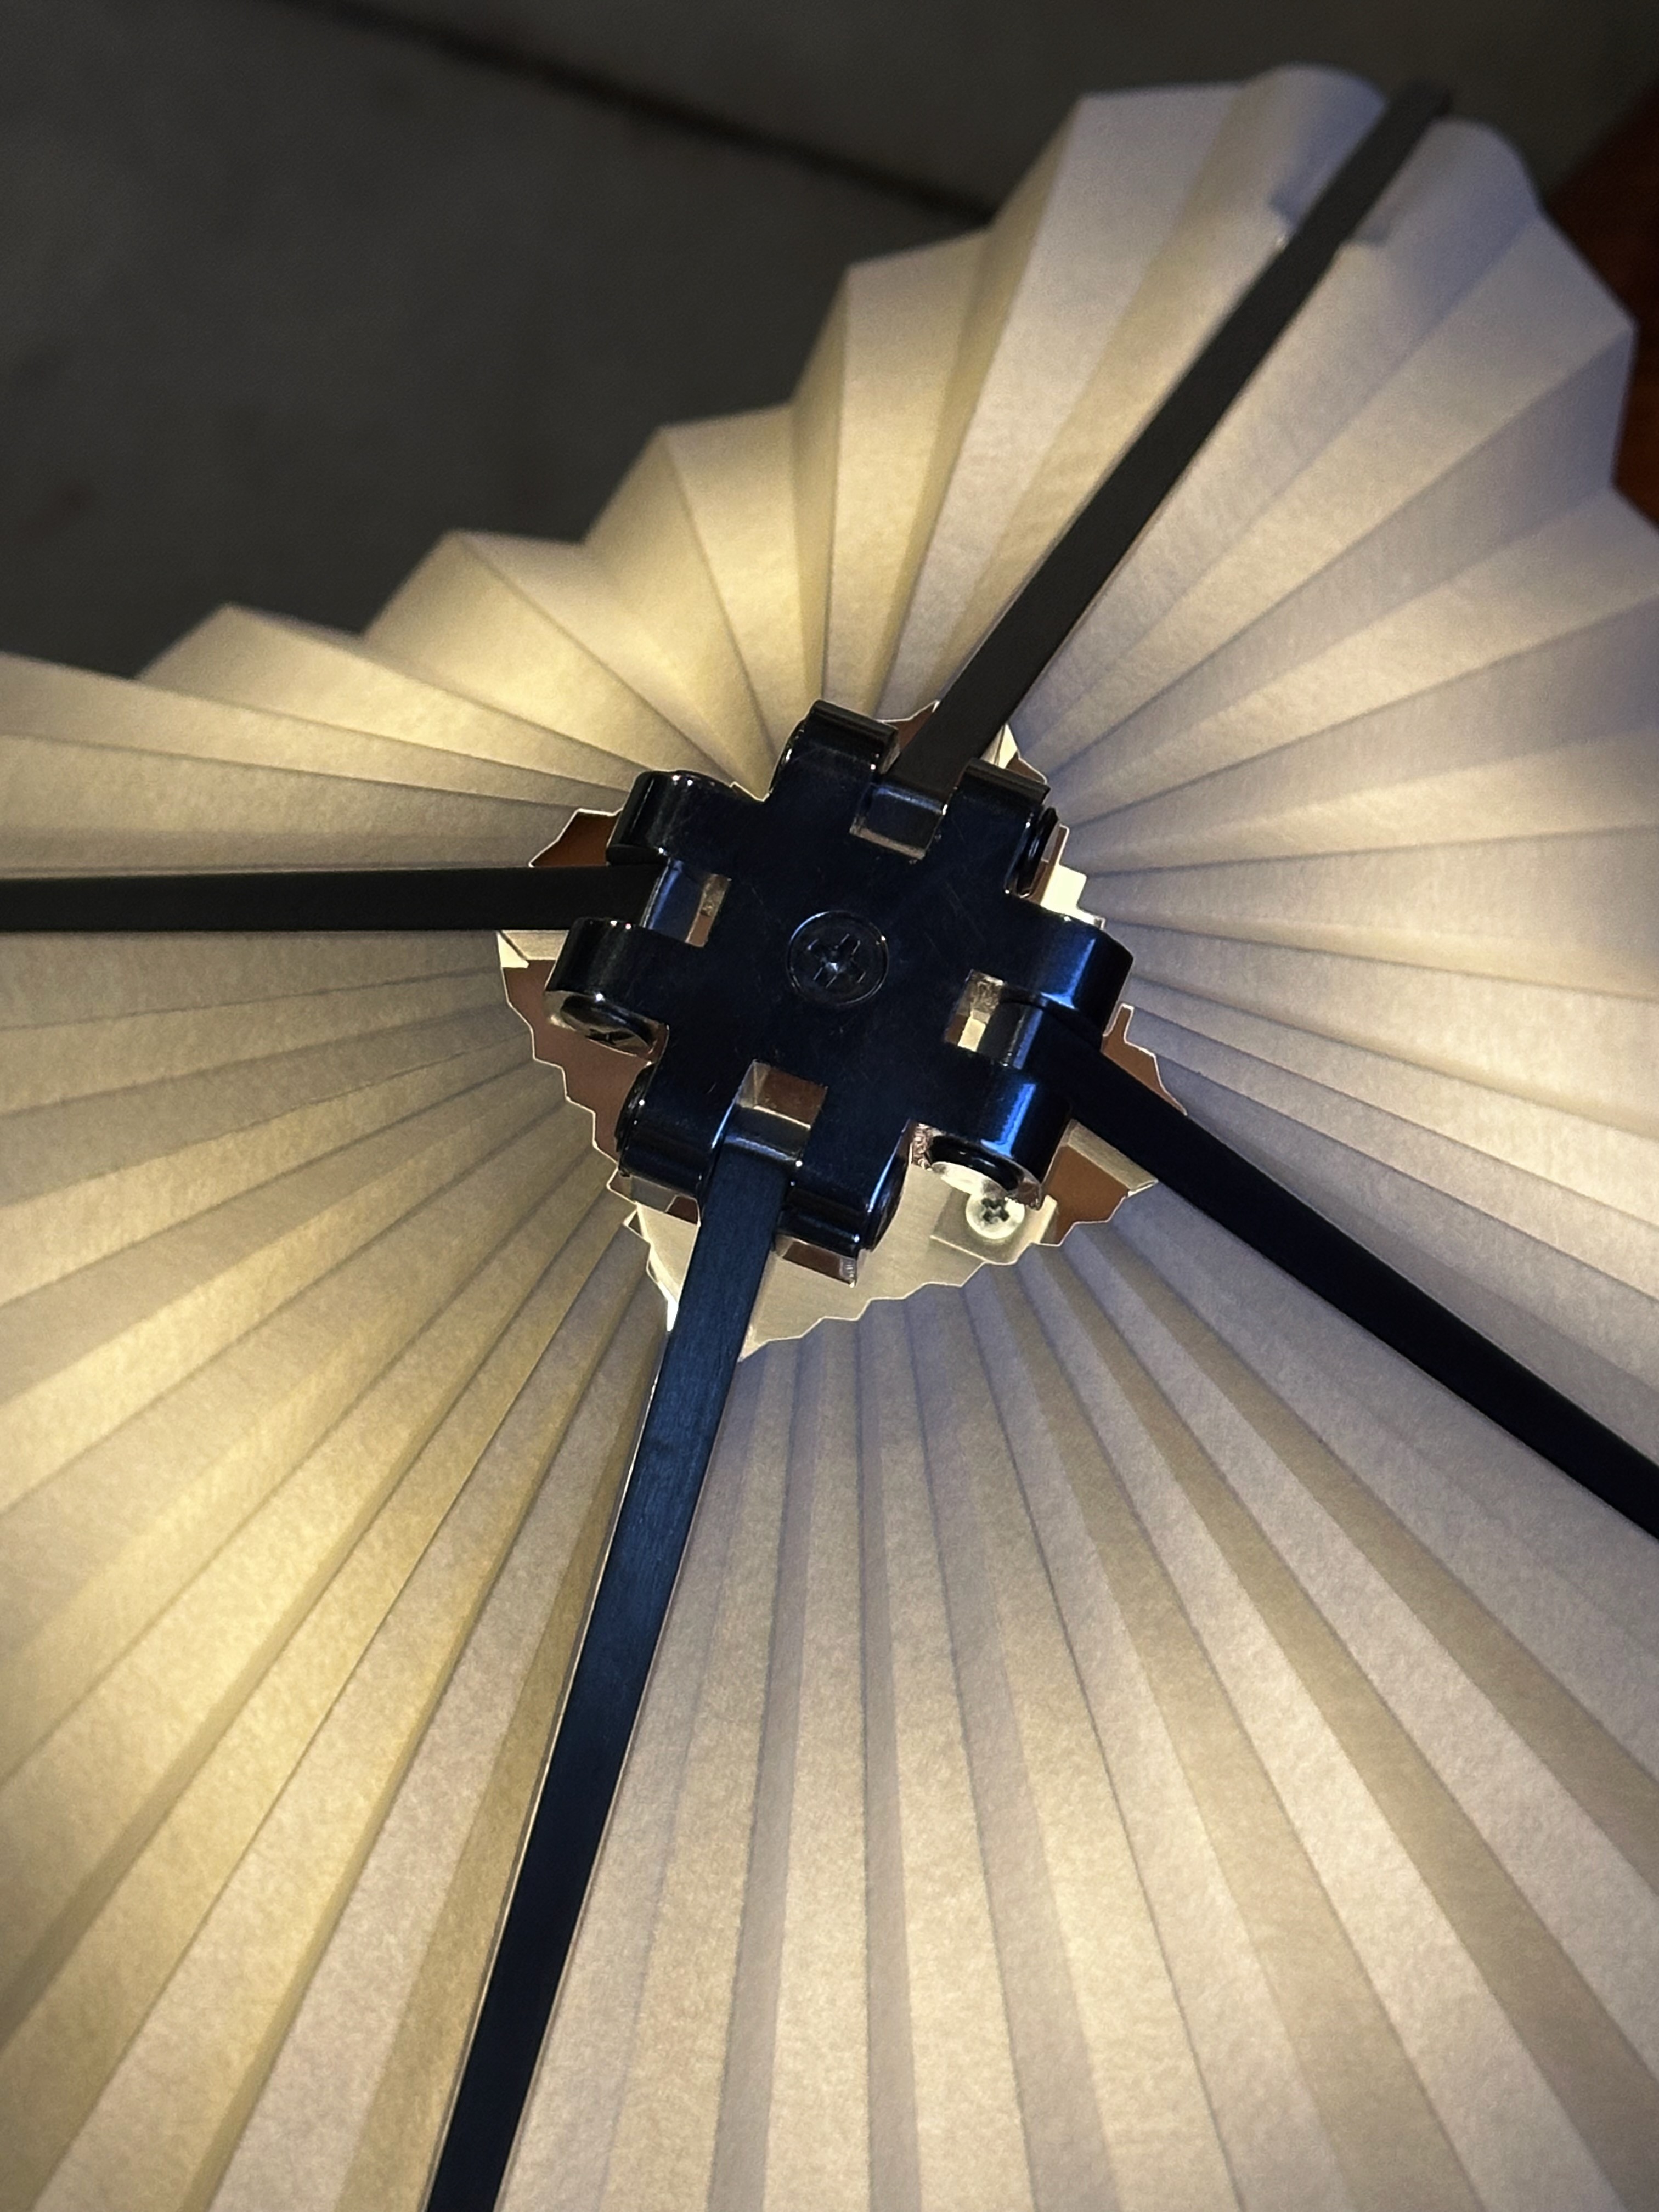
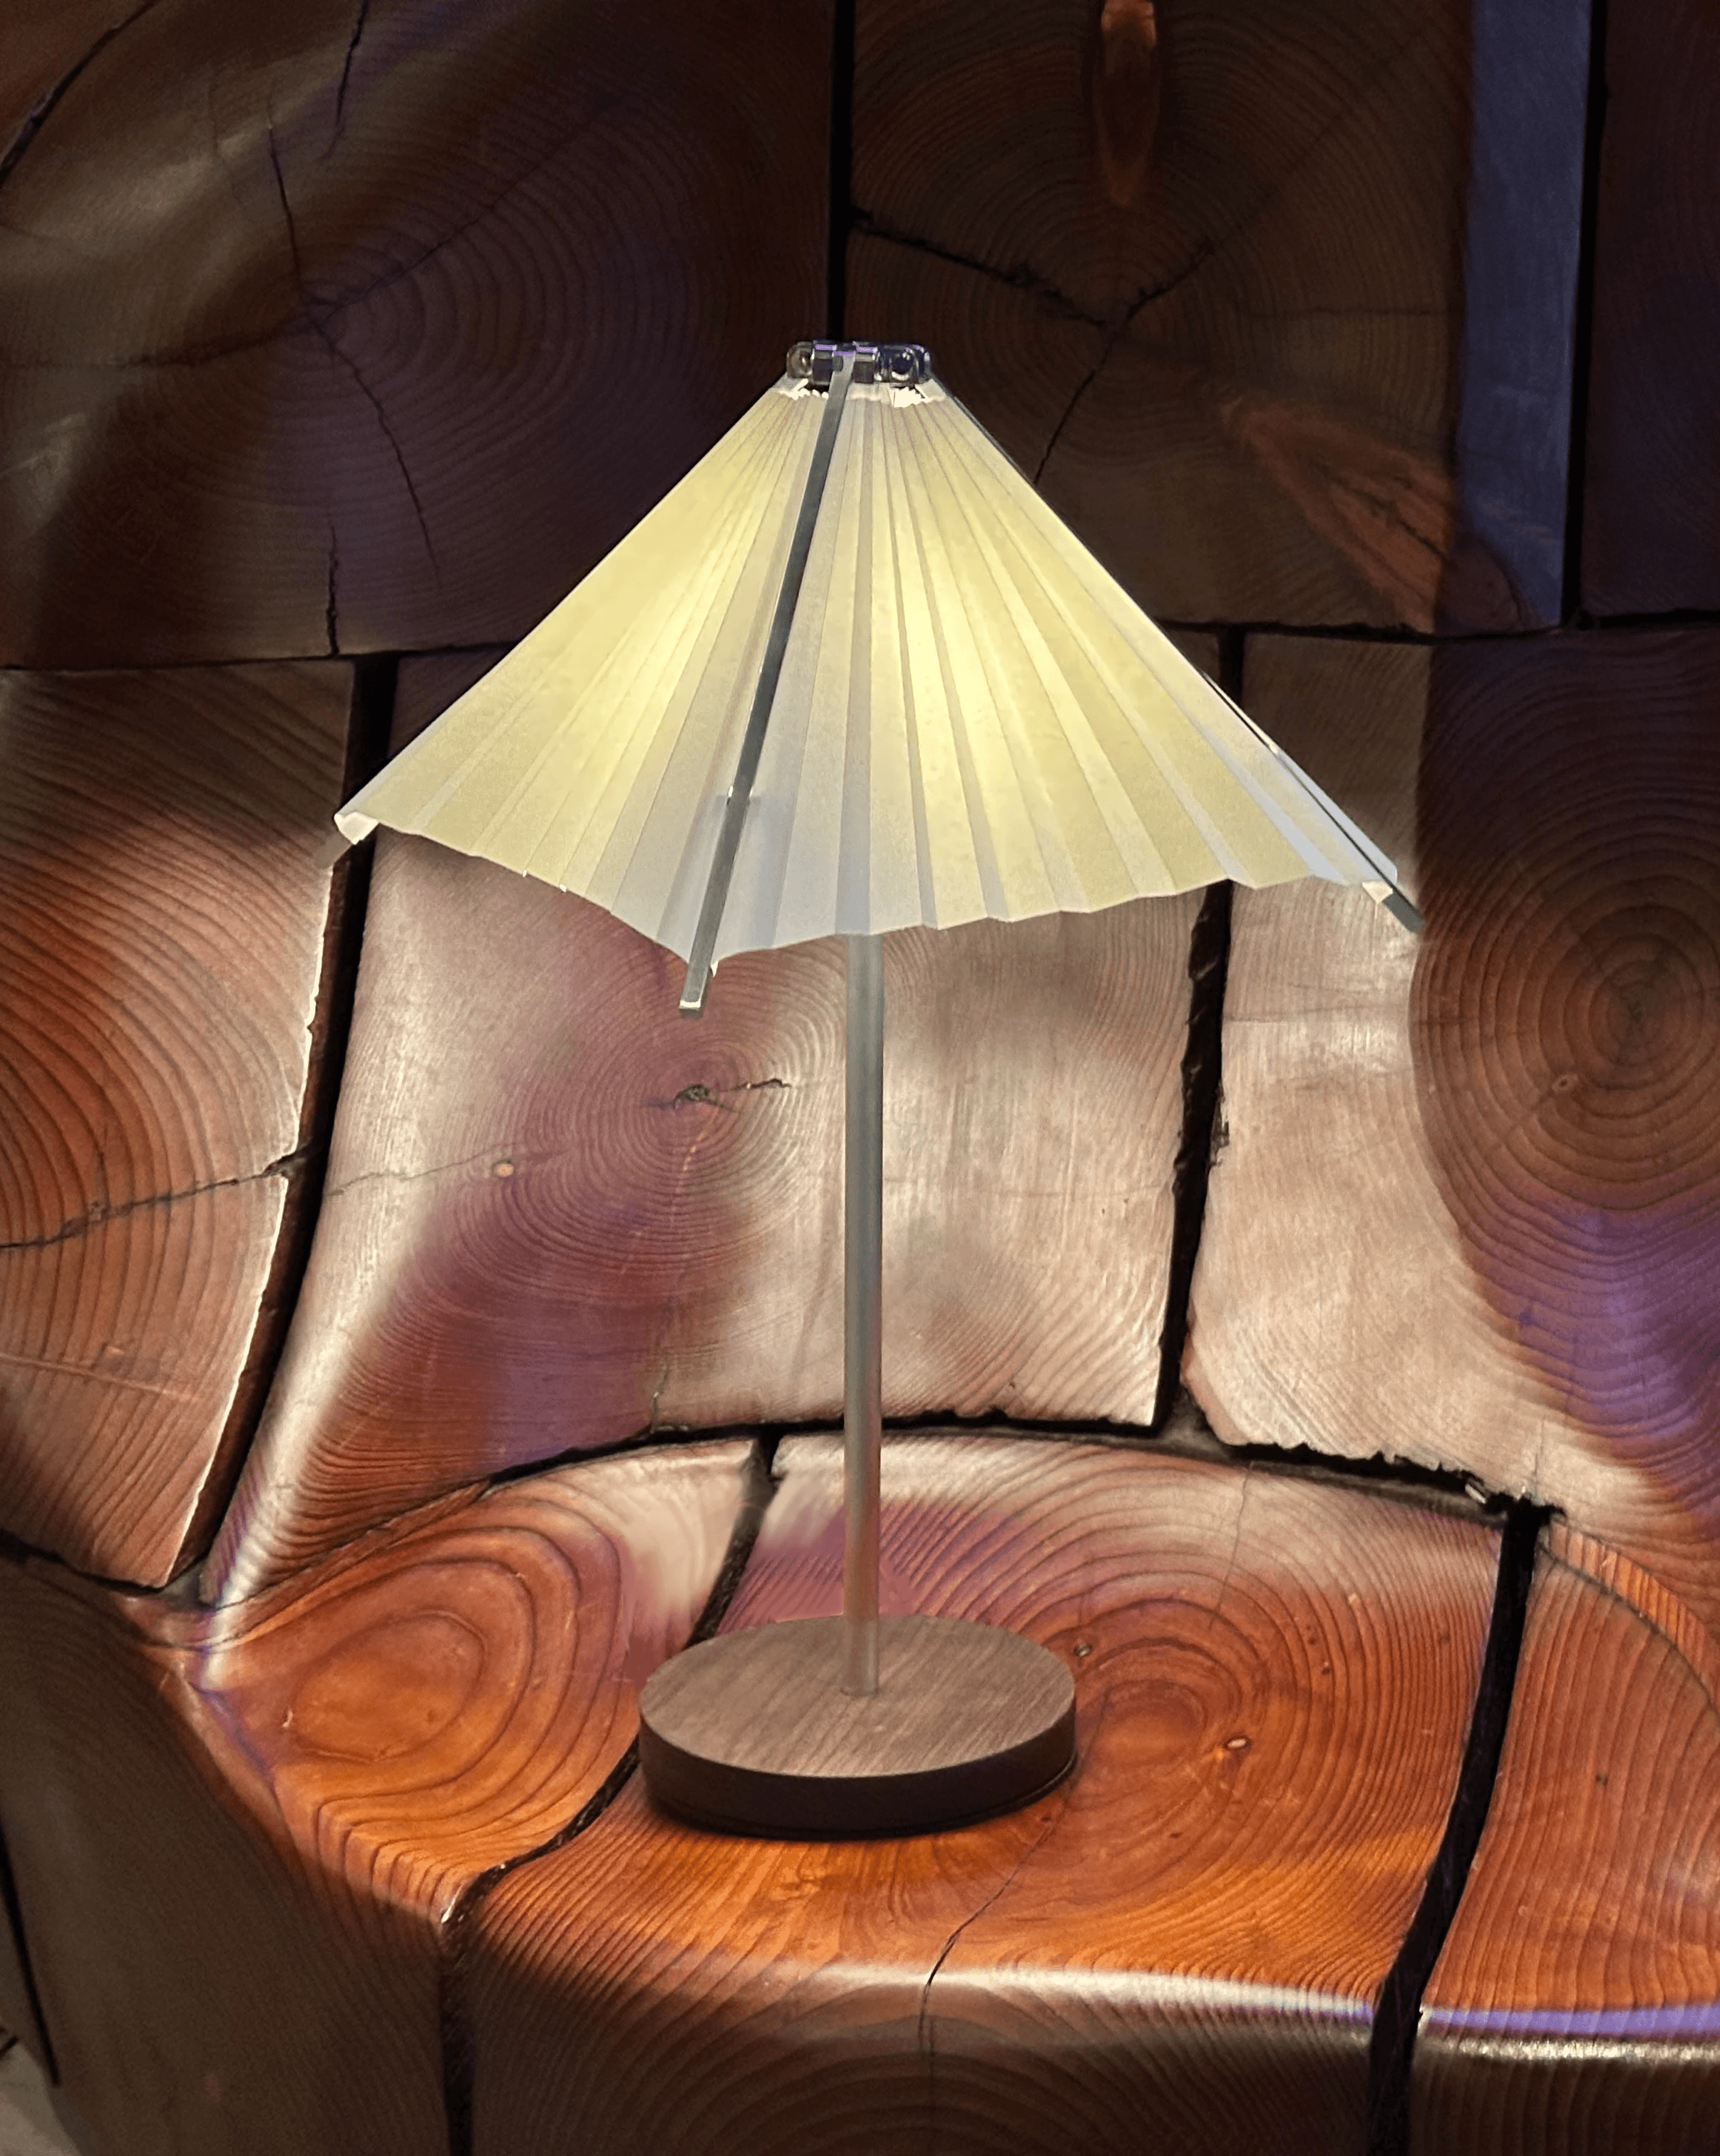
Final Product
After sanding and finishing each part, I designed and hand-folded four paper shades and attached them to the arms of the lamp. Final product was exhibited at Meet the Makers, a showcase hosted by the Stanford Department of Mechanical Engineering.

Contact:
Go home